Most homeowners feel stuck with outdated dining tables that no longer match their style. They want a fresh look but don’t want to spend hundreds on a brand new table.
A simple makeover can completely change how a dining room feels and looks.
This blog will show readers diy dining table makeover ideas without breaking the bank. From paint techniques to hardware updates, these ideas work for any skill level. Each method uses affordable materials and basic tools that most people already have at home.
By the end, readers will know exactly how to give their dining table a stunning new look that matches their style.
Why DIY Dining Table Makeovers are a Game-Changer?
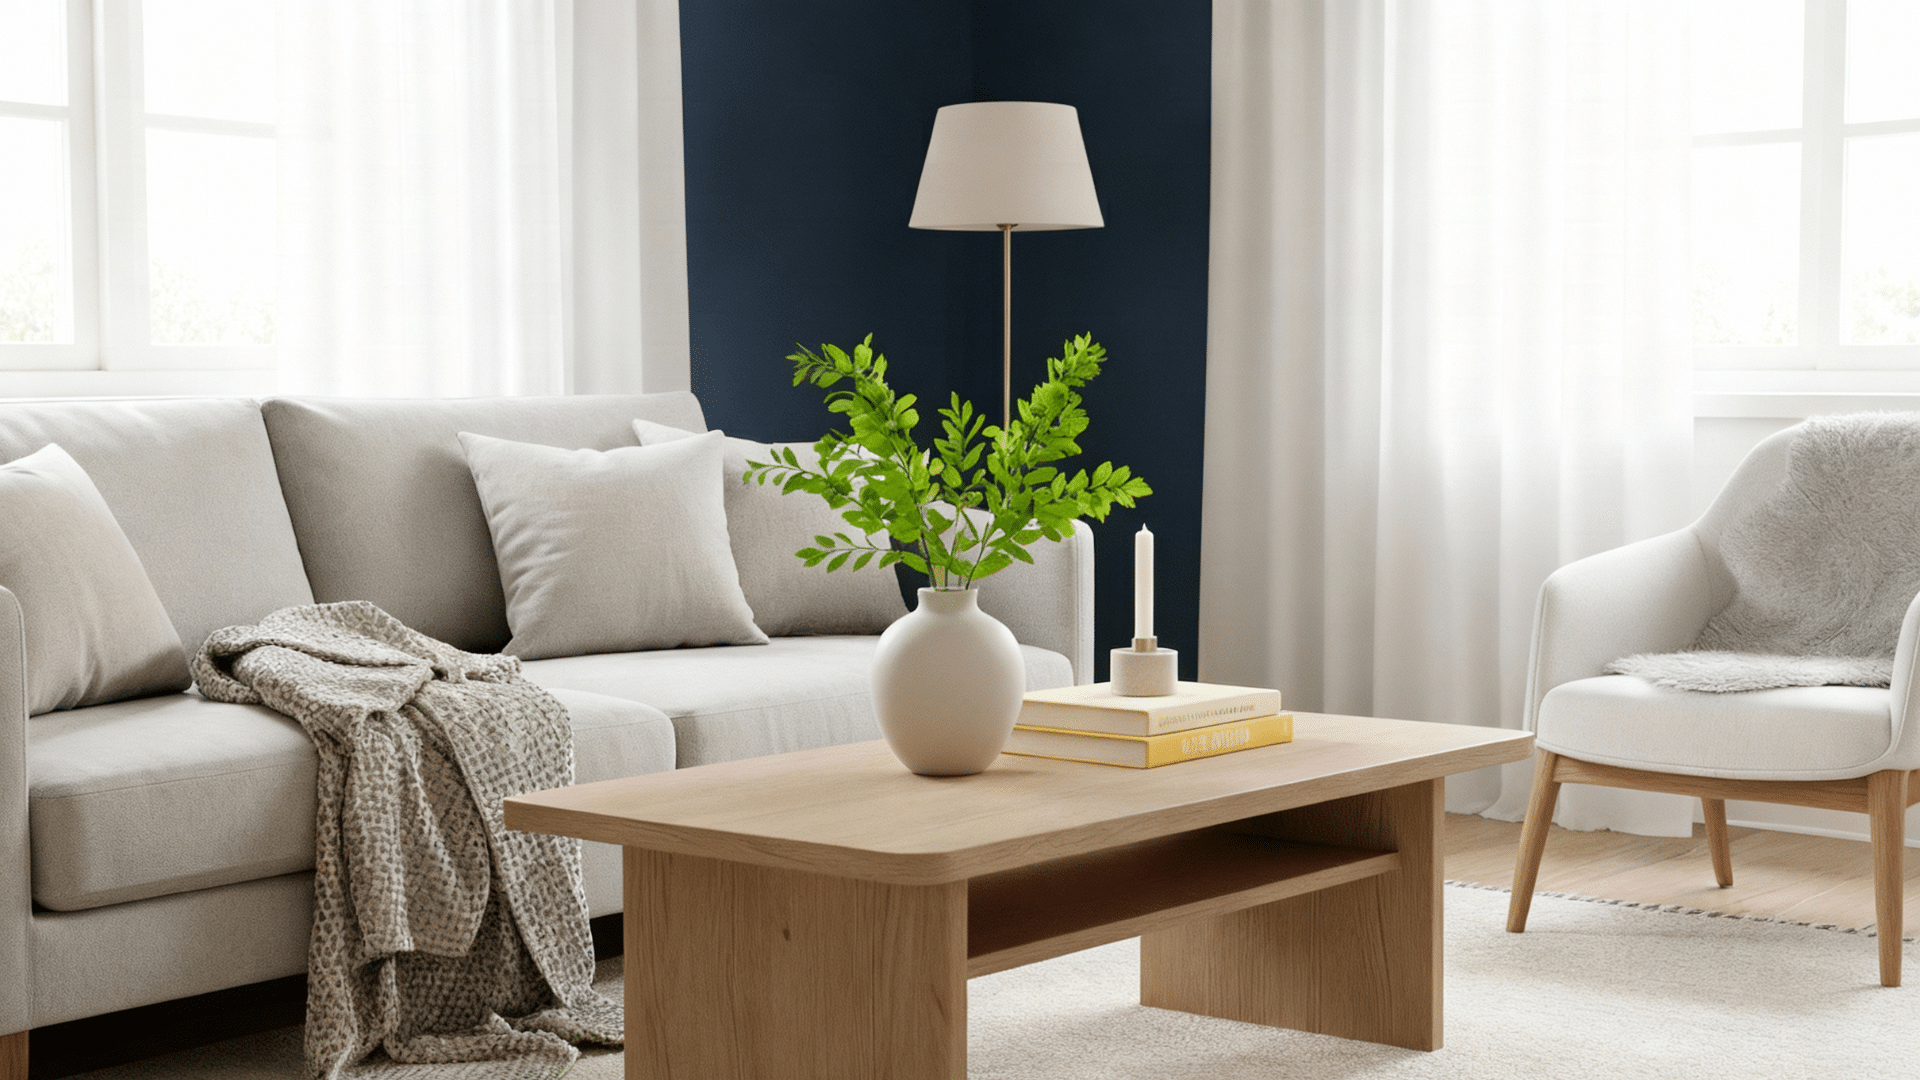
DIY dining table makeover ideas are a game-changer, offering a cost-effective way to refresh your dining space while adding personal style and character. Instead of spending thousands on new furniture, you can change an existing table with paint, stain, or creative finishes, saving significant money, sometimes thousands of dollars.
These projects also allow for customization to perfectly fit your room’s size and aesthetic, whether in a rustic, modern, or farmhouse style.
Beyond savings and style, DIY makeovers provide a rewarding sense of accomplishment and skill development, turning your table into a unique family heirloom that can be refinished or updated over time.
Creative Diy Dining Table Makeover Ideas
Creative DIY dining table makeover ideas let you change your old or worn dining table into a stylish centerpiece without breaking the bank.
The following are a few DIY dining table makeover ideas for you.
1. Paint-Dipped Legs Makeover

A modern twist on minimalism, this makeover highlights just the legs of a wooden table by dipping them in a bold paint color. It’s a playful way to add personality without overpowering the room’s simplicity or warmth.
Materials Needed:
| Item | Quantity |
|---|---|
| Painter’s tape | 1 roll |
| Acrylic or latex paint | 1 can |
| Paintbrush or sponge | 1 |
| Sandpaper (medium-grit) | 1 sheet |
| Drop cloth or newspaper | As needed |
| Clear sealant (optional) | 1 can |
Steps:
- Clean the table legs thoroughly to remove dust and grease.
- Lightly sand the bottom section of the legs to help paint adhere.
- Use painter’s tape to mark off the area you want dipped.
- Lay down a drop cloth under the table.
- Paint the exposed area below the tape using smooth strokes.
- Let the paint dry fully and apply a second coat if needed.
- Optionally, apply a clear sealant for durability.
2. Stenciled Tabletop Patterns
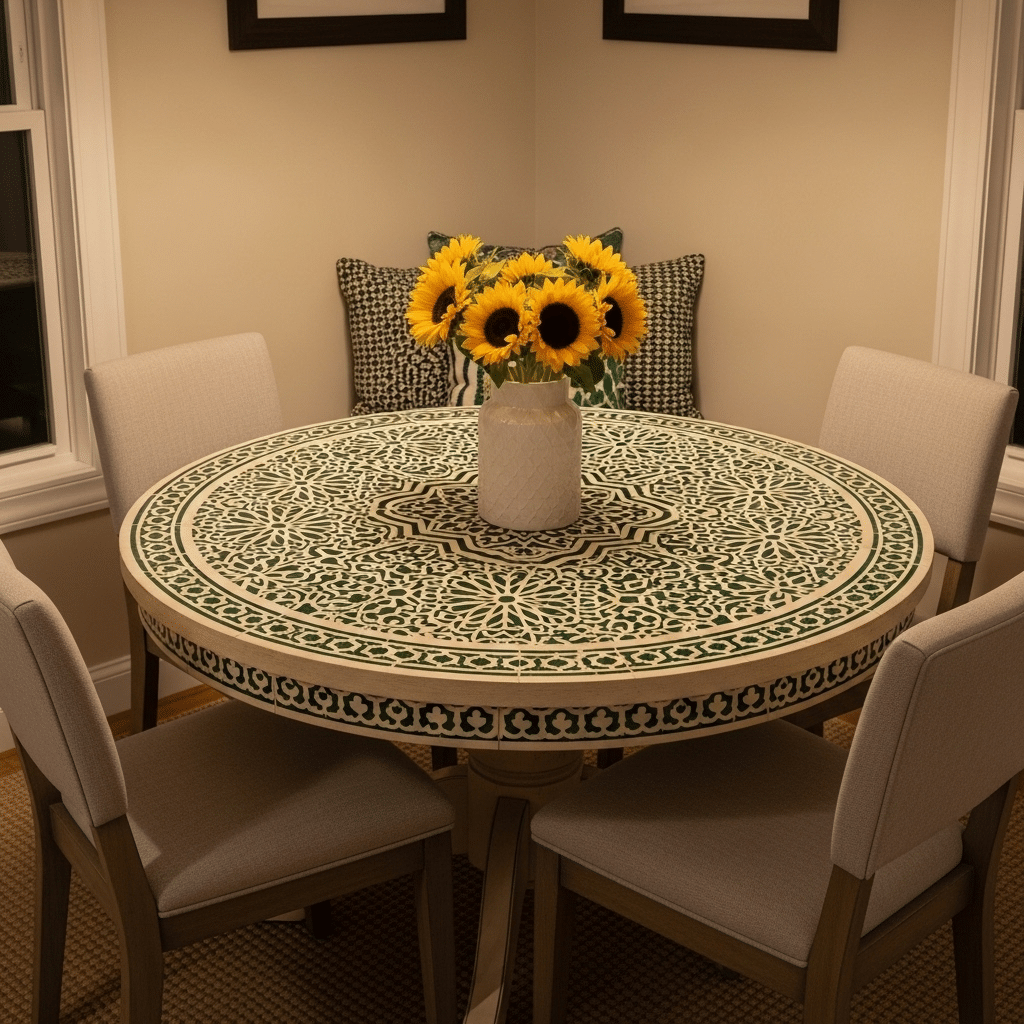
Transform a plain tabletop into a piece of art using intricate stencils and paint. Ideal for creating boho, Moroccan, or vintage vibes, this method elevates even the simplest dining spaces with a handcrafted, ornate flair.
Materials Needed:
| Item | Quantity |
|---|---|
| Stencil sheet | 1 |
| Acrylic paint | 1–2 small bottles |
| Painter’s tape | 1 roll |
| Foam roller or stencil brush | 1 |
| Ruler and pencil | 1 each |
| Clear topcoat sealant | 1 can |
Steps:
- Clean and lightly sand the tabletop surface.
- Use a pencil and ruler to center your stencil accurately.
- Tape the stencil firmly in place with painter’s tape.
- Apply paint over the stencil using a roller or brush.
- Carefully remove the stencil and let it dry completely.
- Repeat pattern if desired across the table.
- Once dry, seal with a clear topcoat for protection.
3. Decoupage with Vintage Maps
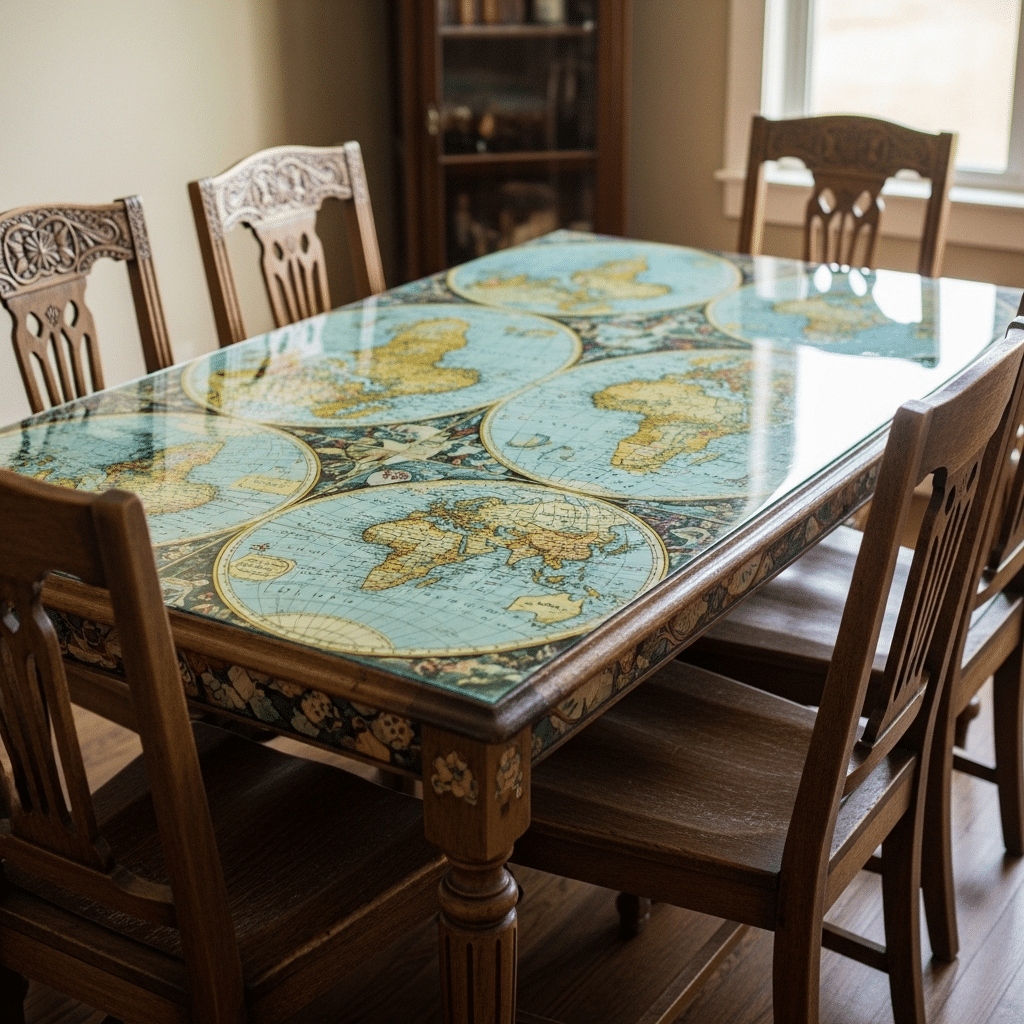
Perfect for travel lovers, this makeover involves applying vintage maps to the tabletop using decoupage techniques. It’s a creative way to showcase wanderlust while also protecting the surface with a glossy, durable finish.
Materials Needed:
| Item | Quantity |
|---|---|
| Vintage-style maps | Enough to cover tabletop |
| Mod Podge (or decoupage glue) | 1 jar |
| Foam brush | 1 |
| Scissors or craft knife | 1 |
| Clear acrylic sealant | 1 can |
| Ruler and pencil | 1 each |
Steps:
- Trim maps to fit the surface layout.
- Apply Mod Podge to the back of each map section.
- Press maps onto the tabletop, smoothing bubbles with your hand or ruler.
- Let dry for a few hours before applying another layer.
- Apply Mod Podge over the top to seal the maps.
- Allow to dry completely before repeating coats for protection.
- Finish with an acrylic sealant for a glossy, wipeable surface.
4. Farmhouse Distressed Finish
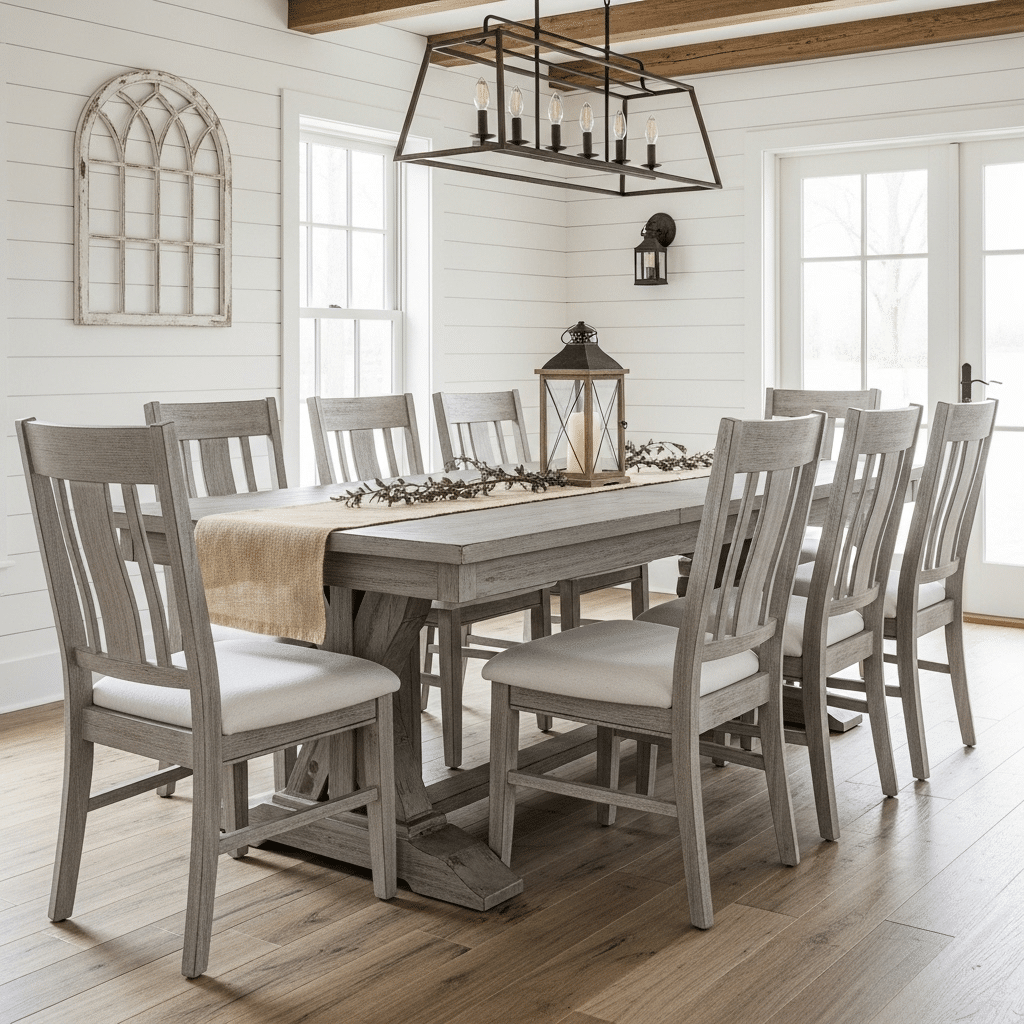
Bring rustic charm to your dining room with this distressed wood finish. Using chalk paint and sanding techniques, this look mimics the wear and tear of a country farmhouse table with timeless appeal.
Materials Needed:
| Item | Quantity |
|---|---|
| Chalk paint | 1 can |
| Sandpaper (coarse and fine) | 2 sheets |
| Paintbrush | 1 |
| Clean rag or sponge | 1 |
| Clear wax or topcoat | 1 jar/can |
| Drop cloth | As needed |
Steps:
- Clean the table thoroughly to remove dust or grease.
- Apply one or two coats of chalk paint, letting each dry completely.
- Use sandpaper to lightly distress edges and corners.
- Focus on areas where natural wear would occur.
- Wipe off dust with a clean rag.
- Apply a clear wax or topcoat to protect the finish.
- Buff the table for a soft, matte glow.
5. Resin River Table Makeover
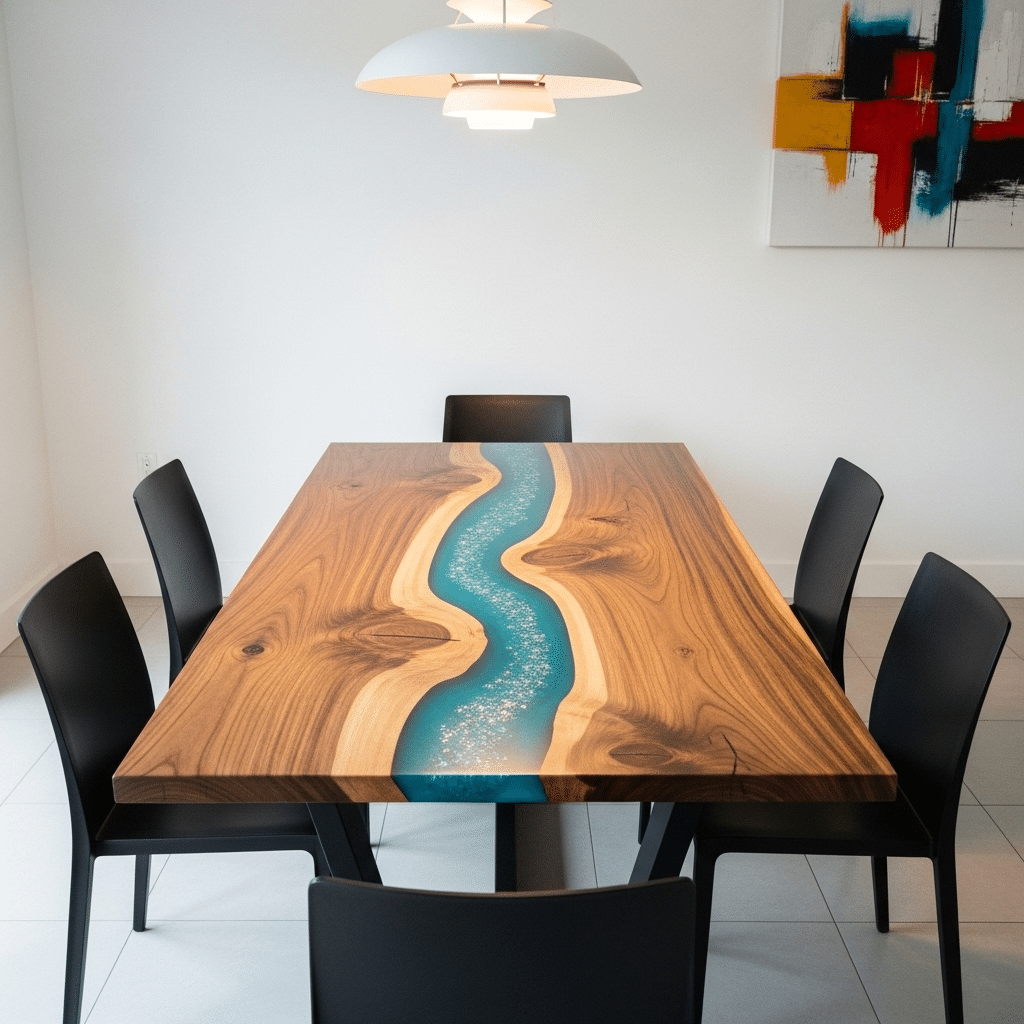
A stunning transformation that mimics the flow of a river down the center of a wooden table. This epoxy resin technique combines natural wood grain with colored resin to create a dynamic, glass-like centerpiece full of movement and texture.
Materials Needed:
| Item | Quantity |
|---|---|
| Epoxy resin kit | 1 set |
| Pigment powder/dye (blue) | As needed |
| Heat gun or torch | 1 |
| Painter’s tape or mold frame | 1 roll or mold |
| Sander and sandpaper | 1 set (80–320 grit) |
| Mixing cups and stir sticks | Multiple |
| Wood slab (with natural edge) | 1 |
Steps:
- Cut a groove or gap through the center of the table/slab.
- Tape the edges or build a mold to contain the resin.
- Mix the resin with pigment thoroughly in mixing cups.
- Pour the resin into the groove in layers.
- Use a heat gun to remove air bubbles.
- Let it cure completely (24–48 hours).
- Sand smooth and seal with a clear topcoat.
6. Mosaic Tile Inlay
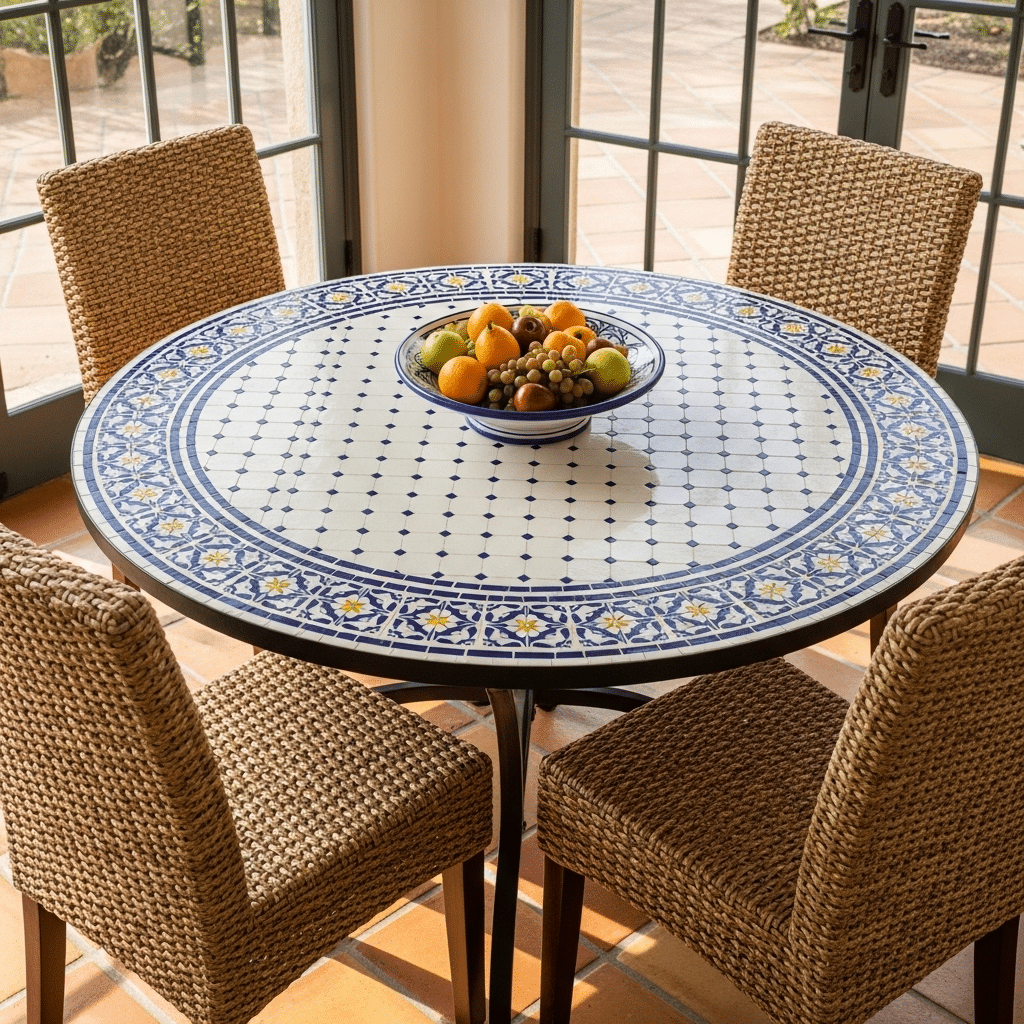
Give your table a Mediterranean vibe with a tile mosaic inlay. Using ceramic or porcelain tiles and strong adhesive, this DIY gives your tabletop durability and vivid geometric charm, perfect for indoor-outdoor dining spaces.
Materials Needed:
| Item | Quantity |
|---|---|
| Mosaic tiles | Enough to cover the area |
| Tile adhesive | 1 tub |
| Grout (matching or contrasting) | 1 bag |
| Tile nippers | 1 |
| Sponge and bucket | 1 each |
| Measuring tape | 1 |
| Trowel | 1 |
Steps:
- Measure and plan your mosaic layout.
- Apply tile adhesive with a trowel.
- Place each tile piece firmly into the adhesive.
- Allow it to set for 24 hours.
- Fill gaps with grout using a float.
- Wipe excess grout with a sponge.
- Let it dry completely before use.
7. Wood-Burned Details

This makeover adds artisan appeal using wood-burning tools to inscribe intricate designs onto the table surface. Ideal for rustic or boho homes, it brings permanent, hand-crafted artistry with nature-inspired or mandala-style patterns.
Materials Needed:
| Item | Quantity |
|---|---|
| Wood-burning pen/tool | 1 |
| Design template (optional) | 1 |
| Pencil | 1 |
| Sandpaper | 1 sheet |
| Clear sealer or wax | 1 jar/can |
Steps:
- Lightly sand the table surface for smoothness.
- Sketch or transfer your design onto the wood.
- Slowly trace the design with a wood-burning tool.
- Continue evenly across the table surface.
- Let the surface cool completely.
- Wipe off any residue or soot.
- Apply a protective sealer for longevity.
8. Rustic Table with Upholstered Edges
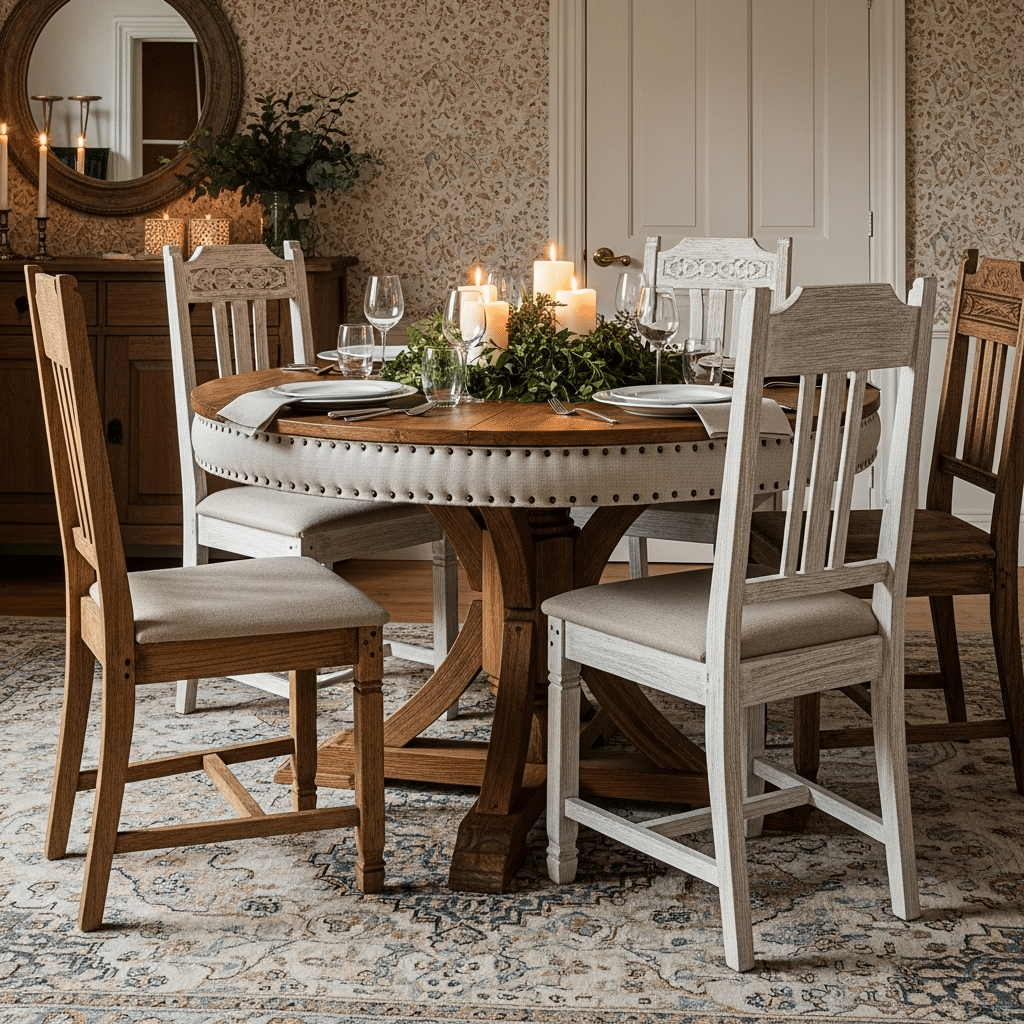
Add comfort and charm to your rustic table by upholstering the outer edge. With nailhead trim or fabric piping, this idea blends softness with structure, offering a unique fusion of comfort and vintage sophistication.
Materials Needed:
| Item | Quantity |
|---|---|
| Upholstery foam/batting | Enough to wrap edges |
| Fabric (canvas, linen, etc.) | 1–2 yards |
| Staple gun and staples | 1 |
| Upholstery nails or trim | As needed |
| Scissors | 1 |
| Measuring tape | 1 |
Steps:
- Measure and cut foam to fit the table edge.
- Attach the foam with a staple gun.
- Drape and secure fabric tightly over foam.
- Staple the fabric underneath the table edge.
- Add nailhead trim or upholstery tacks evenly.
- Smooth fabric and inspect corners.
- Optional: Add piping for a finished look.
9. Faux Marble Contact Paper
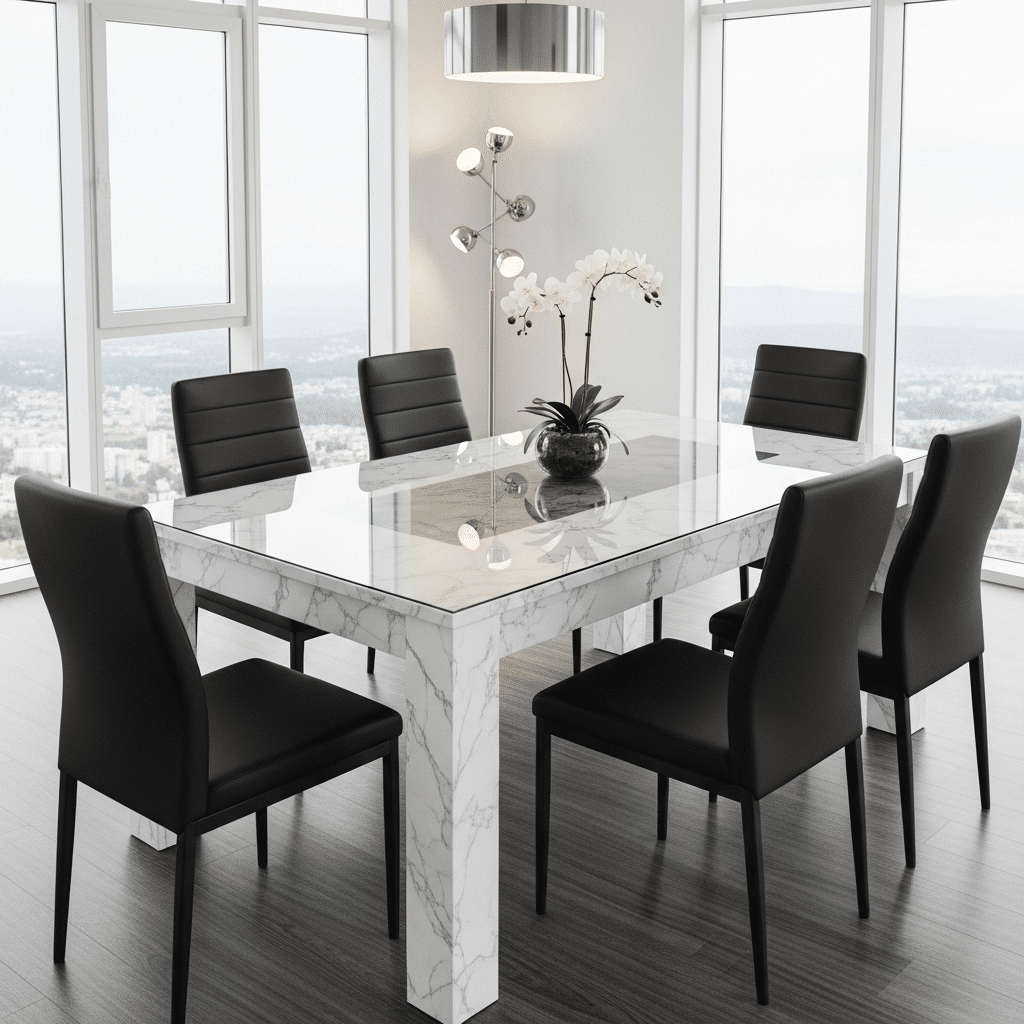
Achieve a luxe marble look without the weight or cost using peel-and-stick marble contact paper. Ideal for renters or anyone craving modern glam, this solution transforms a plain tabletop into a high-end feature in minutes.
Materials Needed:
| Item | Quantity |
|---|---|
| Marble contact paper roll | Enough to cover the surface |
| Squeegee or credit card | 1 |
| Craft knife | 1 |
| Ruler or measuring tape | 1 |
| Spray bottle with water | 1 (optional) |
Steps:
- Measure and cut contact paper slightly larger than the surface.
- Clean and dry the tabletop completely.
- Peel and stick from one end, smoothing as you go.
- Use a squeegee to push out bubbles.
- Trim excess with a craft knife.
- Wrap edges underneath for a seamless look.
- Avoid placing hot pans directly on the surface.
Maintenance Tips for Diy Dinner Table Makeovers
Maintaining your DIY dining table makeover ideas is essential to keep it looking fresh and beautiful for years.
Proper care not only preserves the finish but also protects the wood from damage caused by daily use, spills, and environmental factors.
With consistent upkeep, your changed table will remain a stunning centerpiece in your home.
- Use a soft, lint-free cloth or microfiber towel for daily dusting and wiping to avoid scratches.
- Clean spills immediately with a damp cloth and mild dish soap to prevent stains and water damage.
- Avoid harsh chemicals and abrasive cleaners that can damage the finish.
- Apply a suitable wood conditioner or polish every few months to nourish and protect the surface.
- Use coasters, placemats, and trivets to shield the table from heat, moisture, and scratches.
- Rotate decorative items regularly to prevent uneven fading or wear on the tabletop.
- Keep the table away from direct sunlight and heat sources to avoid warping or discoloration.
Wrapping It Up
A worn-out dining table doesn’t have to stay that way forever.
These makeover ideas prove that small changes can make a big difference. Readers now have practical options that fit different budgets and skill levels.
Most of these DIY dining table makeover ideas can be completed in a weekend. Some take just a few hours. Each idea breathes new life into old furniture without the hefty price tag of buying new.
Pick one idea that speaks to you and get ready to fall in love with your dining space all over again. Your family meals will never feel the same.