Most people walk into furniture stores and see the same generic designs everywhere. Plain white shades, basic patterns, nothing that screams personality. And the prices? Stores want something that looks like it came from a discount bin.
But here’s what most crafters don’t realize: anyone can create a custom fabric lampshade in under two hours with materials that cost less.
The process is simpler than most people think, and the results? Well, guests will be asking where such a unique piece was purchased.
Ready to convert that sad lamp into something special? This blog shows exactly how to do it, step by step.
Why Choose DIY Fabric Lampshades?
Store lampshades are crazy expensive. I nearly fell over when I saw a basic shade for $85 approximately !
Making your own costs less than $20 approximately with materials from any craft store.
When you DIY, you get to pick the exact fabric you want. Found a pattern that perfectly matches your throw pillows? Use it! Have a fabric scrap with special meaning? Turn it into something you’ll see every day.
Standard store options come in boring white, beige, or gray. But your home isn’t boring, so why should your lighting be? Your DIY shade can be any color, pattern, or style you can imagine.
The best part? It’s much easier than it looks. If you can use scissors and glue, you can make a lampshade.
DIY Fabric Lampshade: Easy and Beginner-Friendly Guide
Custom fabric lampshades add personal style to any room without requiring advanced crafting skills or expensive materials.
This simple project transforms plain, boring lampshades into eye-catching decor pieces that match your exact color scheme and style preferences.
With just fabric, adhesive, and basic tools, you can create professional-looking custom lighting that friends will think came from a high-end boutique.
Tools Required
- Cotton Fabric
- Lampshade Frame
- Decorative Ribbon
- Best Press Fabric Starch
- Drop Cloth
- Marking Tool
- Rotary Trimmer or Fabric Scissors
- Spray Adhesive
- Fabric Glue
Step 1. Prepare Your Workspace and Materials
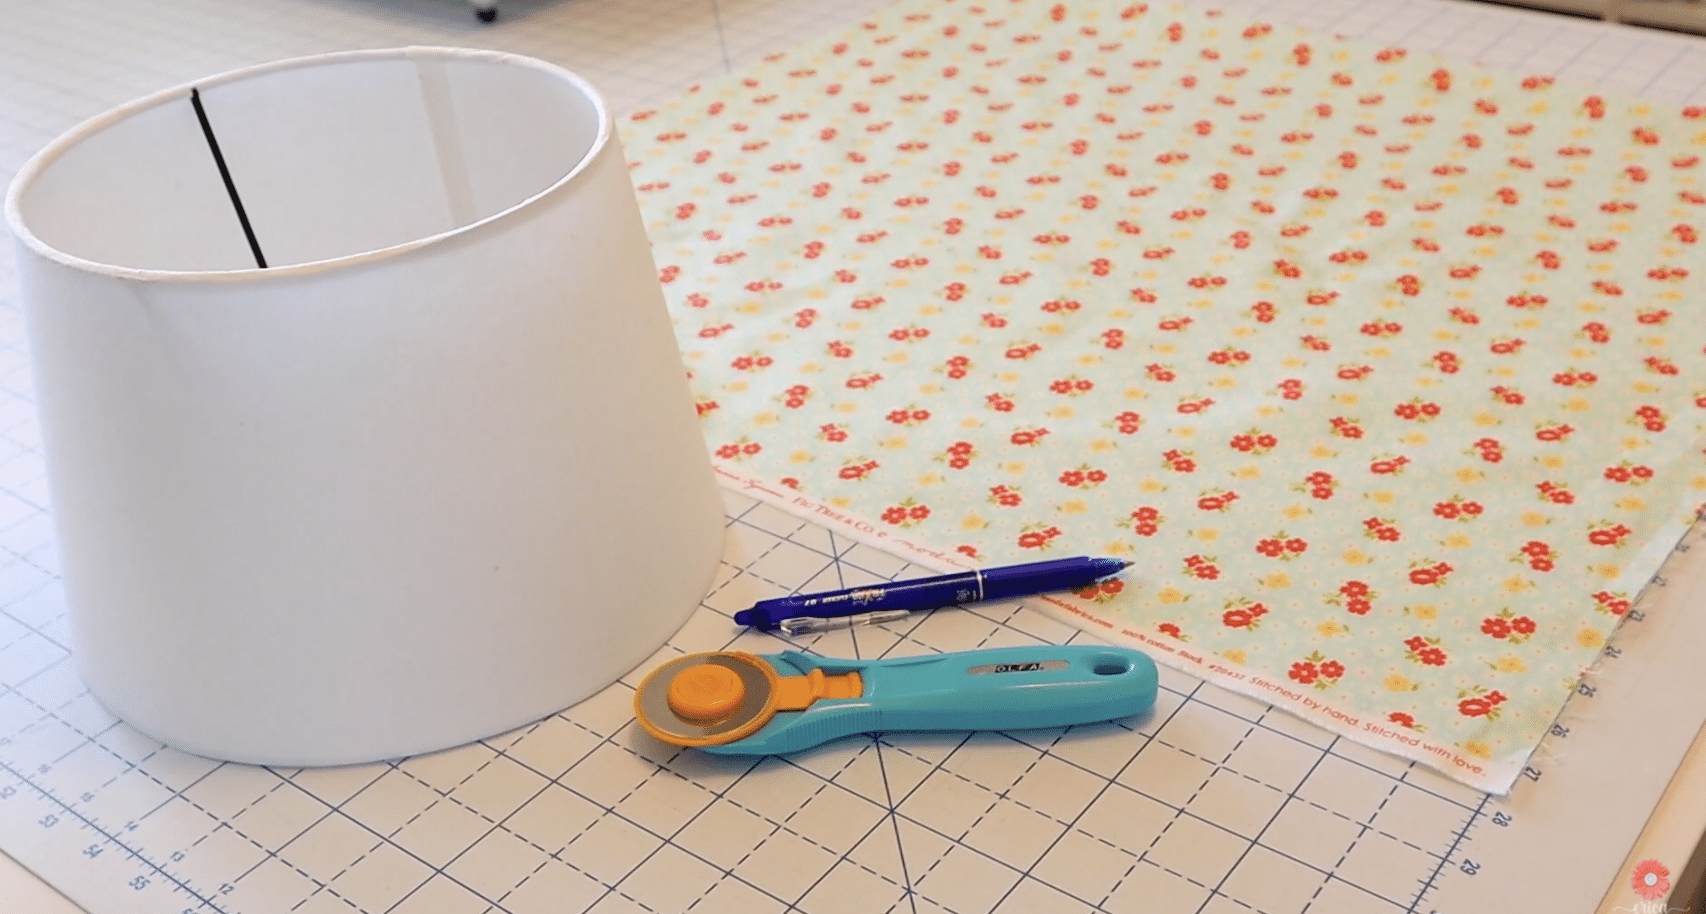
Start by gathering all the materials you’ll need:
- 1 yard of cotton fabric
- Plain lampshade frame
- Decorative ribbon (optional)
- Best Press fabric starch or an alternative starch
- Drop cloth or protective cover for your work surface
Press your fabric with starch (Best Press or any starch alternative) to add extra structure. This will help the fabric hold its shape around the lampshade.
After pressing, lay down a drop cloth or protective covering to safeguard your workspace, as spray adhesive will be used later.
Place the fabric with the right side down on the covered work area, ready for tracing.
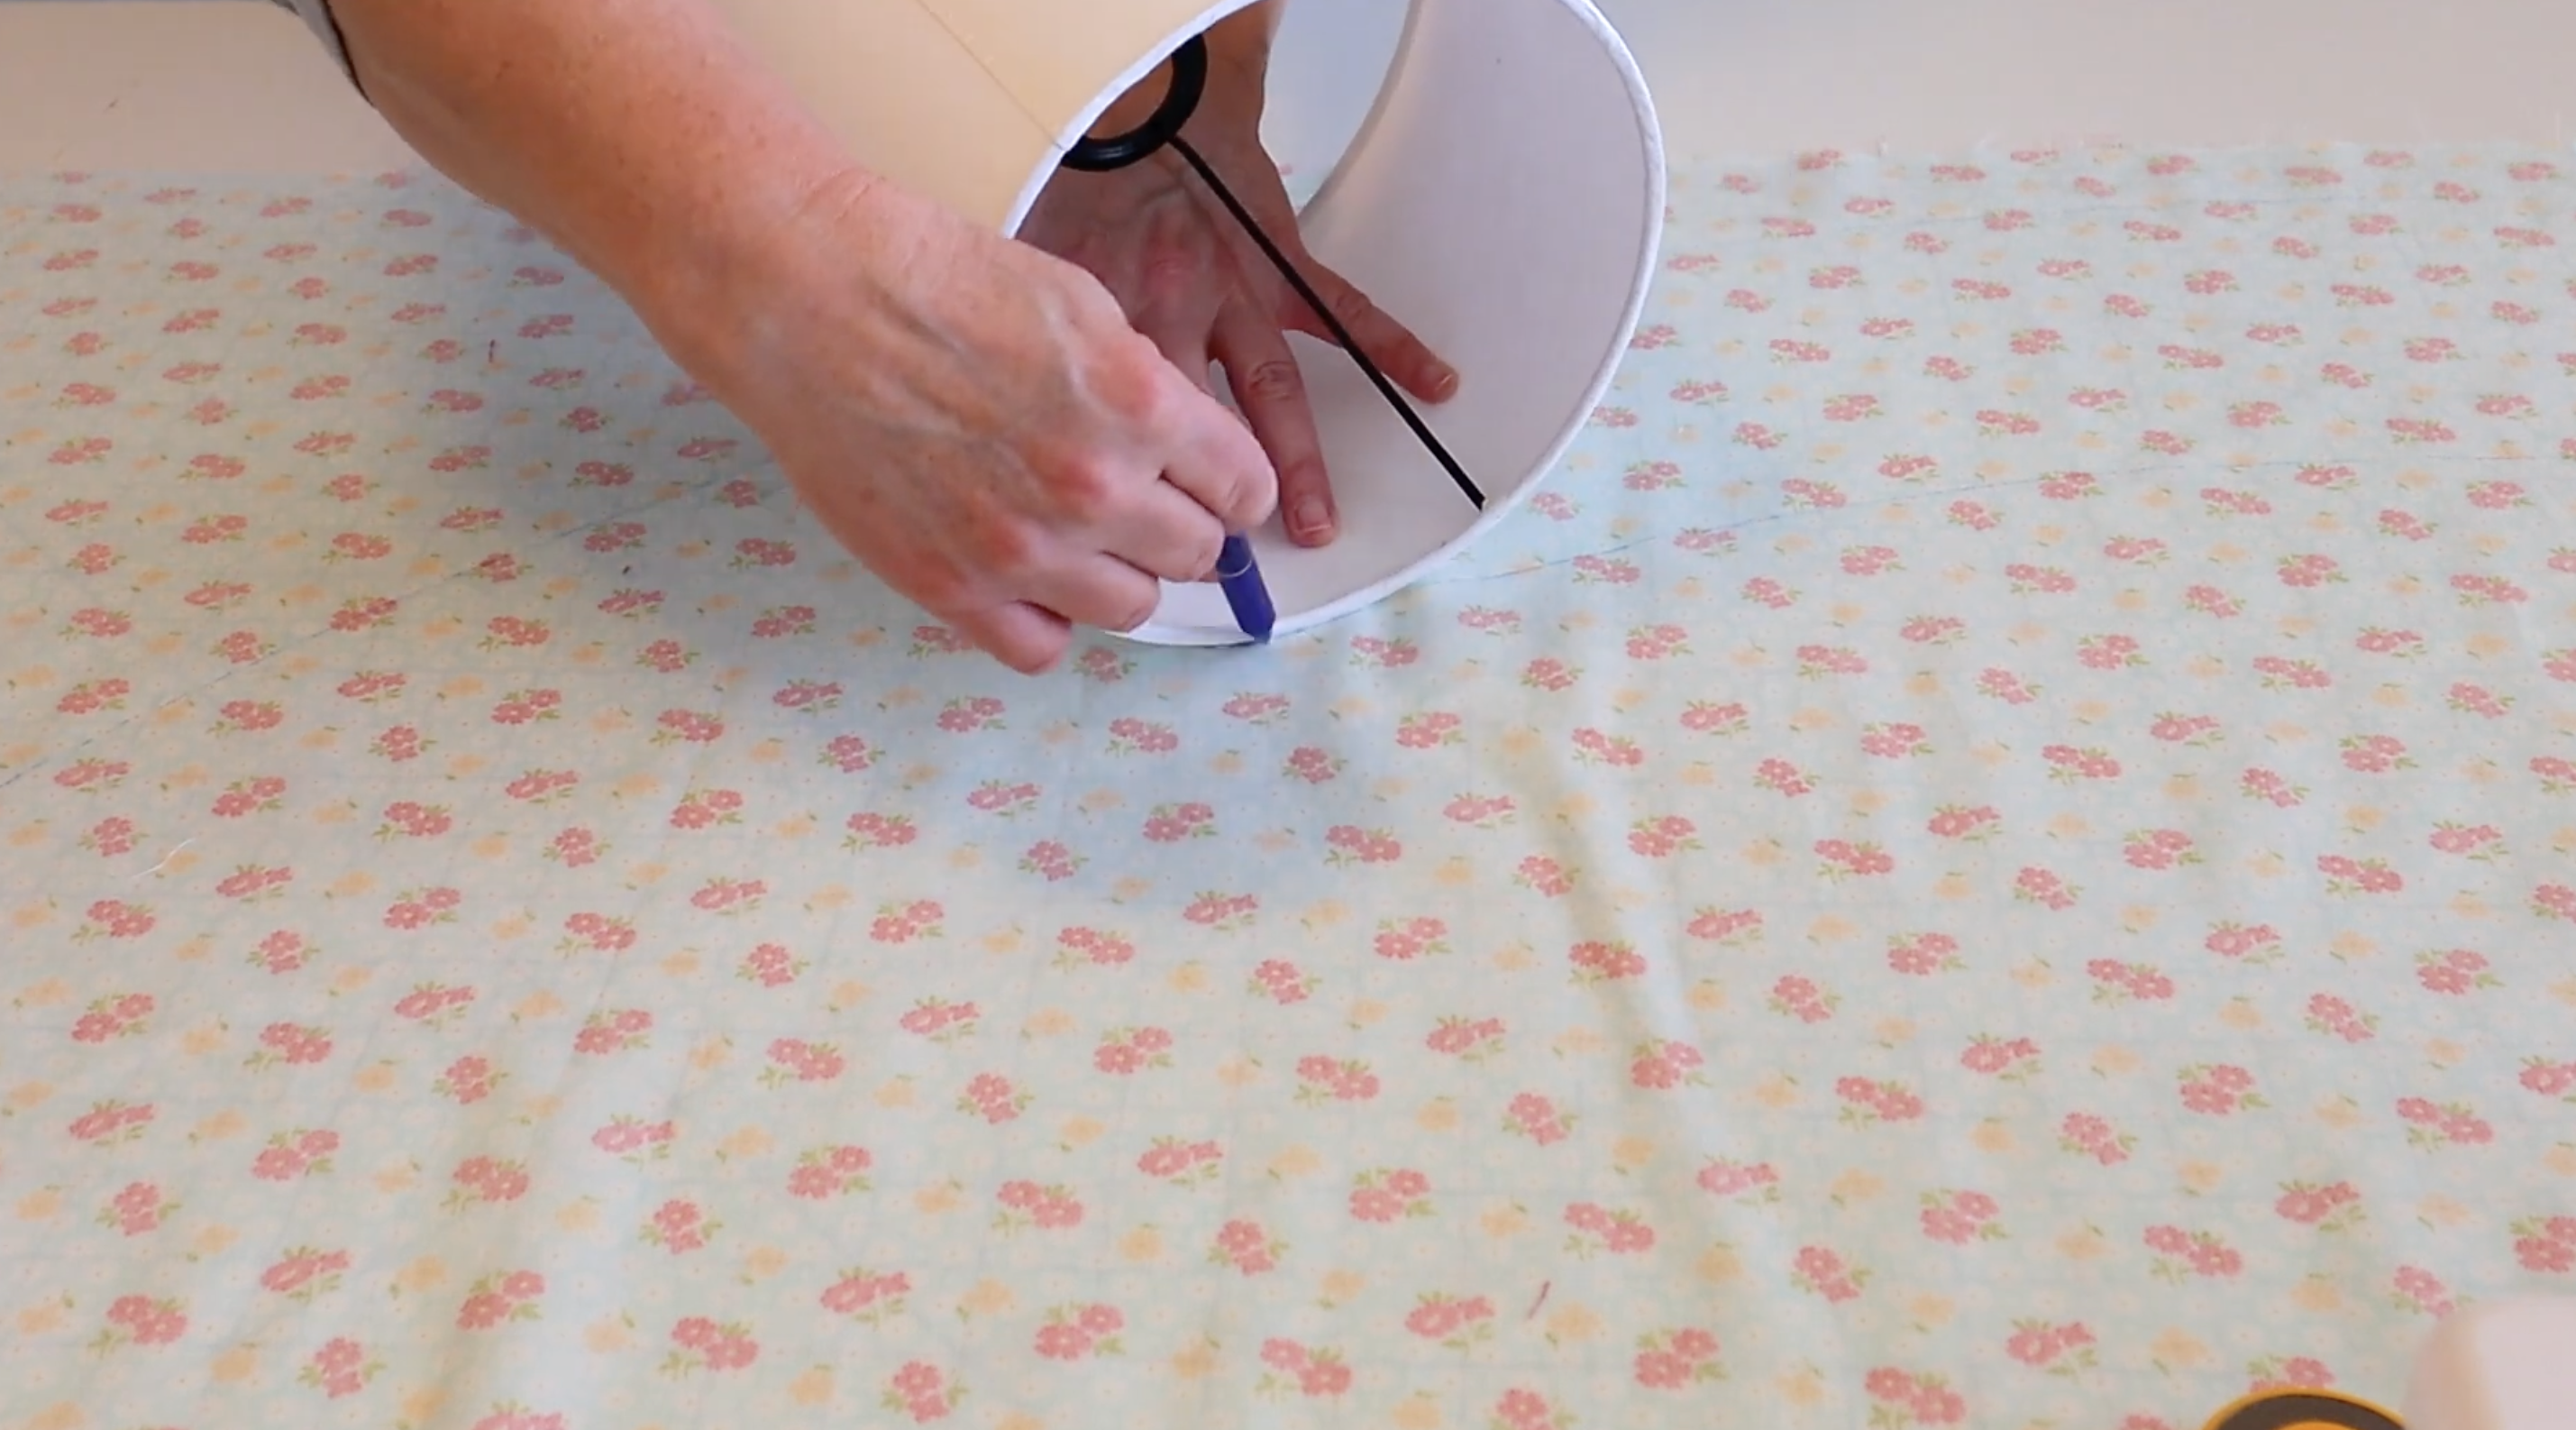
Step 2. Trace the Bottom Edge of the Lampshade

Next, place your lampshade on the fabric. Starting at the lampshade seam, use a marking tool to trace along the bottom edge.
Slowly roll the lampshade across the fabric as you trace, ensuring a custom fit. When you return to the starting point, continue tracing about an inch beyond the seam.
This extra fabric will allow for overlap, ensuring a smooth finish.
Step 3. Trace the Top Edge of the Lampshade
Roll the lampshade back to the starting point, and repeat the same process for the top edge. Again, add an extra inch past the seam for overlap.
Once you’ve finished tracing, use a ruler or eyeball it to draw a straight line that connects the two traced points.
Step 4. Cut the Fabric
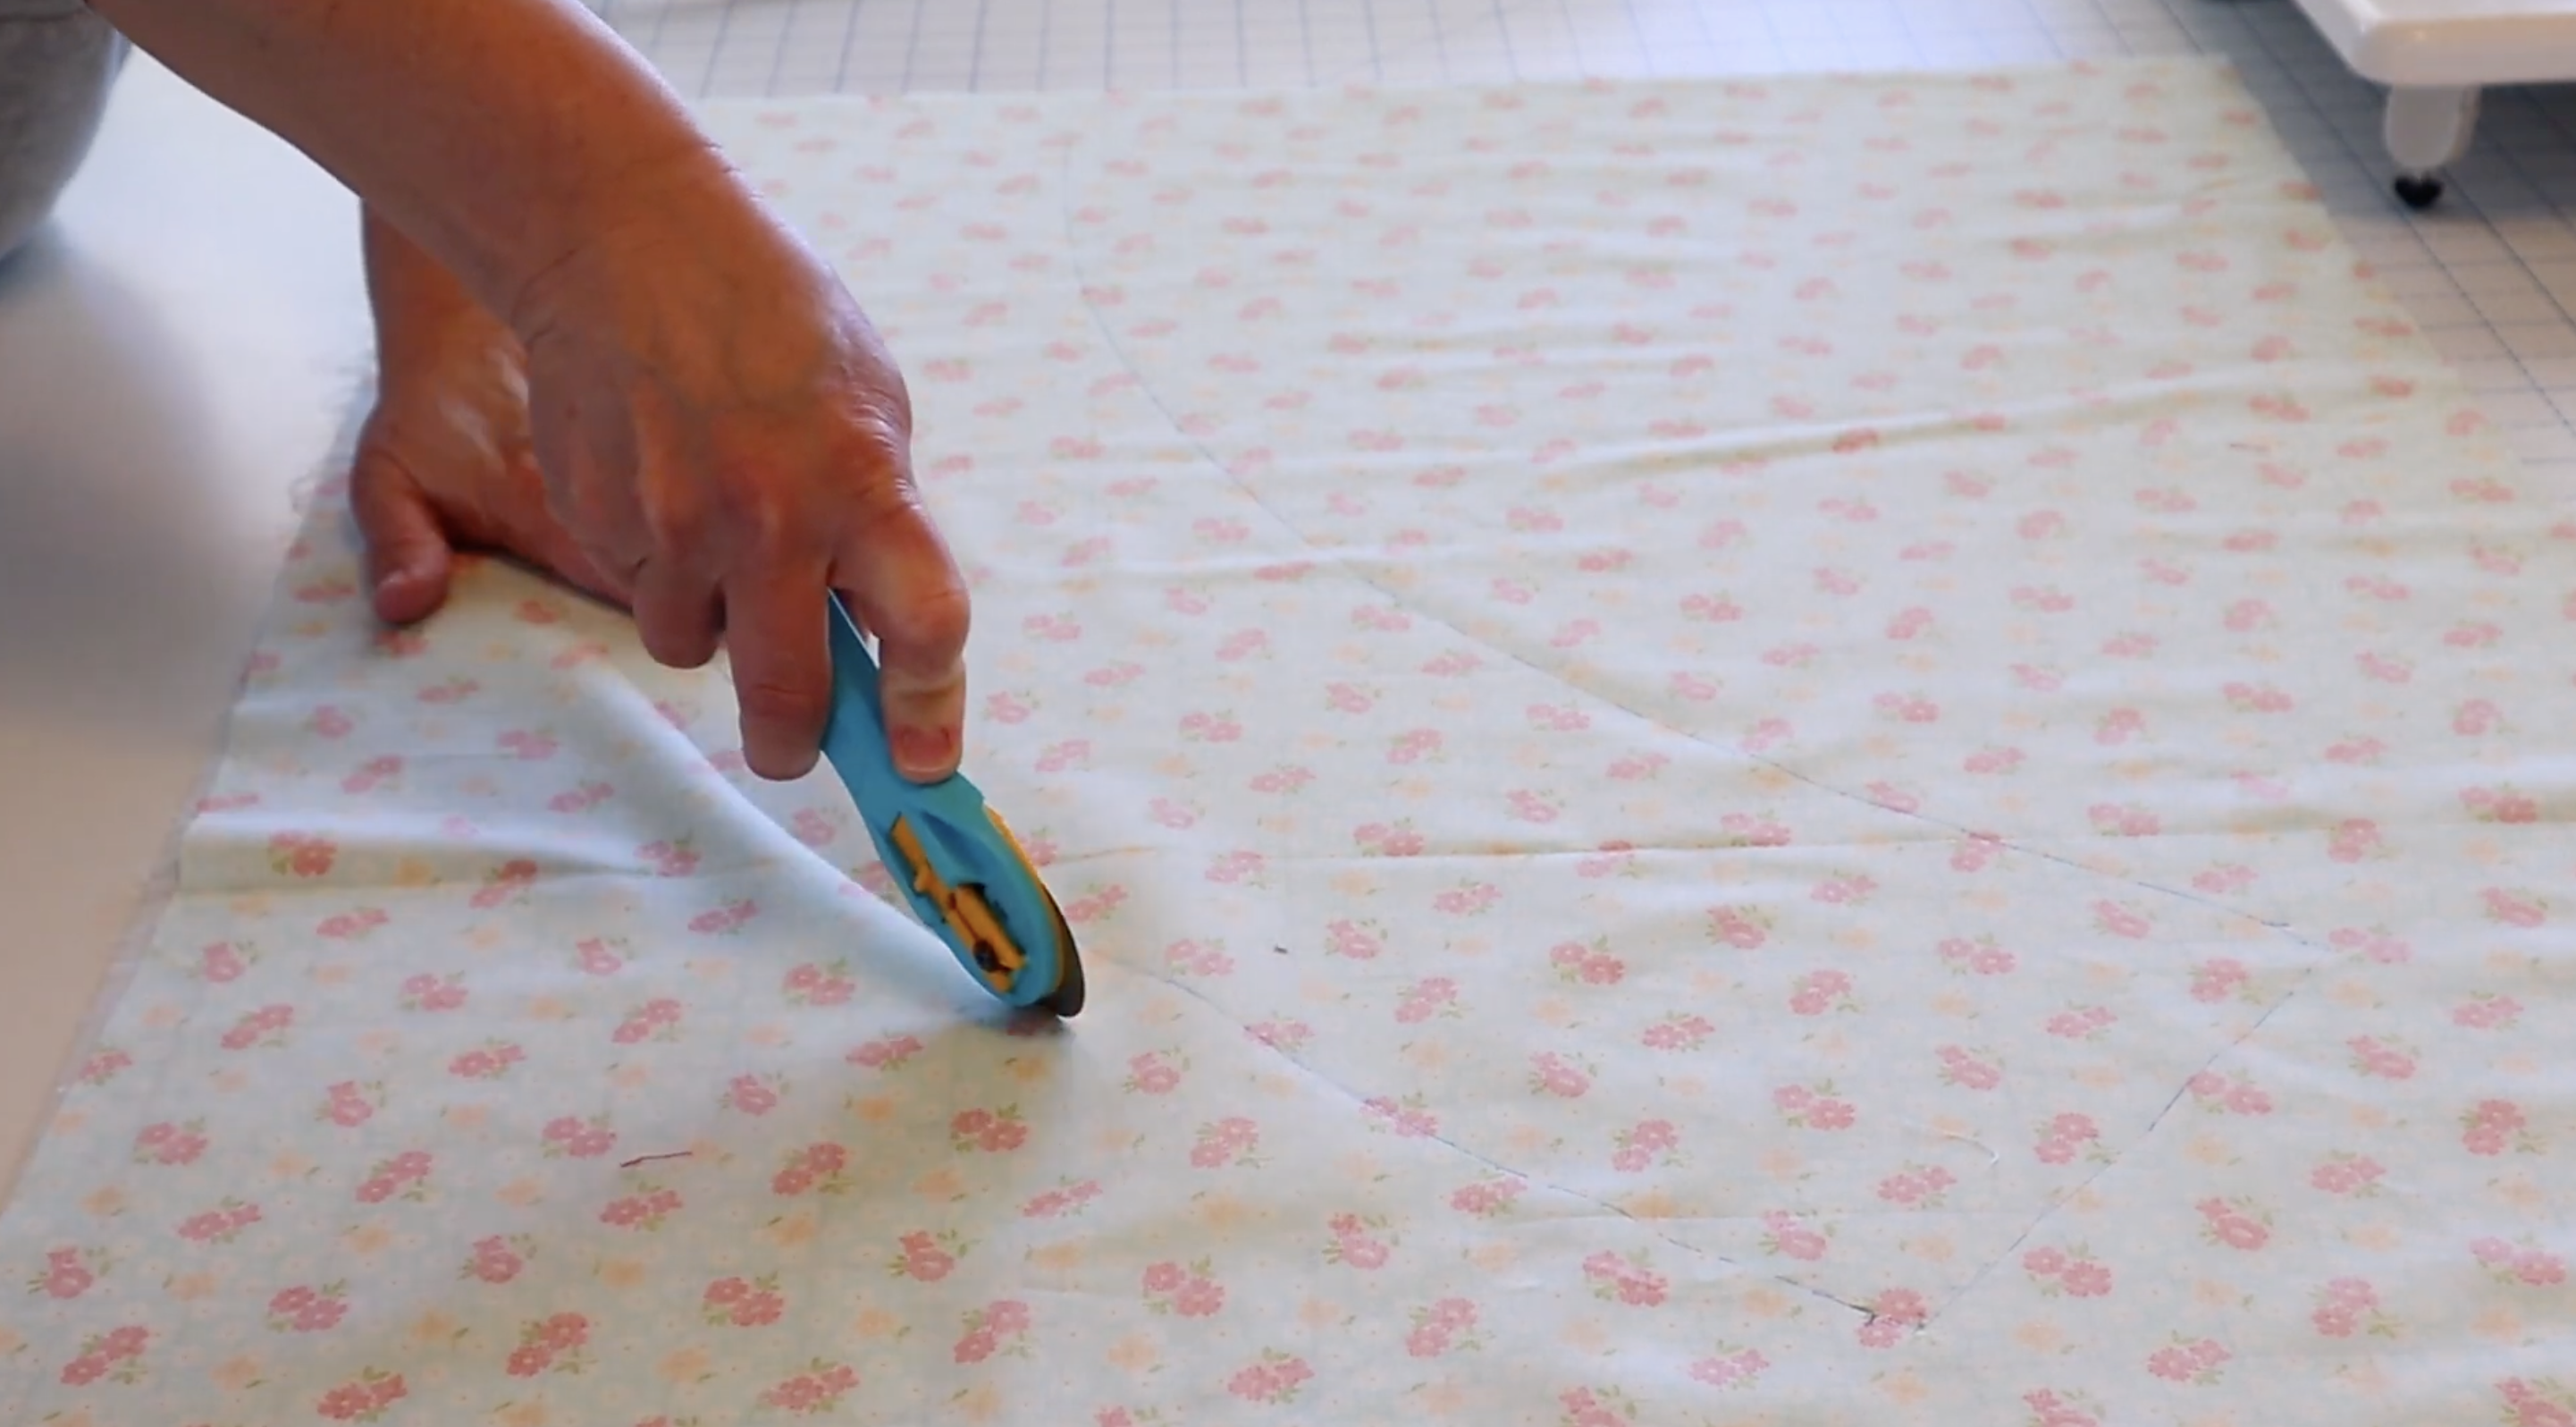
Using a rotary trimmer or fabric scissors, carefully cut along the traced lines. Leave about half to one inch of extra fabric outside the drawn lines.
This extra fabric gives you the flexibility to make adjustments later and ensures a proper fit.
Step 5. Press the Fabric for Clean Edges

To create clean, professional-looking edges, press one of the short ends of the fabric inward by about an inch. This step will eliminate any raw edges.
Additionally, press along your drawn line to provide a guide for when you apply the fabric to the lampshade.
Step 6. Apply the Fabric to the Lampshade
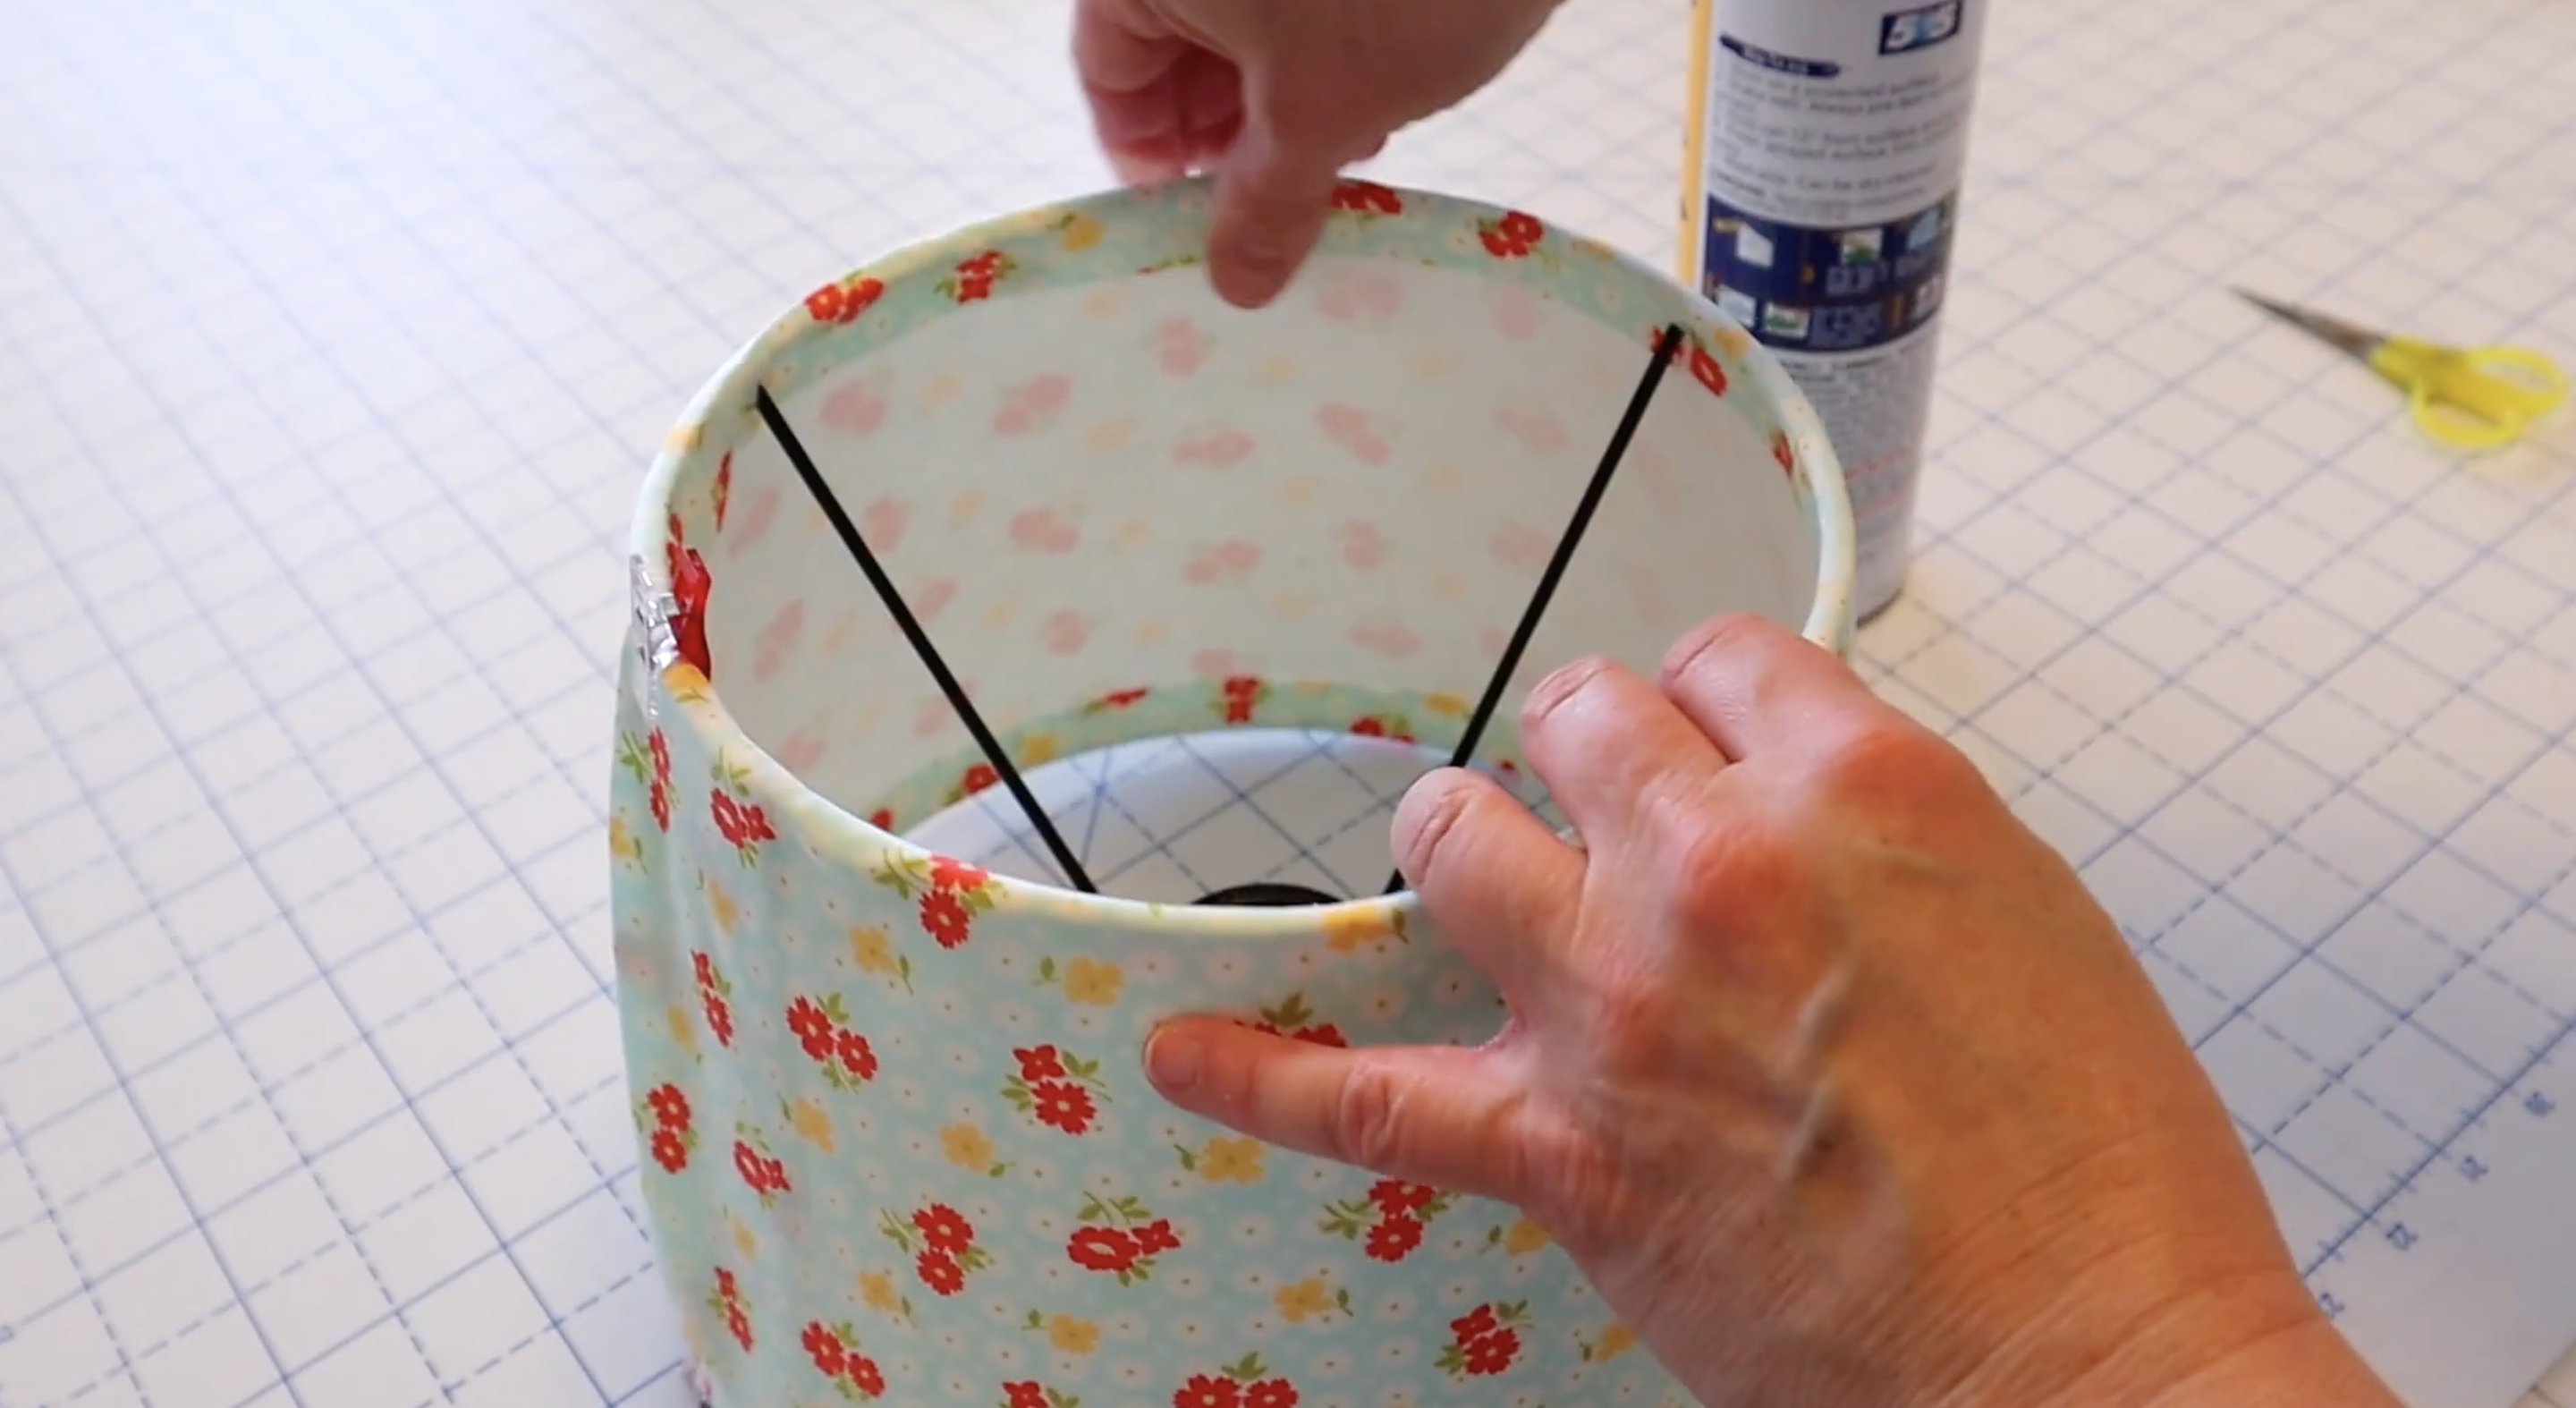
Lightly spray the back of your fabric with adhesive. Be sure to protect your work surface before applying the adhesive. Carefully roll the lampshade onto the sprayed fabric, smoothing out any wrinkles as you go.
Once you reach the end, apply more adhesive to ensure the fabric sticks securely. Press the edges to make sure they overlap slightly, hiding the raw edges.
Step 7. Add Decorative Finishing Touches
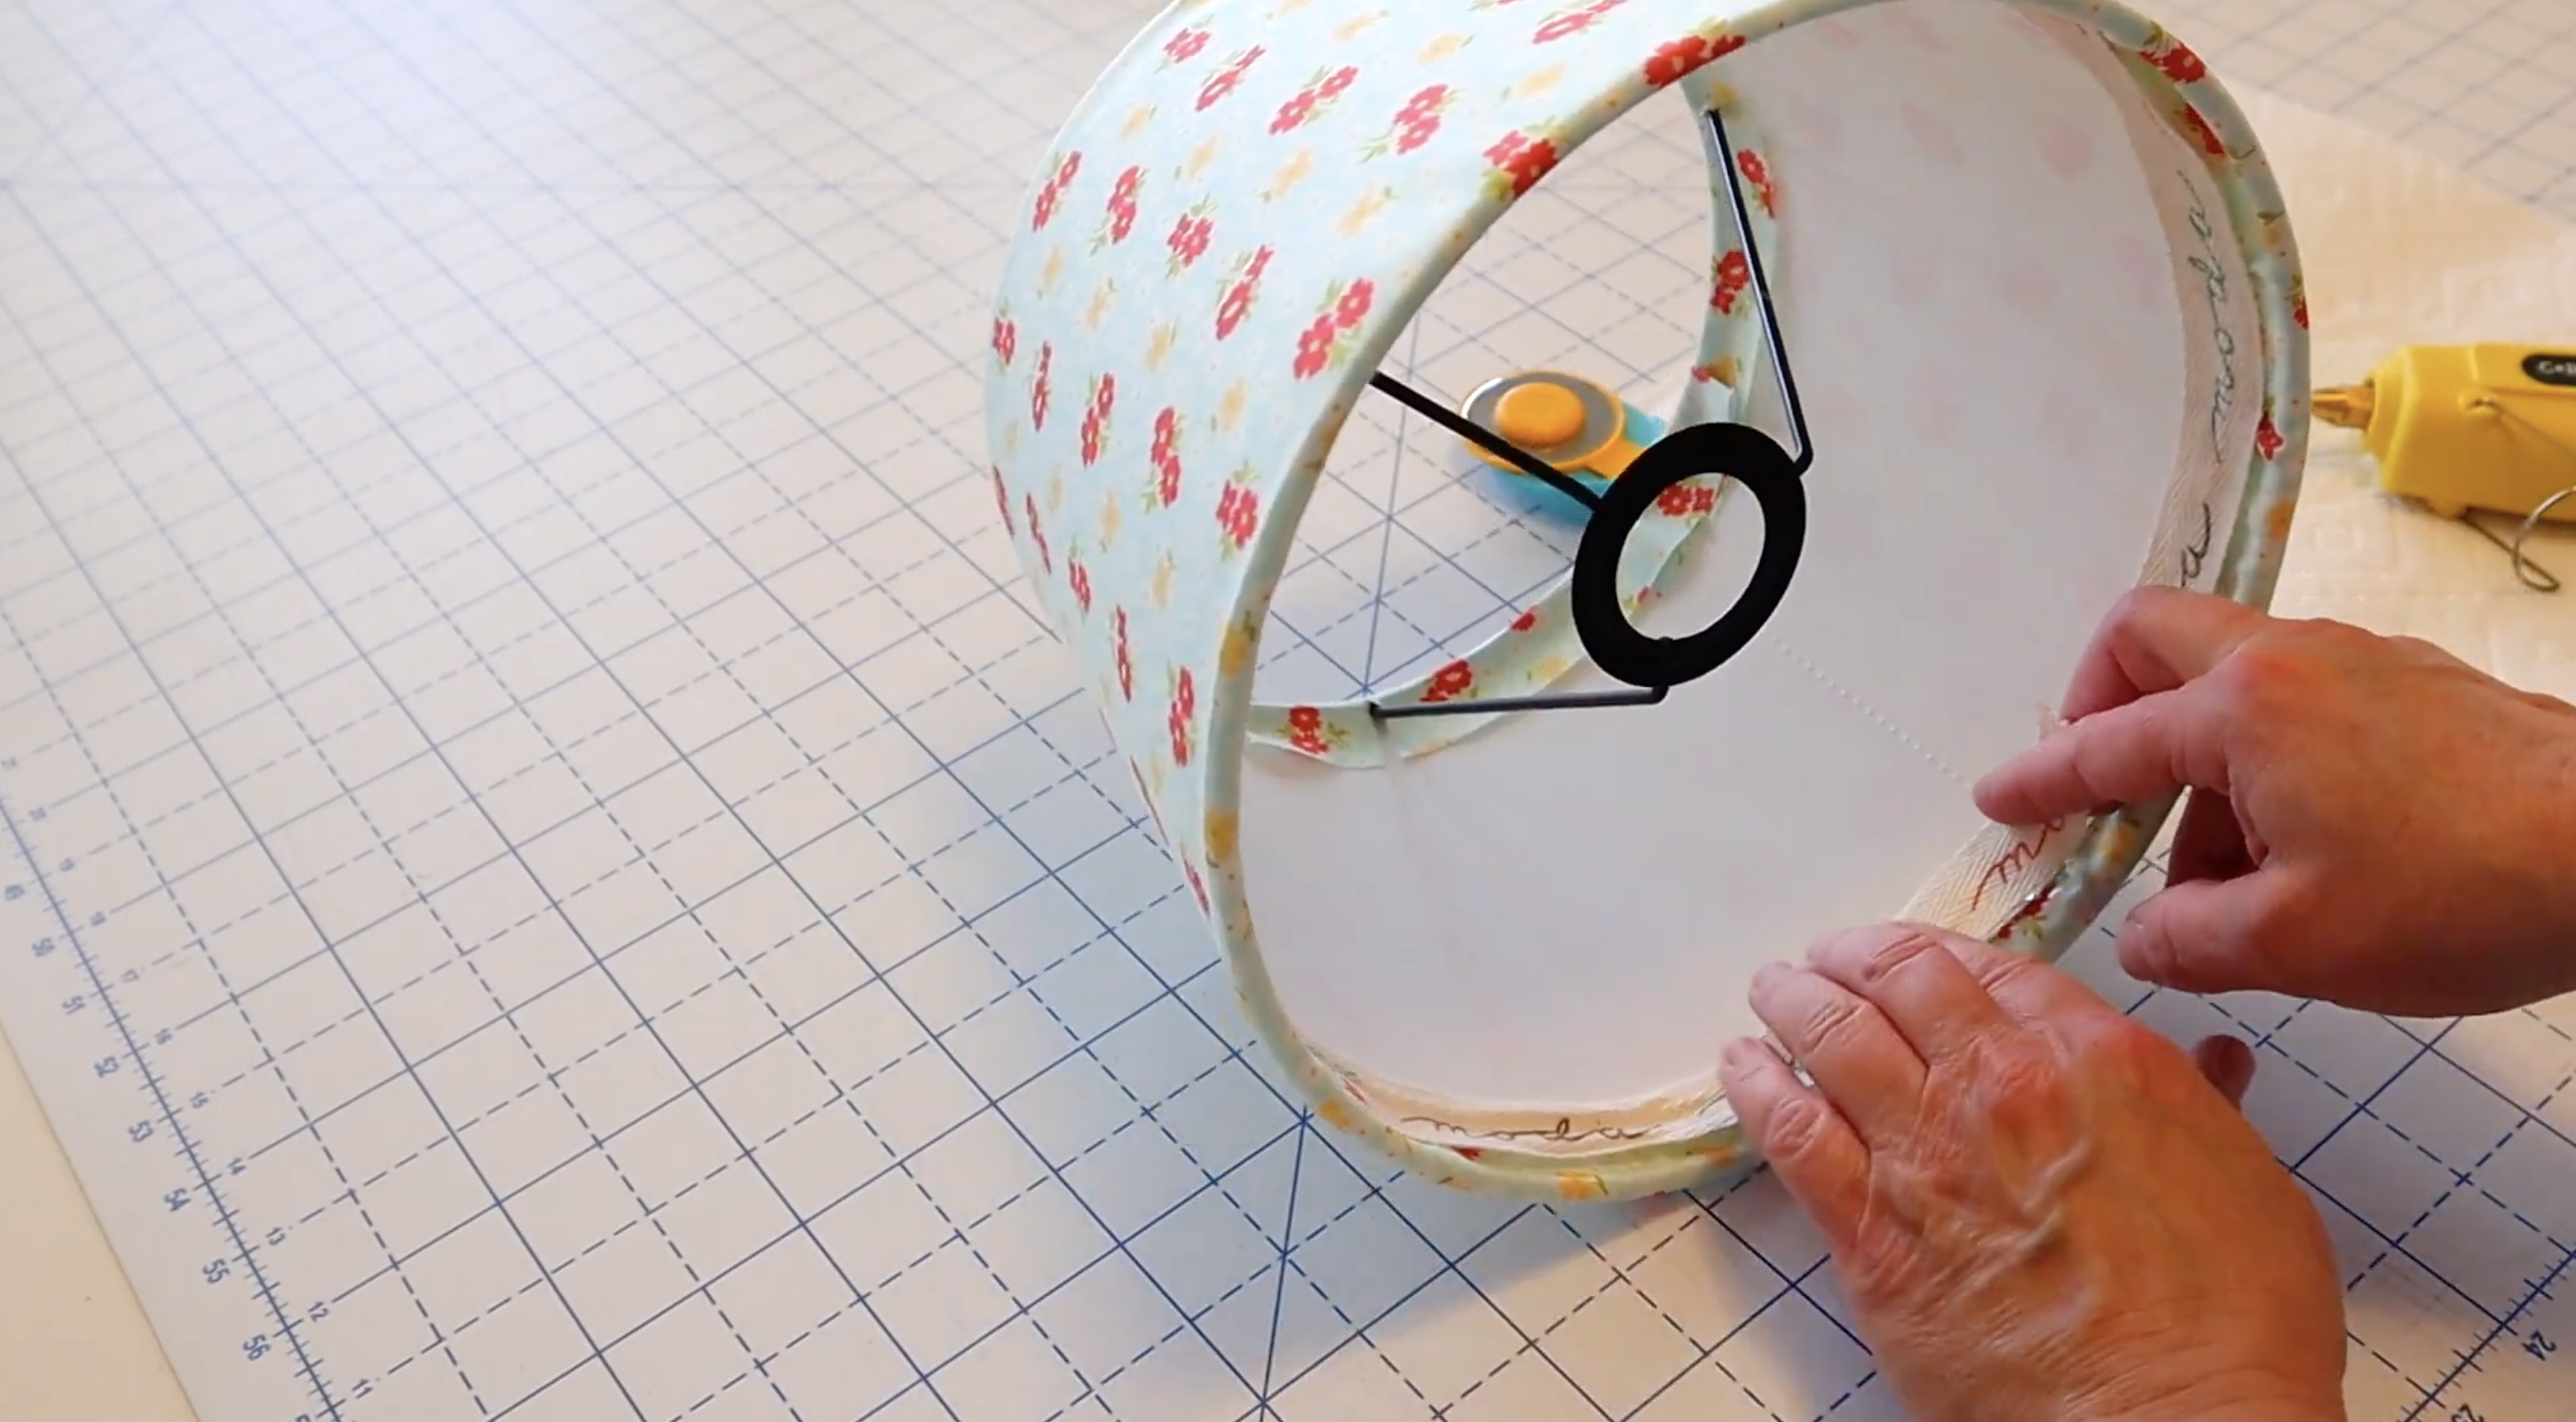
For an extra decorative touch, use a hot glue gun to attach ribbon around the top and bottom edges of the lampshade.
This step covers any raw edges and adds a charming, personalized finish.
If you prefer not to use ribbon, you can fold the raw edges under and glue them to the inside of the lampshade, giving it a clean, finished look.
Once you’re happy with the ribbon placement, your custom lampshade is ready to be displayed!
Essential Tips for A Perfect DIY Fabric Lampshade
When creating custom lampshades, safety and technique go hand in hand. These essential tips will help you create professional-looking shades while ensuring they’re safe for everyday use.
- Use flame-resistant fabric spray: Always treat your finished lampshade with flame-resistant spray, which dries clear and doesn’t alter appearance. This simple step prevents potential fire hazards when the lamp gets hot.
- Test before regular use: Run your lamp with the new shade for 30 minutes, then check for hot spots. This testing period ensures your fabric choice and construction are safe for longer periods of use.
- Measure twice, cut once: An unbalanced or uneven lampshade looks amateur and might sit crooked. Take extra time with measurements and consider making paper templates before cutting your fabric.
- Choose LED bulbs: LED bulbs run cooler than incandescent options and come in warm light tones. They’re safer for fabric shades and use less energy while still providing beautiful light.
- Prep your lampshade frame: Wipe old frames with rubbing alcohol to remove dust and adhesive residue. A clean, smooth base ensures your fabric will adhere properly without bumps or bubbles.
- Document your process: Take photos of each step when working with existing shades. These visual references prevent confusion when reassembling and help you repeat successful techniques.
- Consider light quality: Dark fabrics create intimate, focused lighting while lighter fabrics maximize brightness. Choose your fabric color based on the mood and function you want for the space.
What are the Best Fabrics for DIY Lampshades
Not all fabrics work well for lampshades. We learned this the hard way when my first attempt with thick upholstery fabric blocked too much light.
1. Cotton
- Why: Cotton is lightweight, easy to work with, and allows light to diffuse beautifully. It comes in a variety of patterns and colors.
- Best Use: Ideal for drum or pleated lampshades.
2. Linen
- Why: Linen has a natural texture that adds elegance. It is lightweight but sturdy enough for crafting.
- Best Use: It works well for pleated or smooth lampshades.
3. Lightweight Upholstery Fabric
- Why: It provides durability while allowing some light to pass through. Choose thinner upholstery fabrics to avoid blocking too much light.
- Best Use: Suitable for larger lampshades requiring more structure.
4. Non-Stretch Cotton
- Why: Non-stretch cotton ensures the fabric stays taut and doesn’t warp during application, making it ideal for adhesive-based lampshade kits.
- Best Use: Perfect for straight-sided shades.
5. Block-printed fabrics
- Why: Block-printed fabrics add a unique, artistic touch to your lampshade. You can even print your own designs for a bespoke look.
- Best Use: Great for creating personalized or themed shades.
6. Gingham or Patterned Fabrics
- Why: Fabrics like gingham or floral prints add charm and personality while still maintaining light diffusion.
- Best Use: Ideal for decorative table lamps.
Common DIY Lampshade Mistakes and How to Fix Them
When crafting a DIY lampshade, it’s easy to make mistakes, but don’t worry! Here’s a breakdown of common mishaps and how to fix them:
1. Uneven Fabric Application
- Mistake: Sometimes, fabric doesn’t go on smoothly, causing wrinkles or uneven application.
- Fix: To avoid this, always spray the fabric with adhesive evenly and make sure to smooth it out as you apply it.
2. Fabric Doesn’t Fit Properly
- Mistake: If the fabric isn’t measured or cut properly, it may not fit your lampshade.
- Fix: Always measure your lampshade’s dimensions before cutting the fabric, and leave an extra inch around the edges to account for any adjustments.
3. Raw Edges Showing
- Mistake: Raw fabric edges can be visible at the top or bottom of your lampshade, giving it a messy appearance.
- Fix: Tuck the edges under and glue them inside the lampshade for a clean look.
4. Overusing Adhesive
- Mistake: Applying too much spray adhesive can leave sticky patches or cause the fabric to slip out of place.
- Fix: Lightly spray the fabric and the lampshade with adhesive.
5. Using the Wrong Fabric
- Mistake: Some fabrics may be too thick, stiff, or difficult to apply, causing issues with light diffusion or fit.
- Fix: Choose lightweight cotton, linen, or other fabrics that are flexible and easy to work with.
6. Improper Cutting of Fabric
- Mistake: Cutting fabric unevenly or without enough extra room can result in an imperfect fit.
- Fix: Use a rotary cutter or fabric scissors for a cleaner cut and leave an extra half to one inch of fabric around your measurements to allow for adjustments.
7. Not Testing the Lamp Before Assembly
- Mistake: Not checking how the fabric interacts with light before finalizing the lampshade.
- Fix: Always test the fabric by holding it up to the light or placing the lampshade on the lamp briefly before securing it fully.
By being mindful of these common mistakes and following these fixes, you’ll be well on your way to creating a flawless DIY fabric lampshade!
The Bottom Line
Creating your own fabric lampshade transforms both your lighting and your space without breaking the bank. The process is simpler than most people think, and the results are truly worth the effort.
Ready to brighten up your home with a custom touch? Grab some fabric that makes you happy and start creating!
Your first lampshade might not be perfect, but each one gets better, and the skill lasts a lifetime.
Don’t forget to share your creations in the comments below. We’d love to see how your custom lampshades turn out and hear which techniques worked best for you!