Barn doors are taking over modern homes faster than you can say “farmhouse chic.”
But here’s what most people don’t realize about how to build a barn door – you don’t need to spend hundreds at fancy stores or hire contractors.
Building your own barn door saves serious cash while giving you that satisfying “I made this myself” feeling. Plus, you get exactly the style and size you want.
This guide walks you through every step, from picking the right wood to hanging your finished masterpiece. Ready to turn some basic lumber into your home’s new favorite feature?
What to Know Before Installing a Barn Door?
Choosing the right barn door style makes all the difference in a project’s success. Two main options exist: sliding and hinged doors.
Sliding vs. Hinged Barn Doors
Sliding barn doors roll along a metal track mounted above the opening. They save space since they don’t swing out into rooms. Most people prefer sliding doors for bedrooms, closets, and pantries where floor space matters.
Hinged barn doors swing open like traditional doors but feature rustic styling. They work well when wall space for sliding isn’t available. However, they need clearance to open fully.
Interior vs. Exterior Applications
Indoor barn doors focus on style and smooth operation. They use lighter materials and basic hardware since the weather isn’t a concern. Popular spots include master bedrooms, laundry rooms, and home offices.
Outdoor barn doors face harsh conditions. They require treated lumber, weatherproof stain, and heavy-duty hardware. Garage doors, shed entrances, and patio openings suit this application.
Getting Measurements Right
Proper measuring prevents costly mistakes. The door should be 1-2 inches wider and taller than the opening. This covers gaps and ensures smooth operation.
For sliding doors, measure the wall space where the track mounts. The door needs room to slide completely clear of the opening. Standard doors need at least their width in wall space.
Check that the walls are level before ordering materials. Uneven walls require adjustments during installation.
Table of Materials for Building a Barn Door
| Category | Items |
|---|---|
| Lumber | Rough-sawn pine boards (for frame and tongue-and-groove planks) |
| Fasteners | 1 1/4″ pocket hole screws, 1 1/4″ brad nails, wood glue |
| Hardware Kit | 79″ sliding barn door hardware kit (includes rail, spacers, casters, etc.) |
| Finishing Items | Wood filler, Minwax Special Walnut stain, and optional paint for the handle |
| Door Accessories | Barn door handle, rubber bumpers, door stops, floor guide |
| Tools | Craig jig, drill/driver, clamps, miter saw, circular saw, speed square socket wrench set, rubber mallet, tape measure, sanding tools |
| Safety Items | Safety goggles, a dust mask and hearing protection |
Step-By-Step Guide on How to Build a Barn Door
Learning how to build a barn door becomes much easier when broken down into simple steps. This section covers everything from cutting the first board to installing the final piece of hardware.
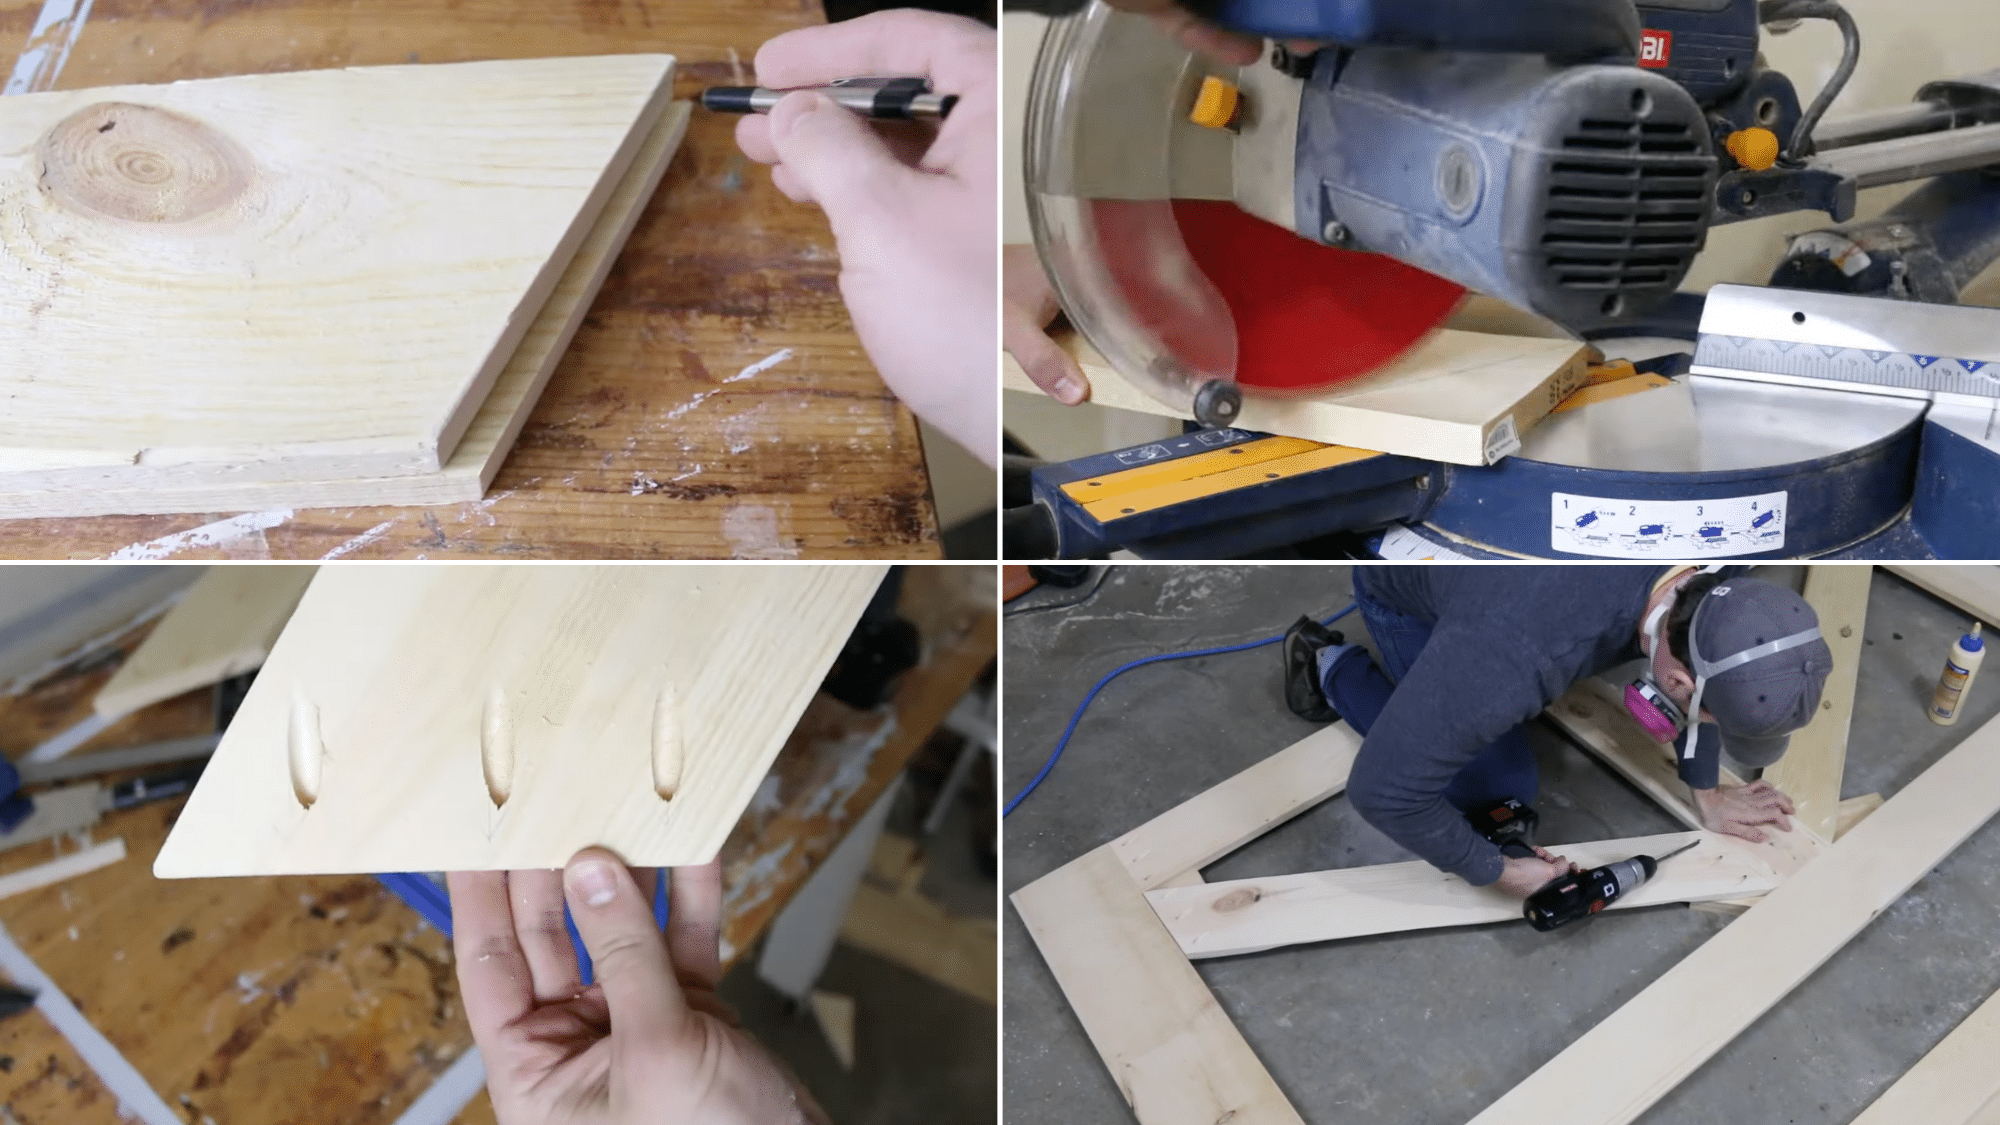
Step 1: Choose and Prepare the Wood
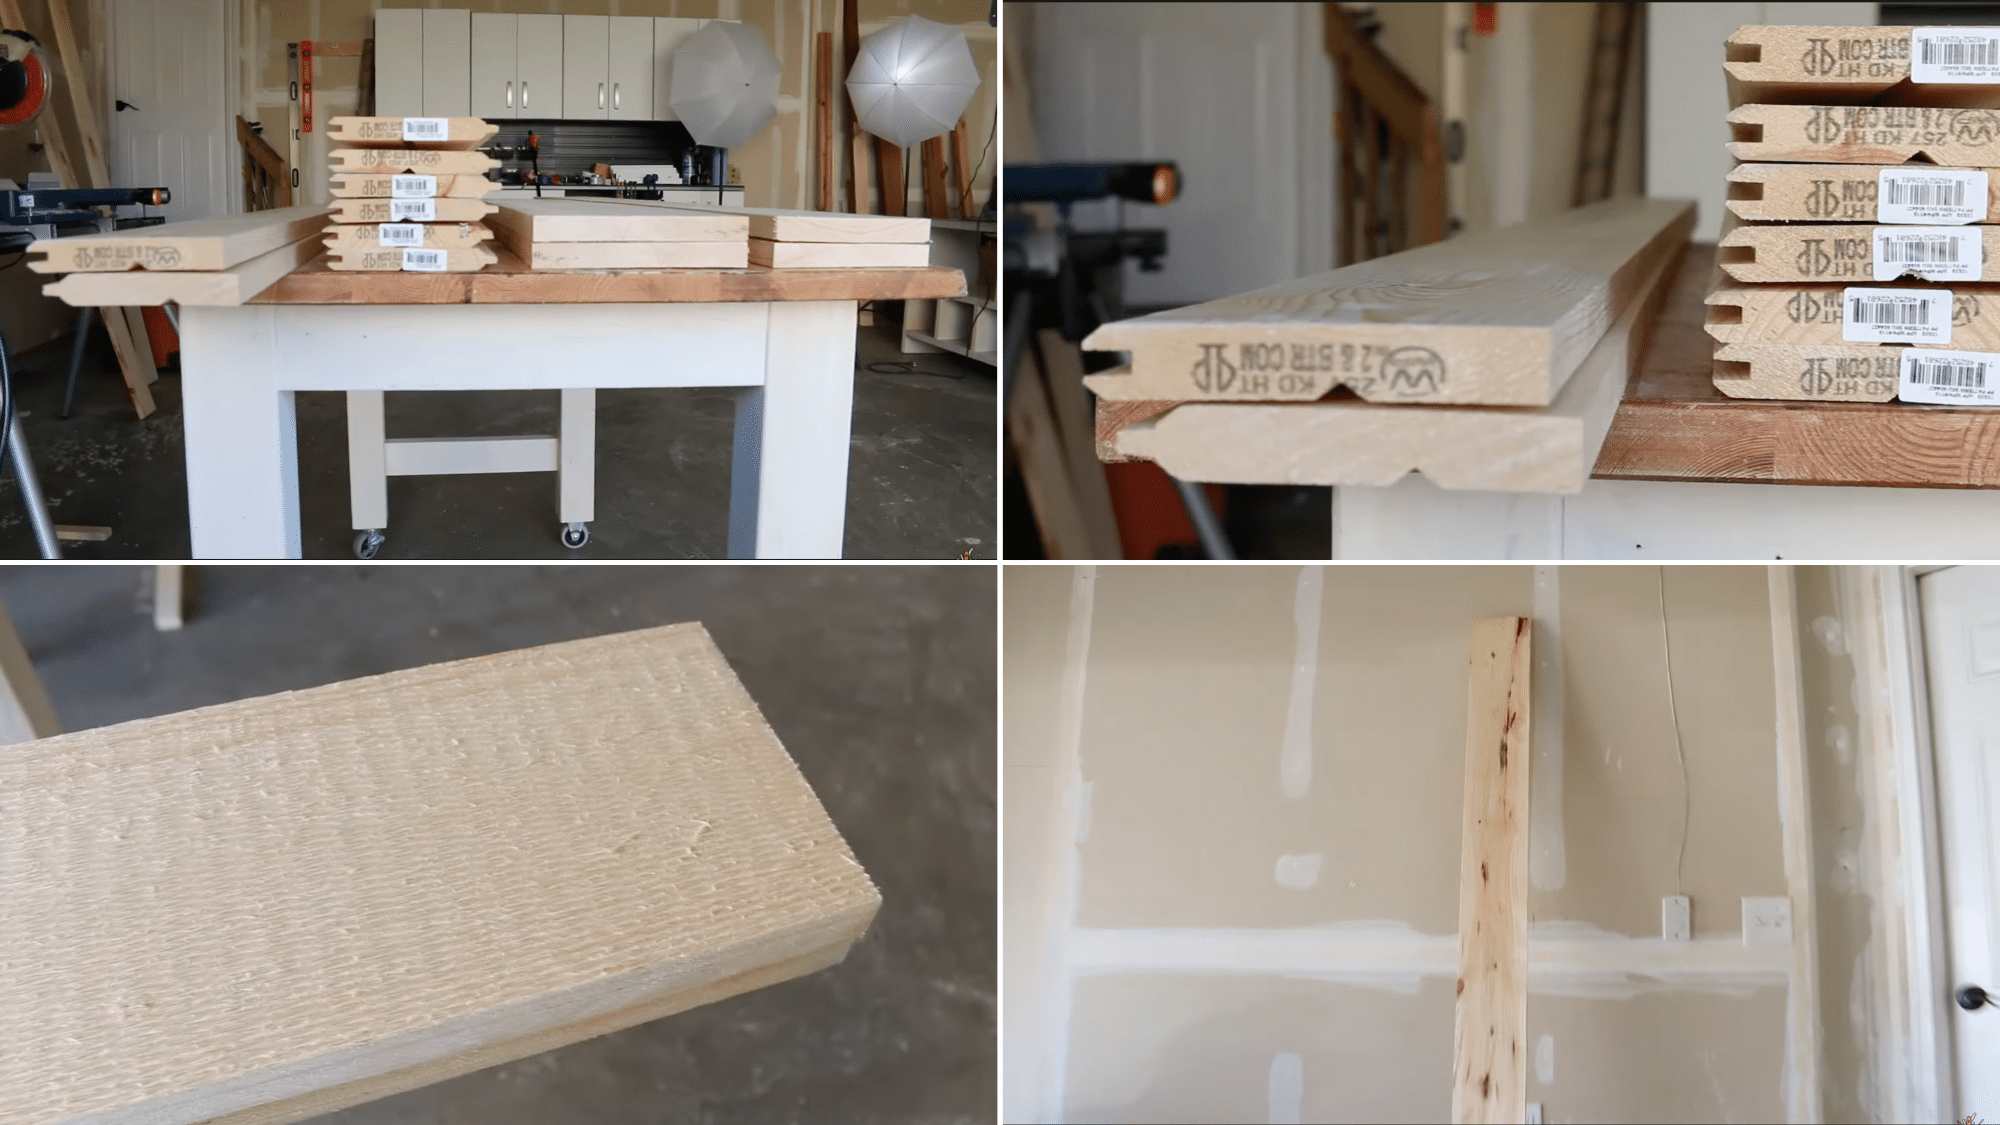
The process begins with selecting rough-sawn wood, ideally something with plenty of texture and grain. While these boards may appear uneven or warped, that’s part of their charm.
Each piece is cut to match the final dimensions of the barn door, including the vertical stiles and horizontal rails.
Step 2: Drill Pocket Holes and Assemble the Frame
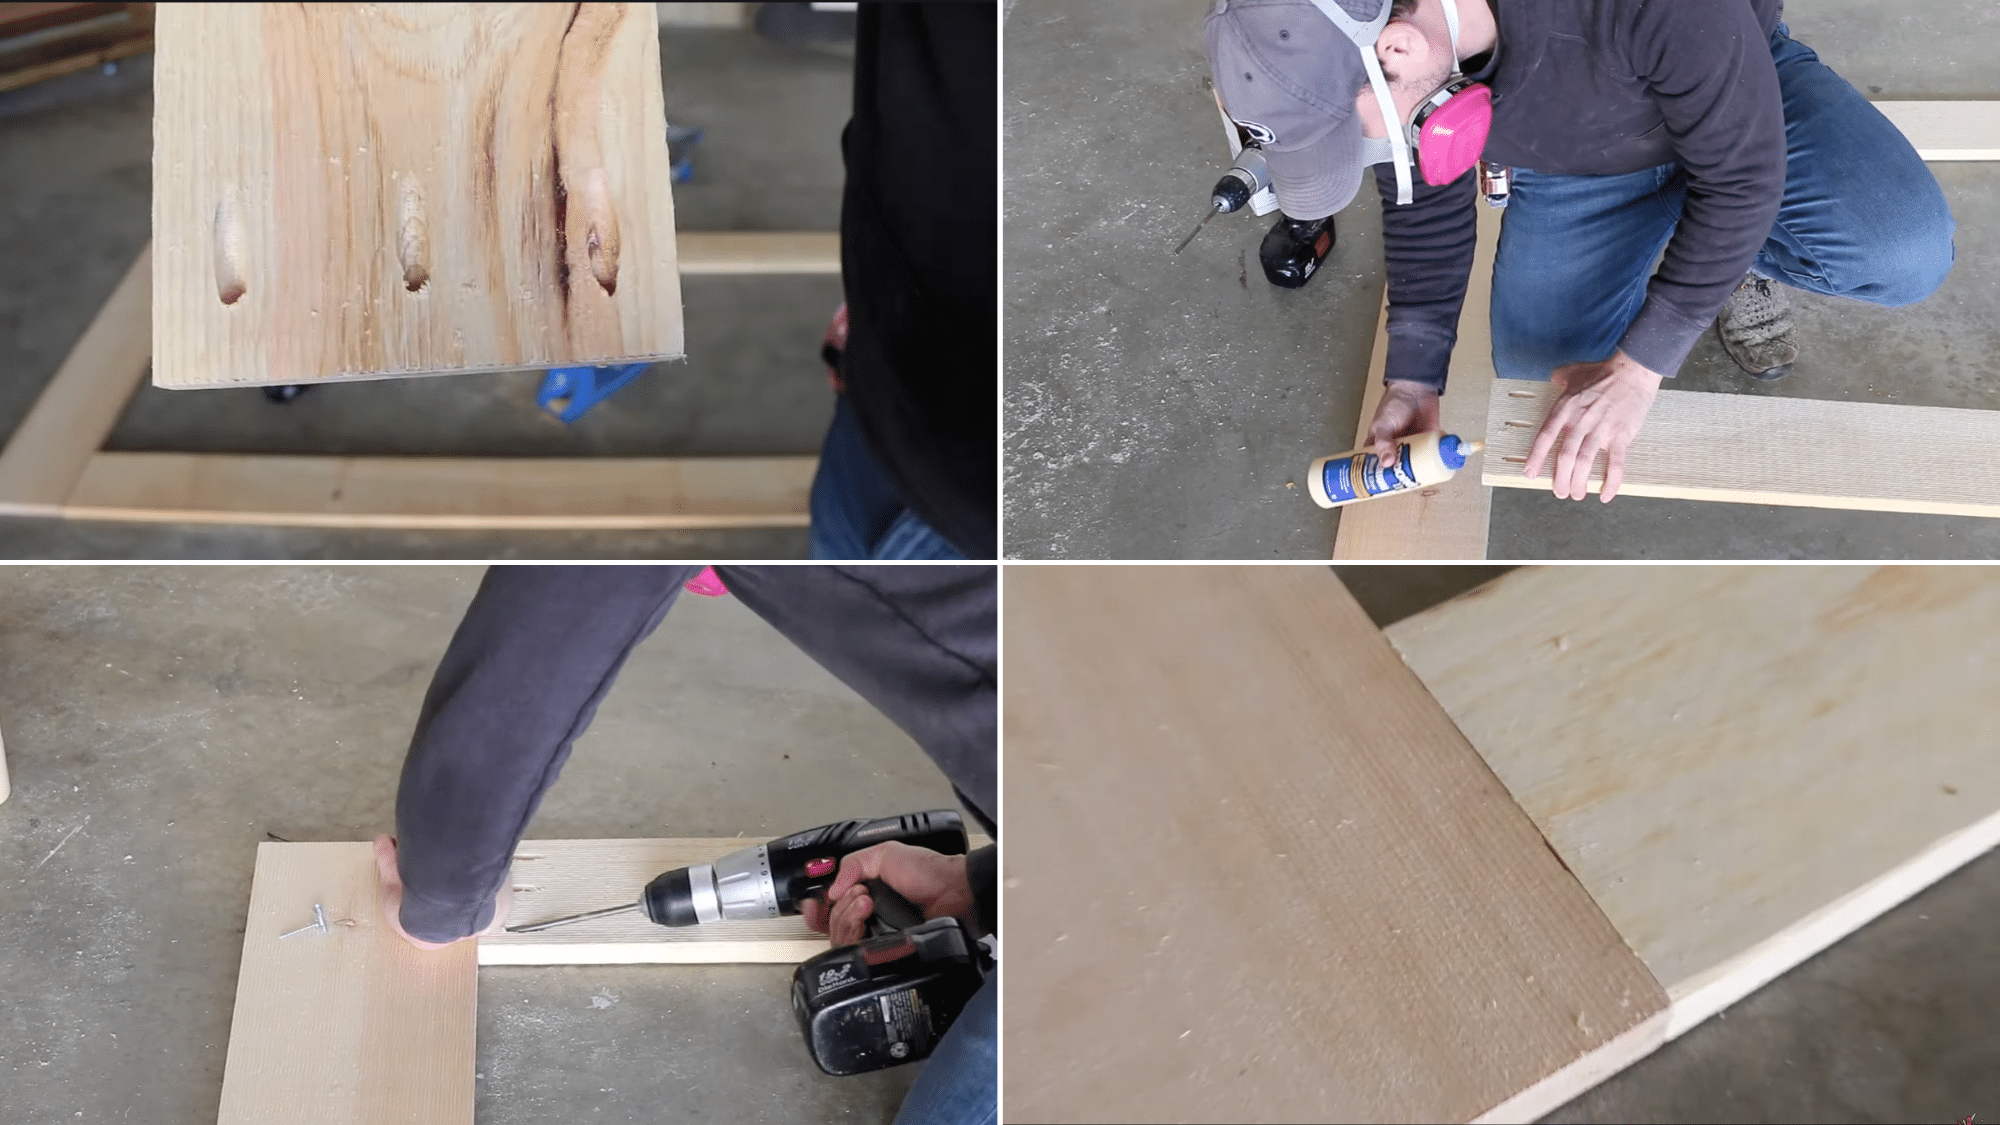
With the boards cut, pocket holes are drilled along the edges to connect the frame. Wood glue is applied to each joint, and the pieces are joined using screws.
Clamps are used throughout this process to hold everything in place and prevent the frame from bowing or shifting, especially near the base.
Step 3: Fit and Attach the Center Plank
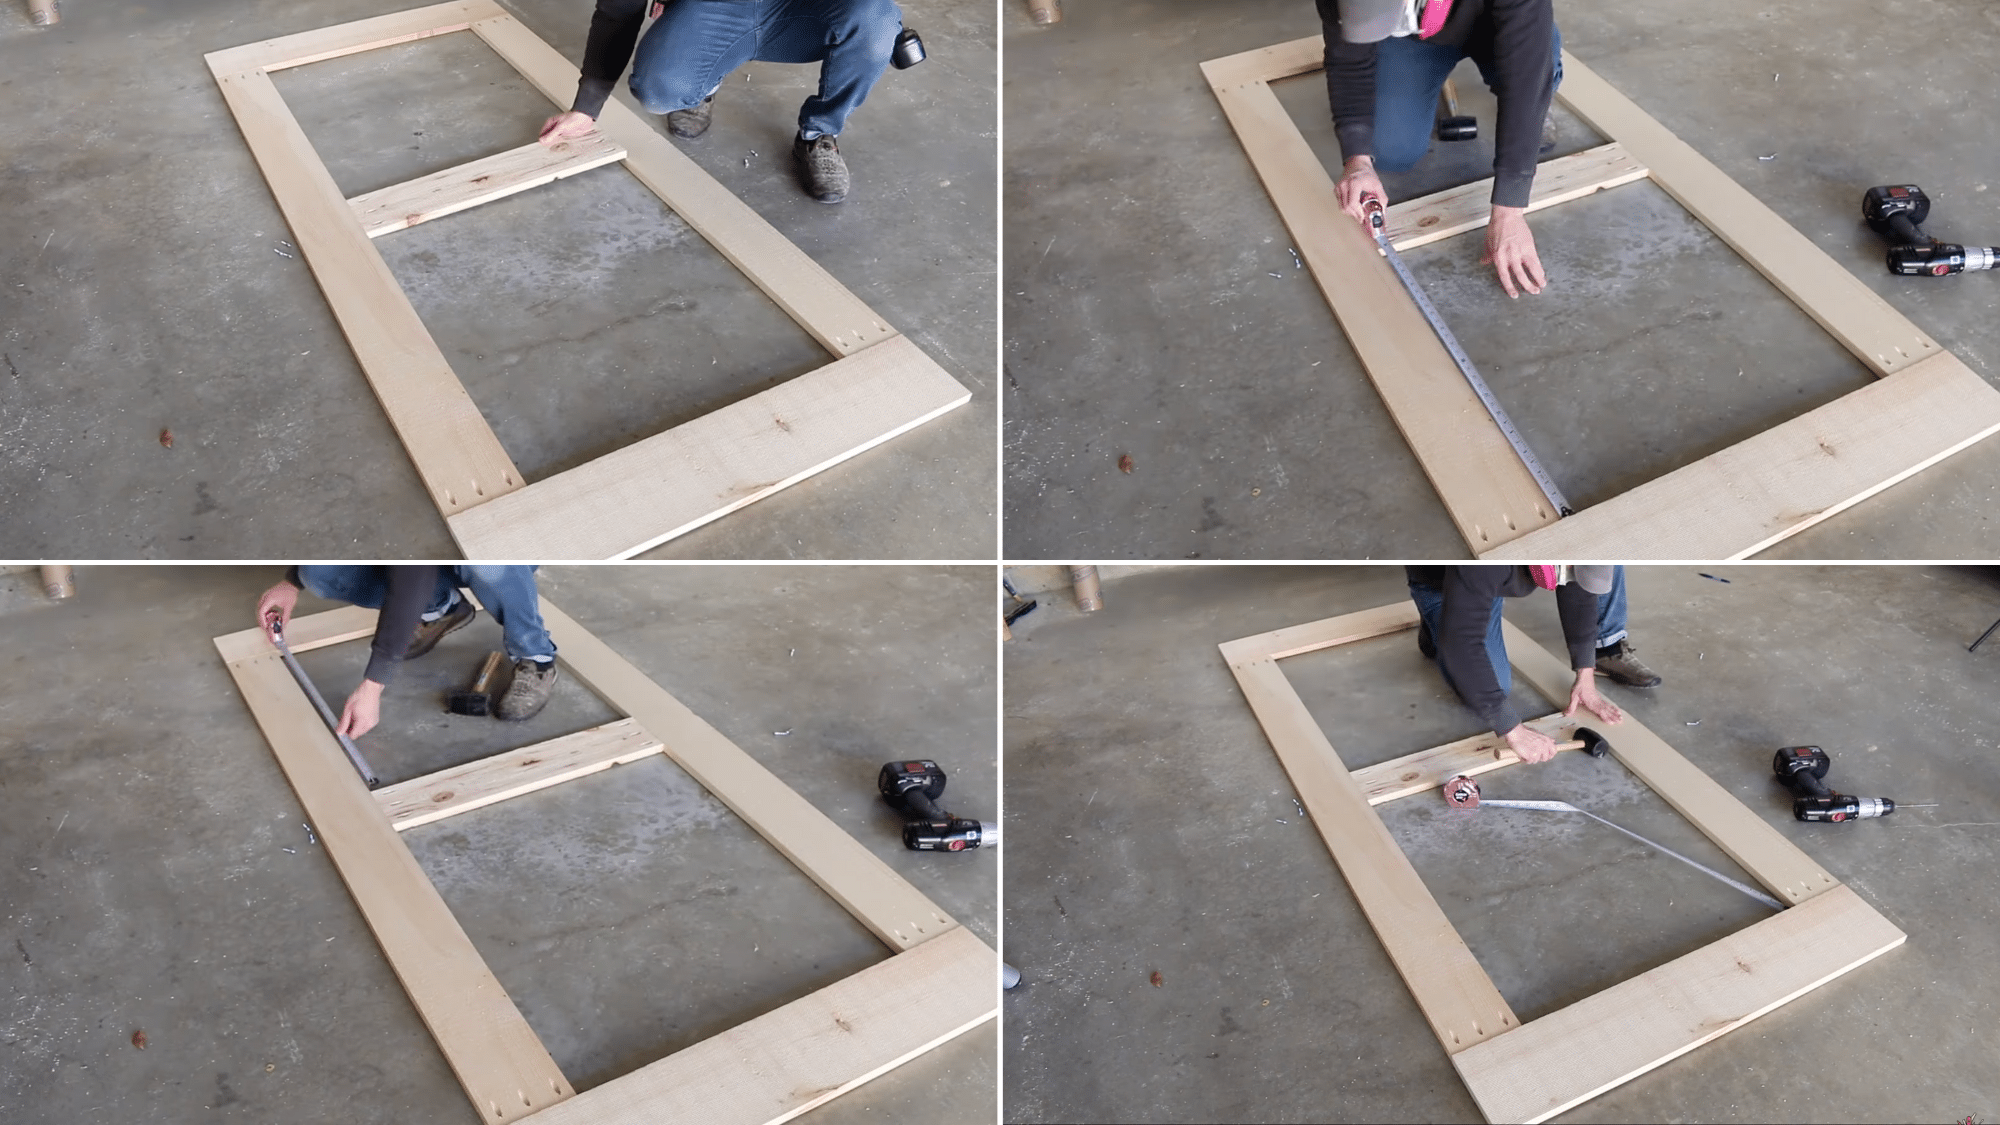
A vertical plank is measured and trimmed to size for the center of the door. After checking its position with a tape measure, it’s cut to fit snugly and then secured using glue and screws. This step adds visual balance and structural support to the frame.
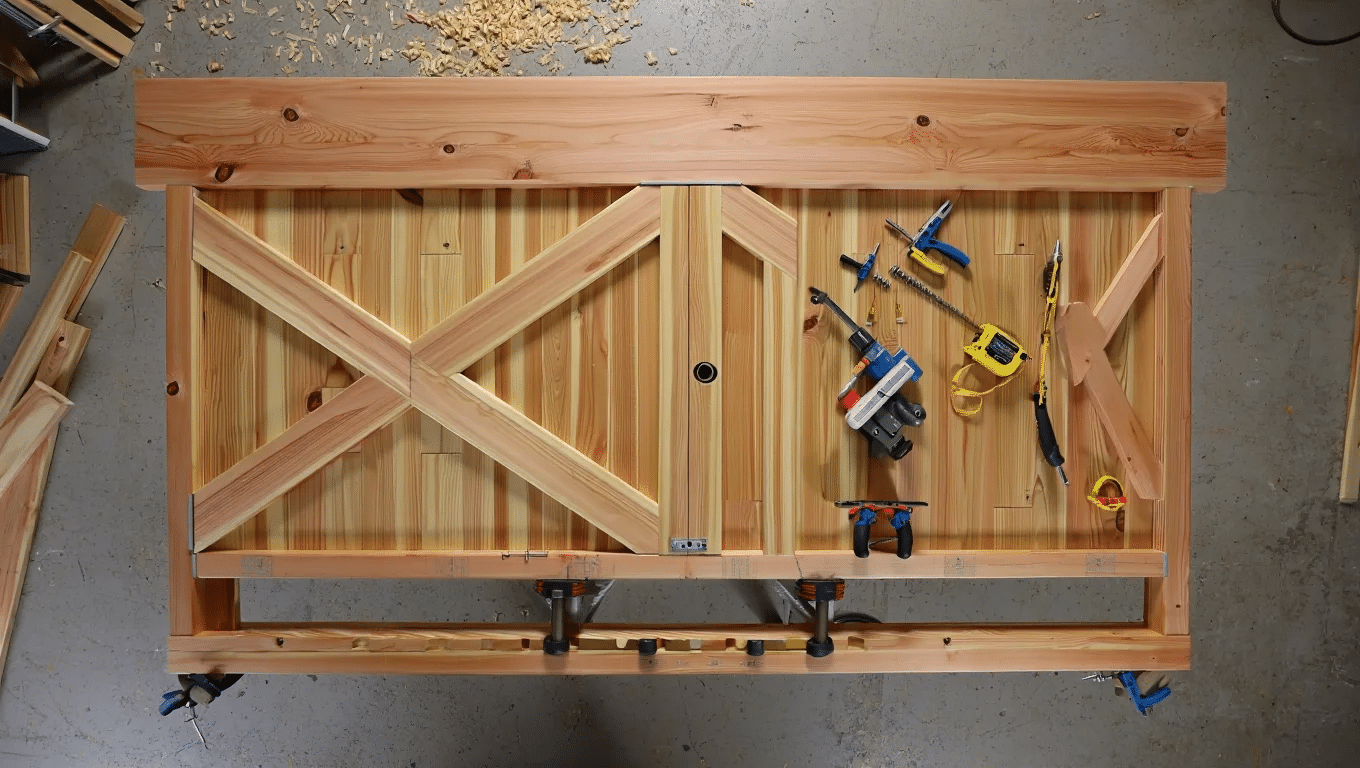
Step 4: Cut and Install Diagonal Braces
Two diagonal support braces are added next, crossing from corner to corner for both style and strength. Since the required angle is steep, the pieces are initially cut by hand and then fine-tuned using a saw.
Scrap wood is placed beneath the braces during attachment to keep the face of the door flush.
Step 5: Add Tongue & Groove Paneling
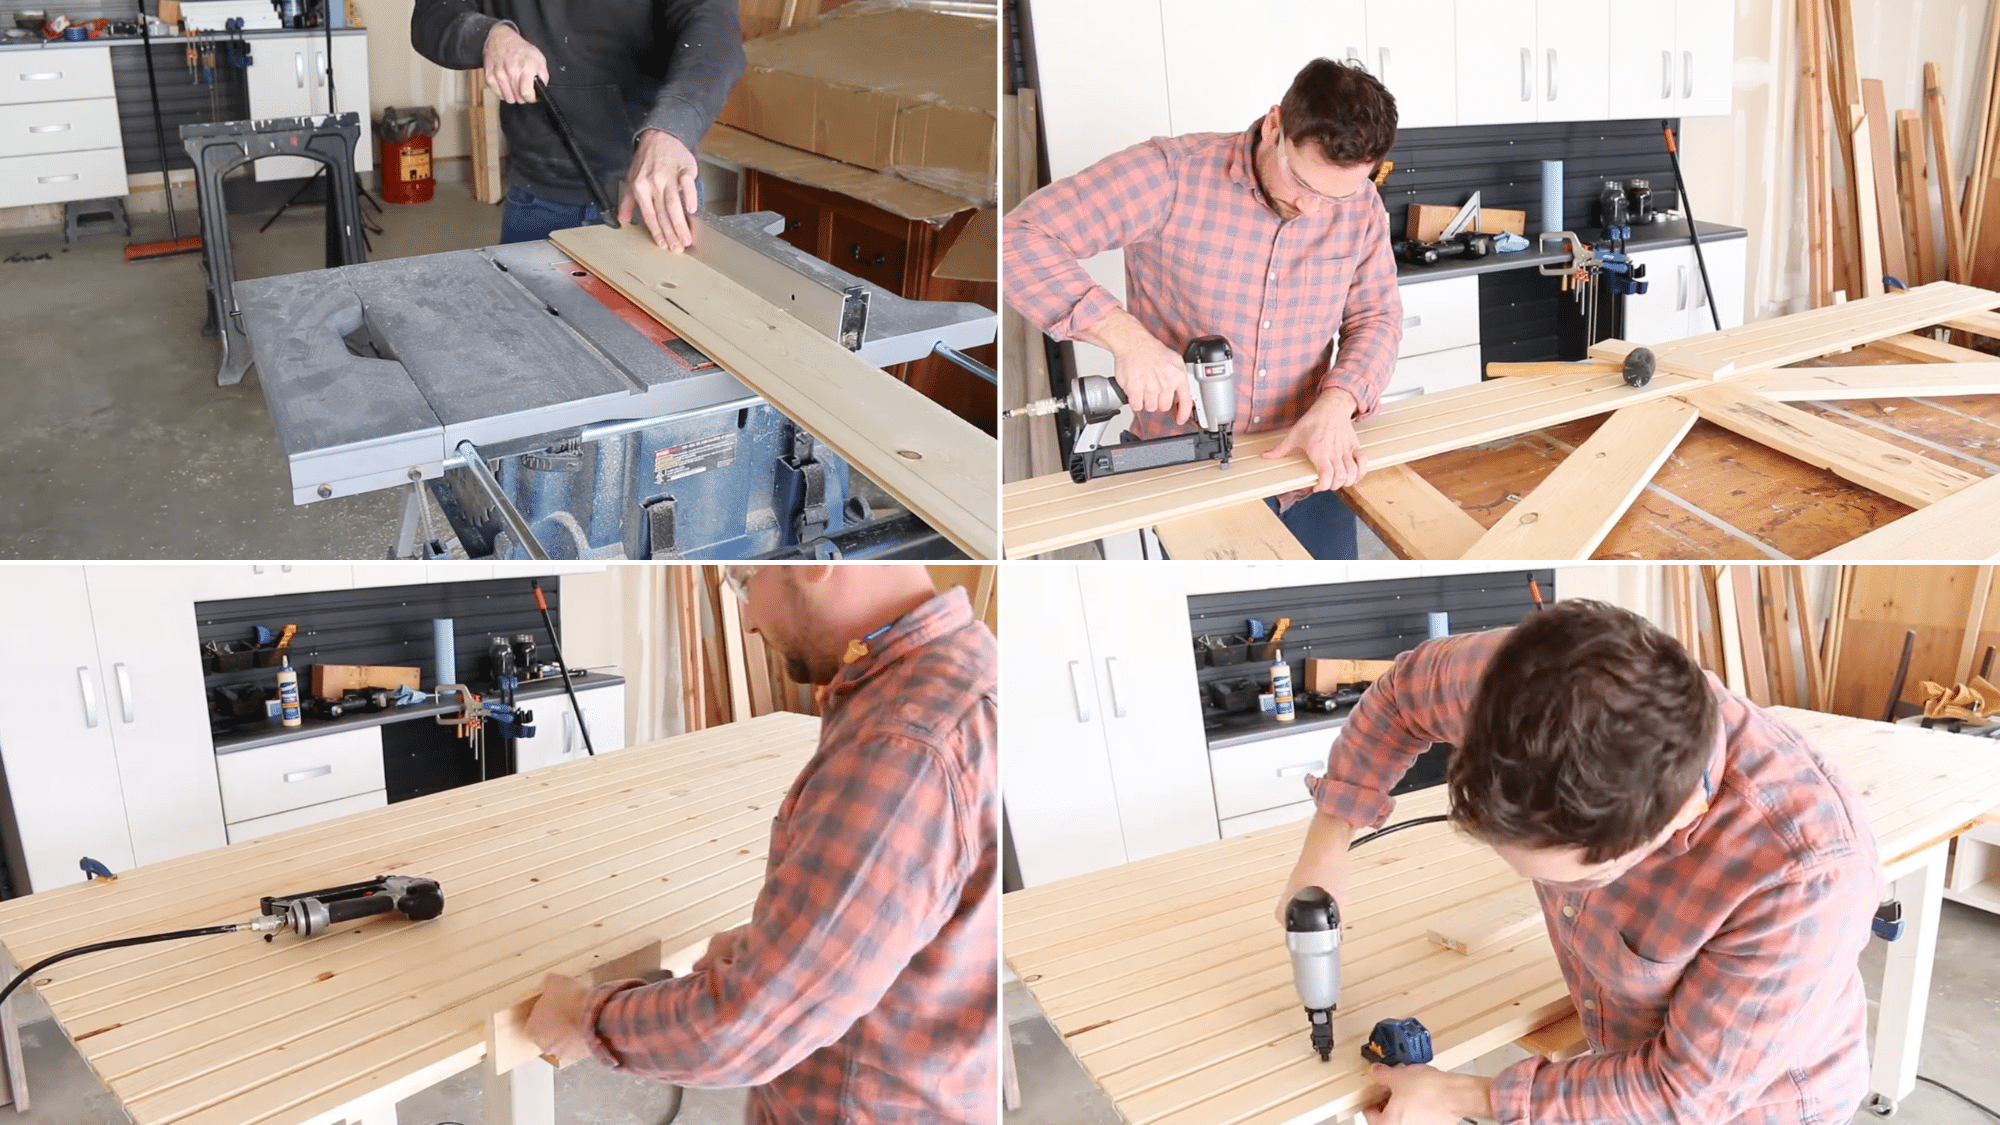
The back and front of the door are covered using tongue-and-groove boards.
The first piece is nailed down and acts as an anchor. Each additional board is fitted like flooring; tapped into place using a mallet and a block of scrap wood, then nailed once flush with its neighbor.
Step 6: Trim, Sand, and Fill
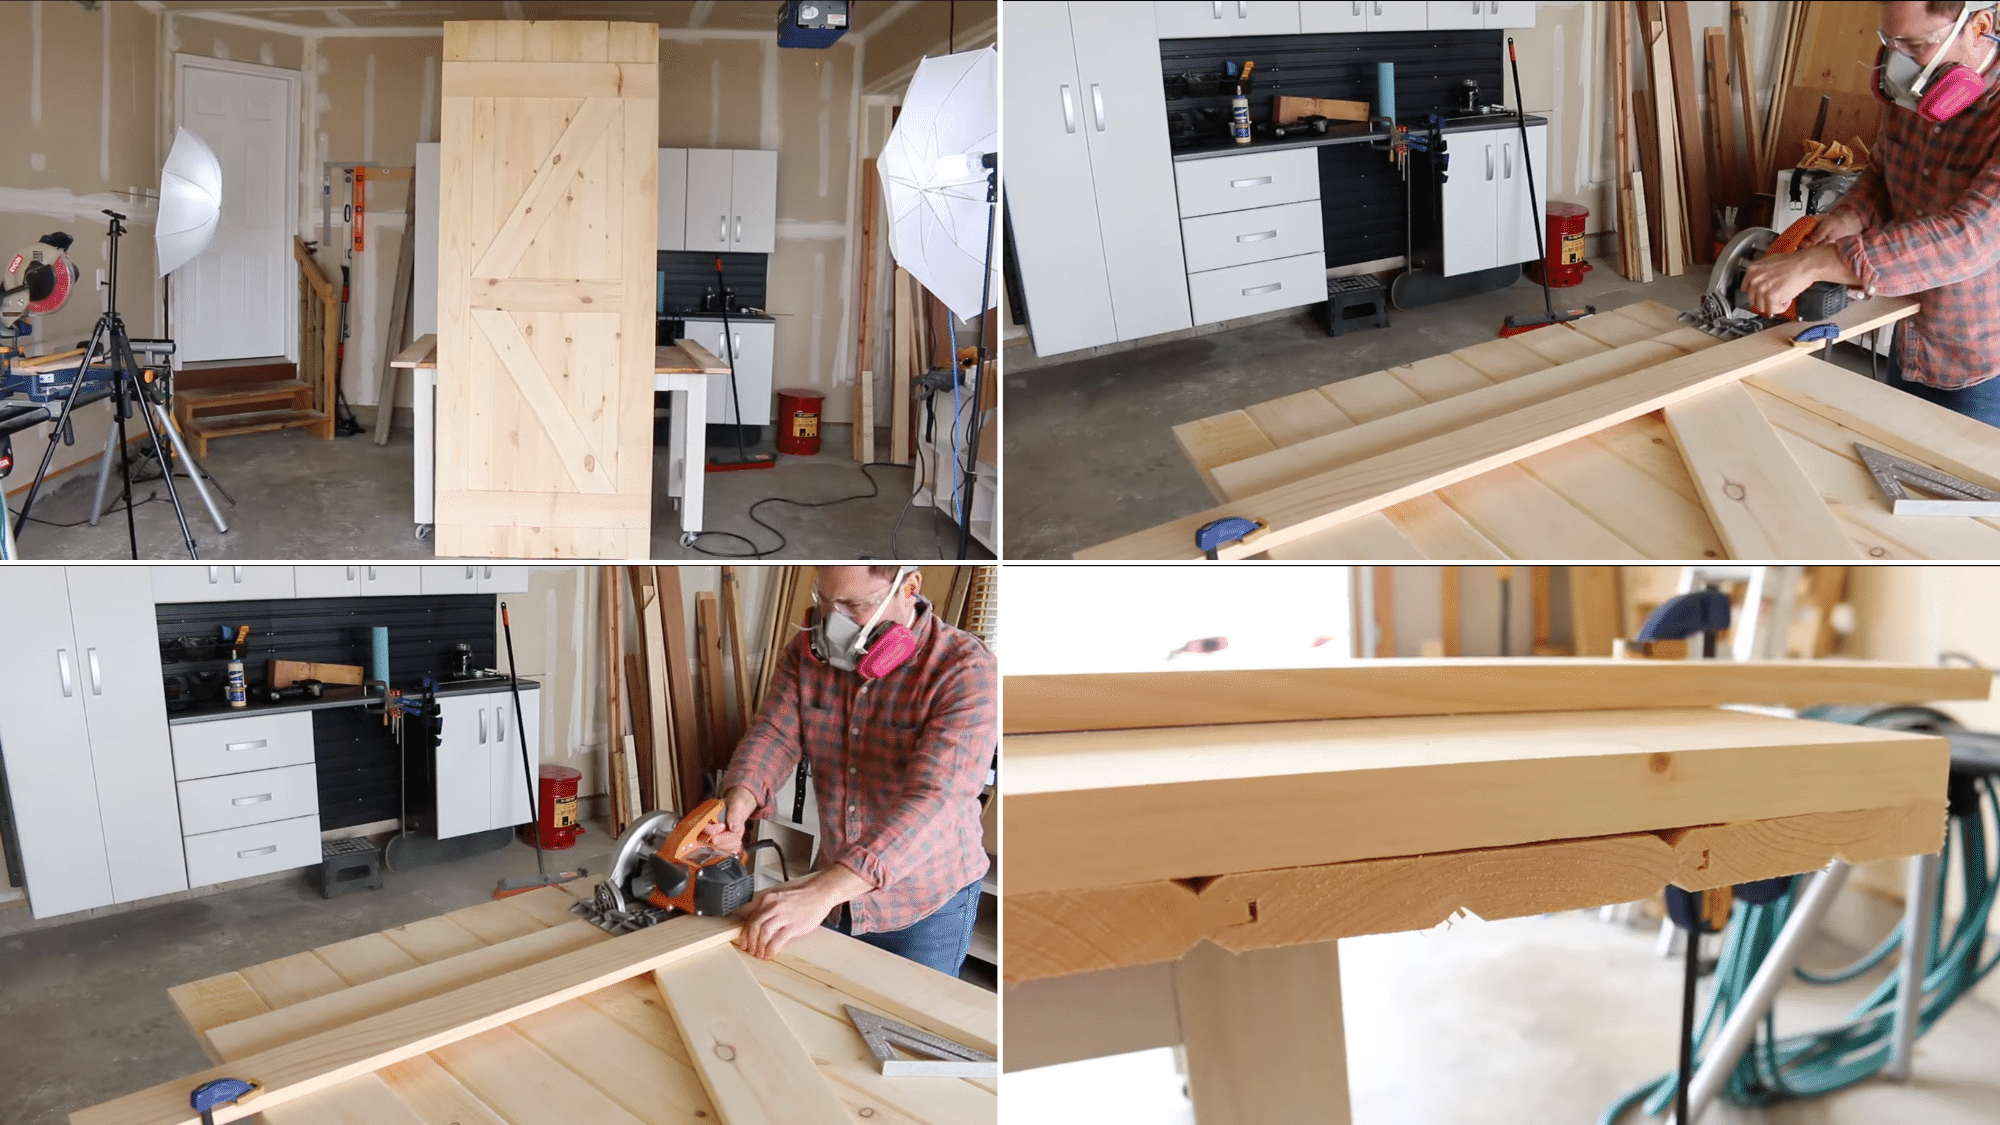
With all boards attached, any excess overhang is trimmed using a circular saw guided by a straight board. Nail holes are filled with wood filler, and the entire surface is sanded thoroughly to create a smooth, unified look.
Step 7: Stain the Door
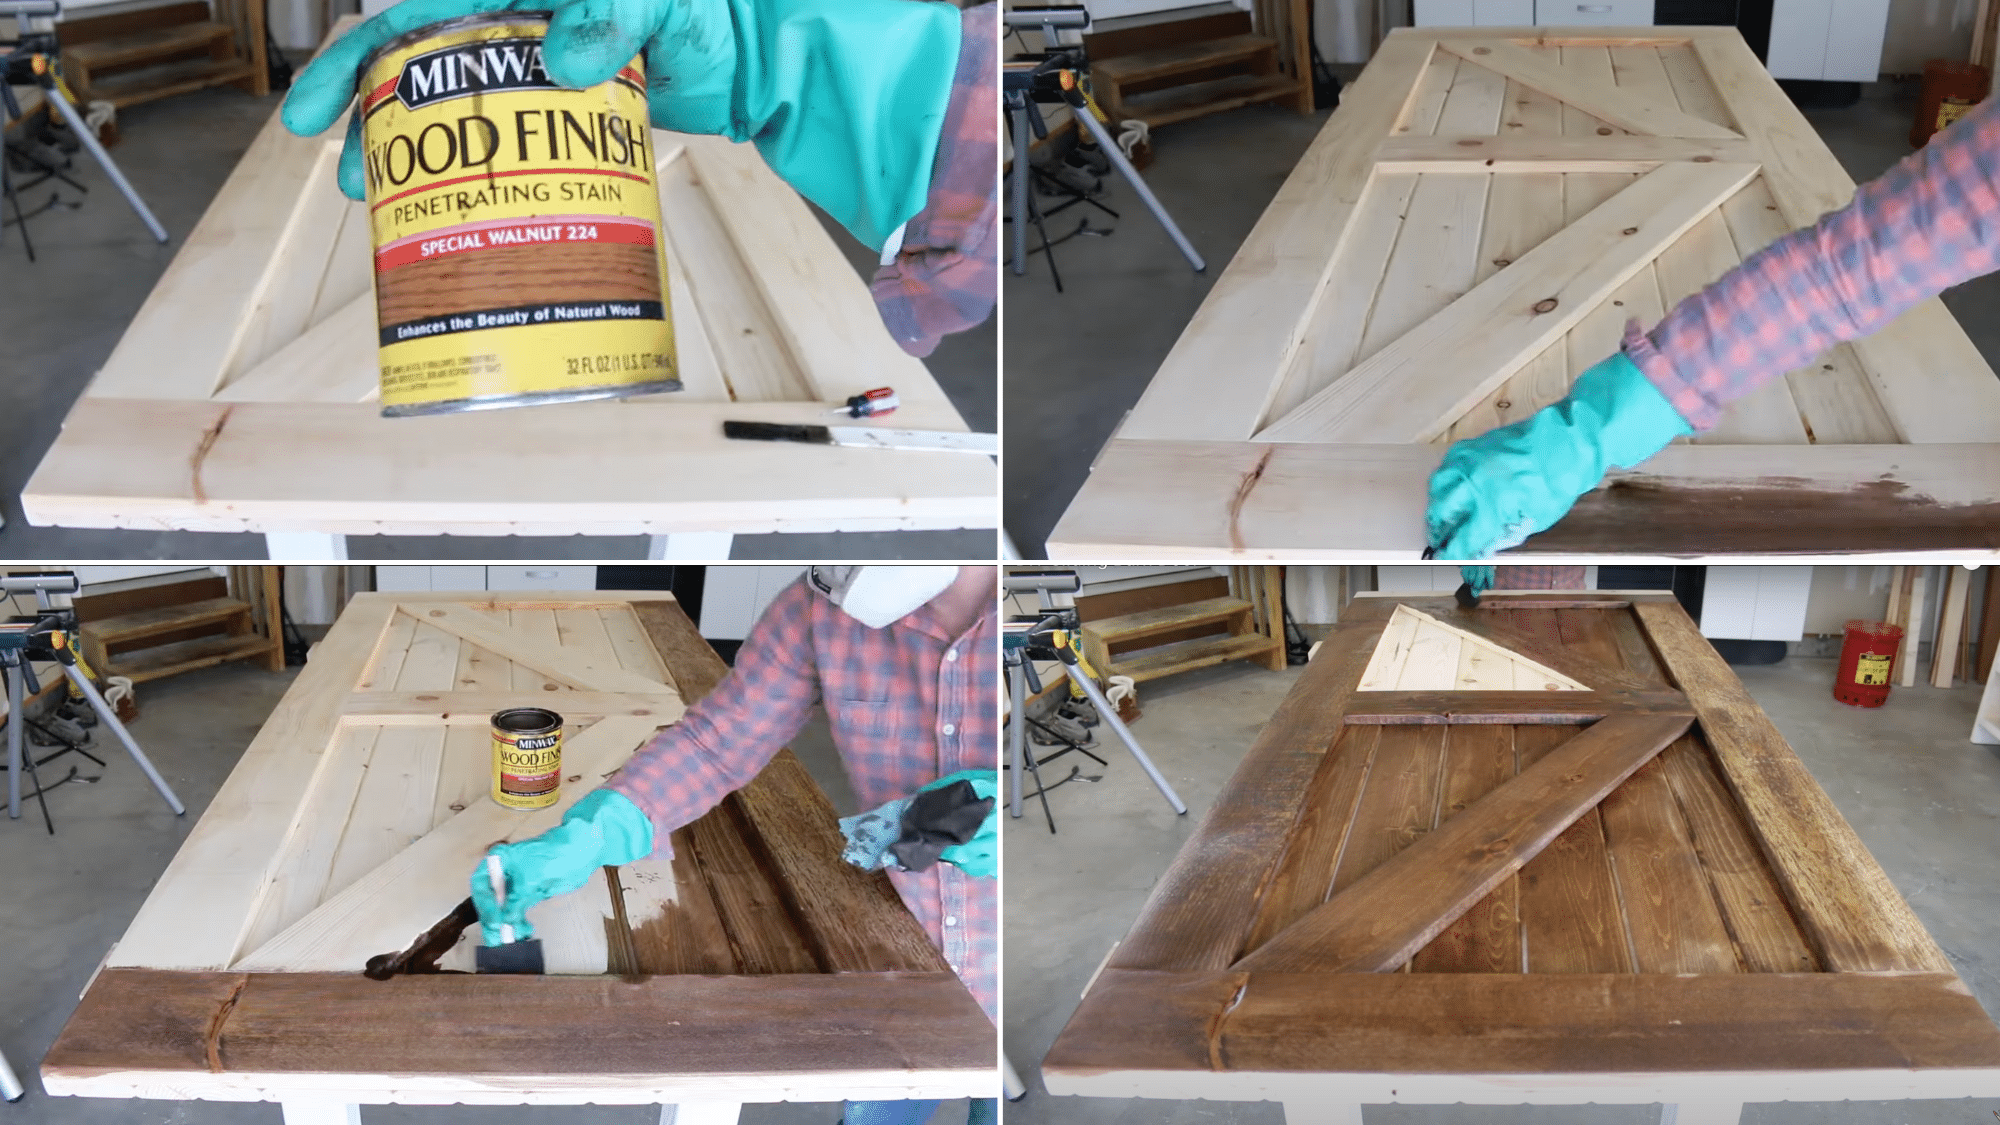
After sanding, a single coat of stain is applied across the surface. This gives the wood a warm, natural tone that enhances its texture without hiding the grain. One coat is often enough to achieve a beautifully distressed finish.
Step 8: Install the Sliding Hardware
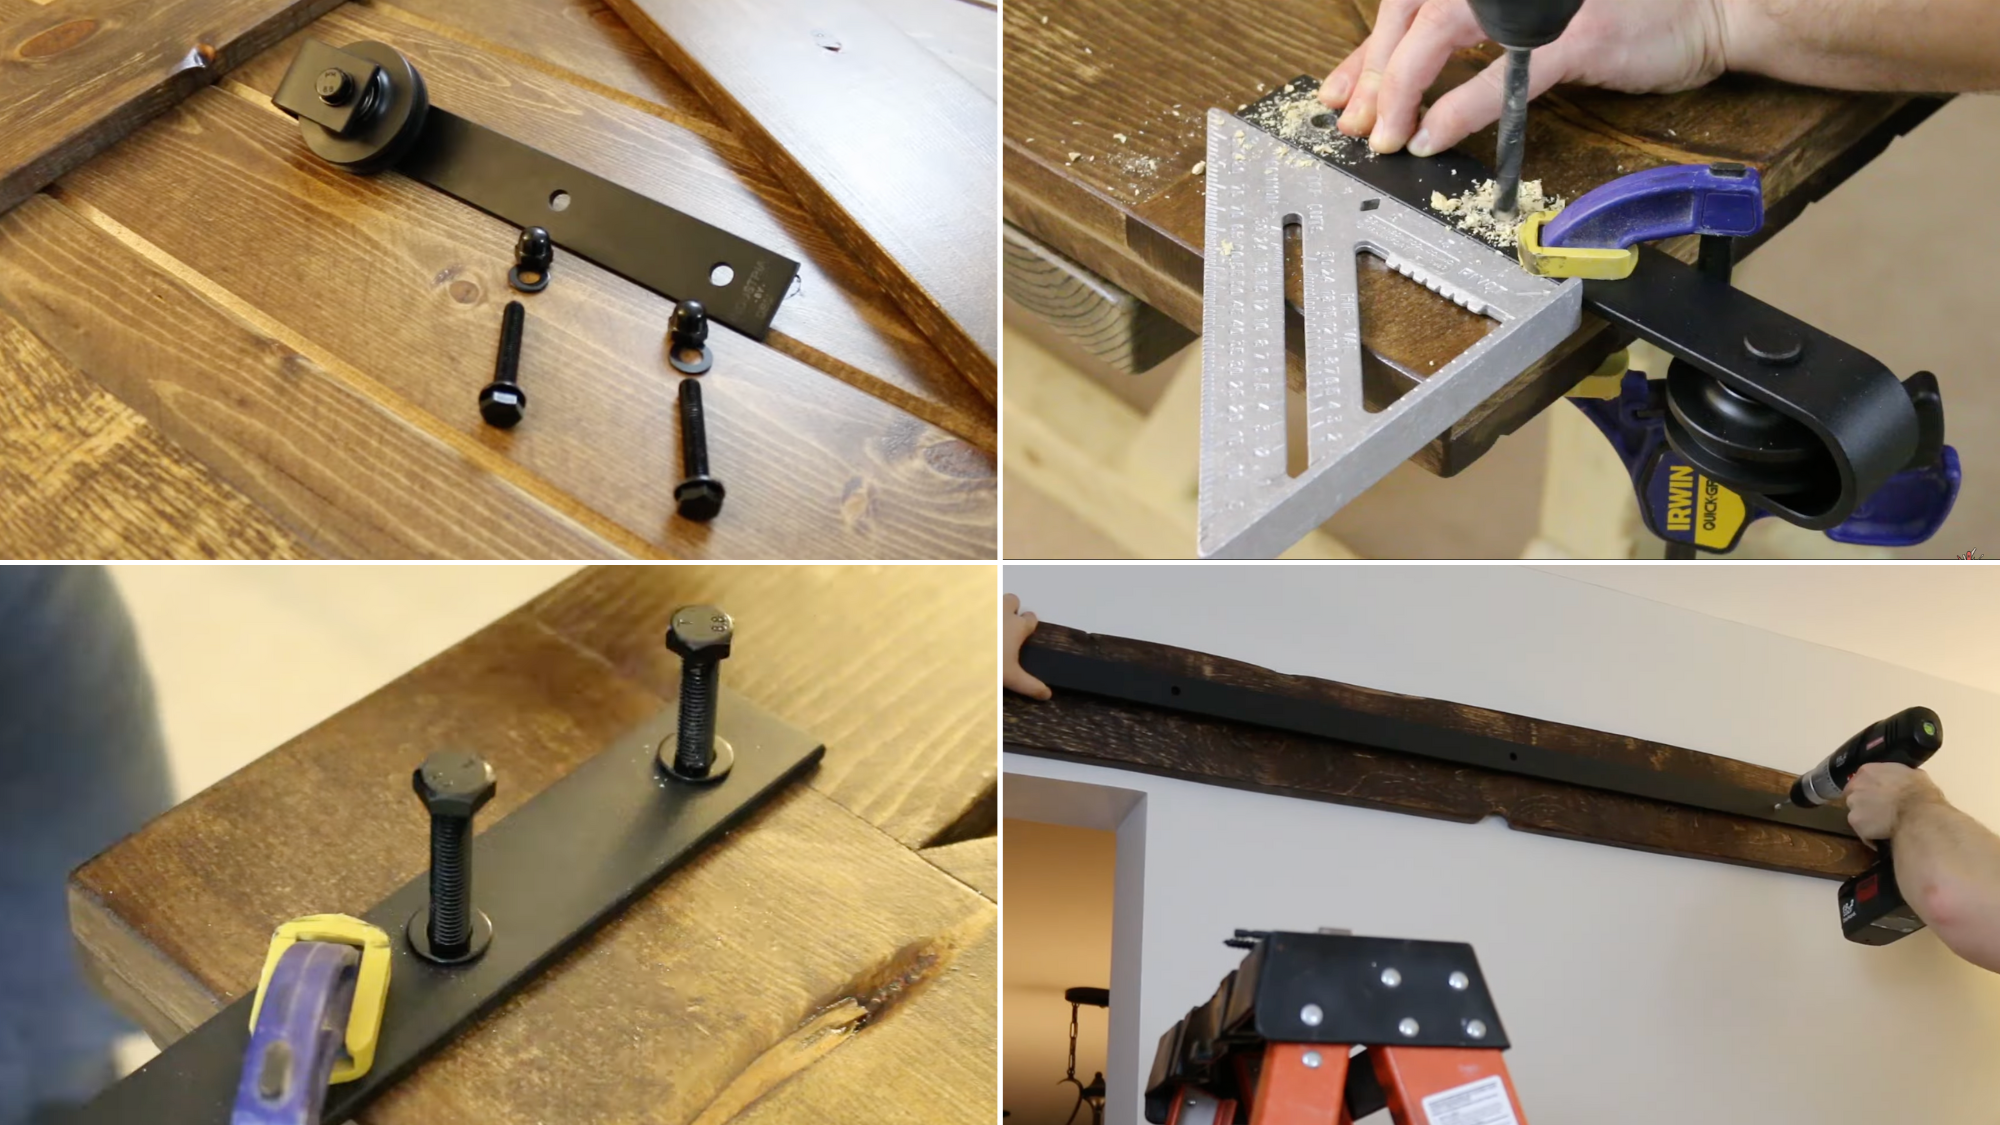
Once stained and dried, sliding hardware is added to the top of the door. The casters are aligned, clamped, and drilled through before being secured with bolts.
If the wall studs don’t align with the rail, a separate header board is installed first. The rail is then mounted using bolts and spacers, with a level ensuring everything runs straight.
Step 9: Add Door Stops and Floor Guide
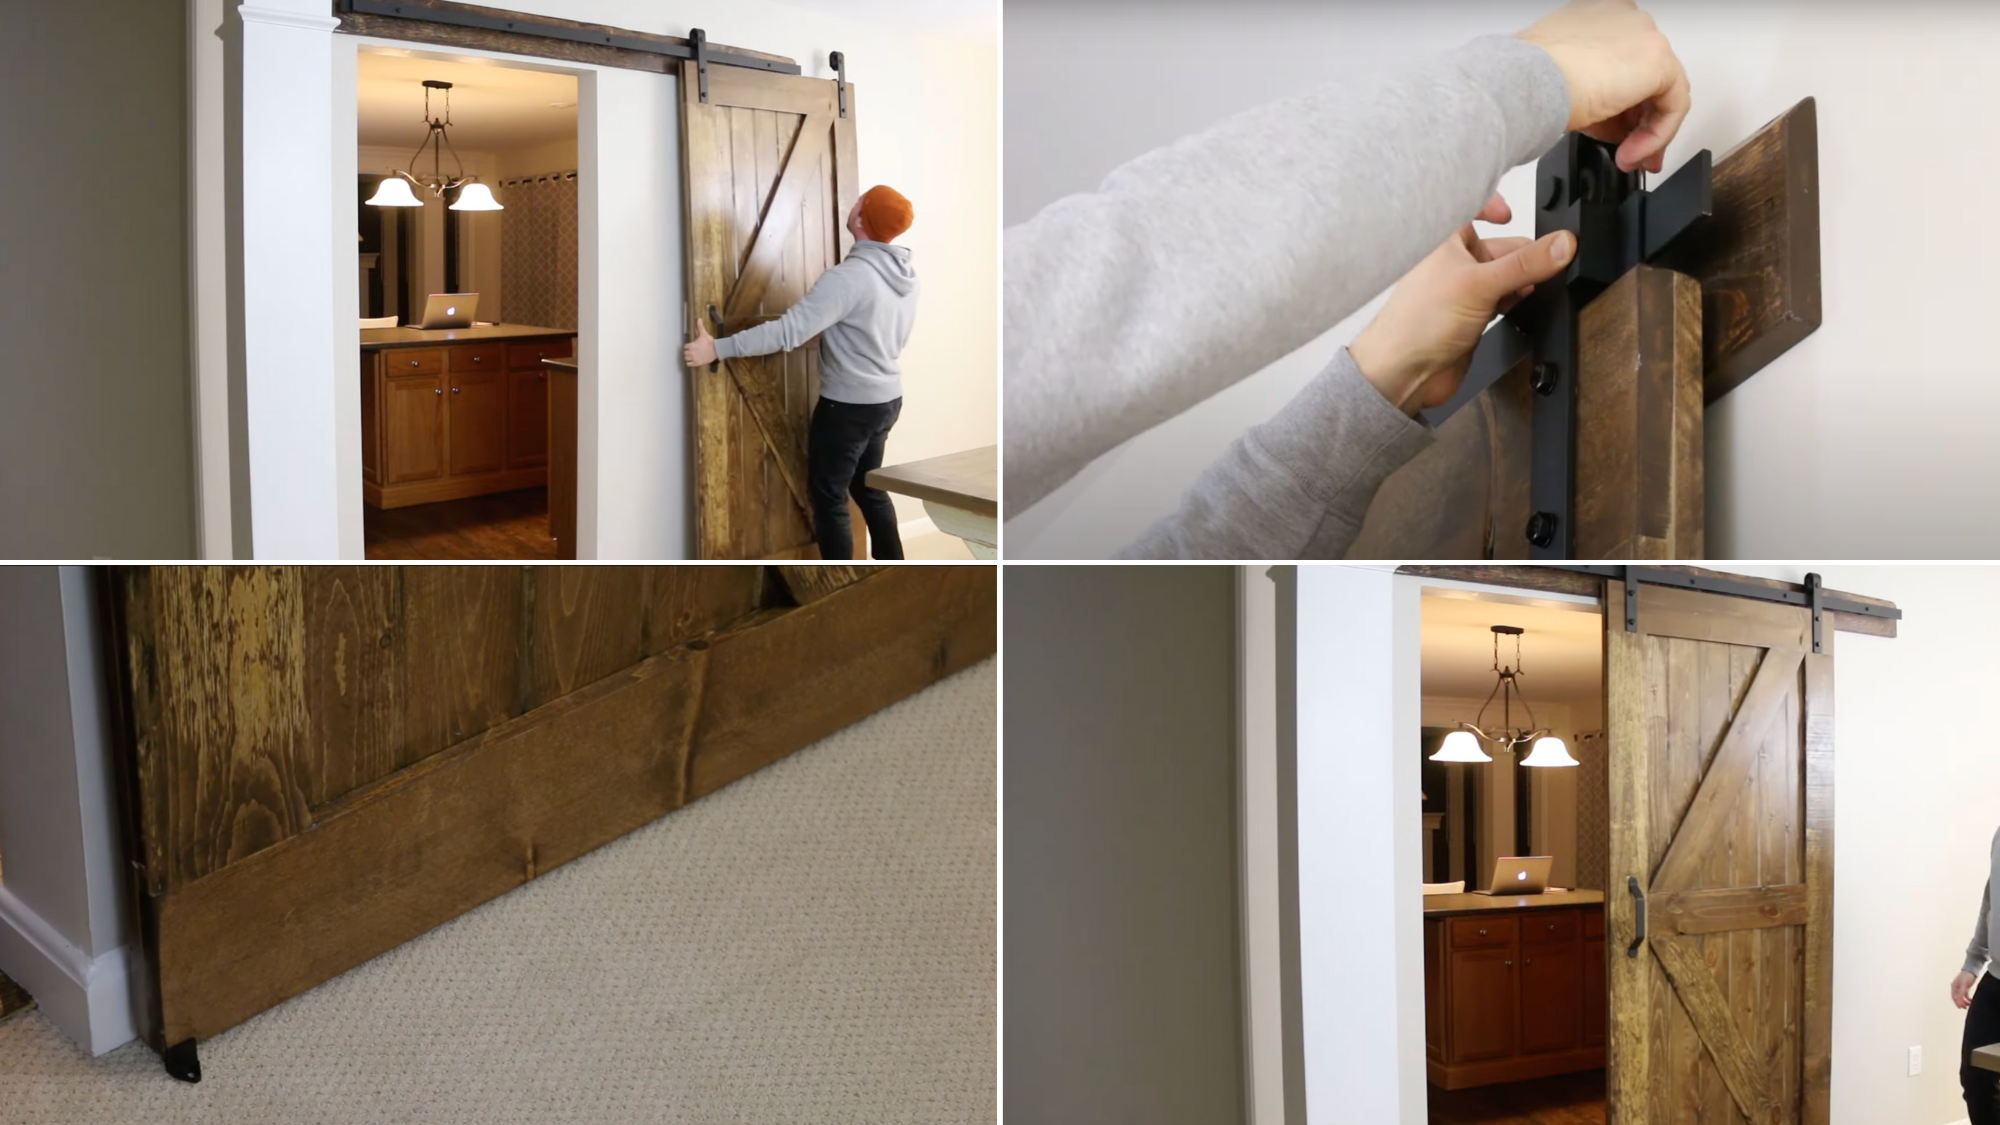
To keep the door from sliding too far, stoppers are added to each end of the rail and tightened with a small key. Lastly, a floor guide is installed near the bottom to keep the door from swaying.
If there’s no groove routed into the door base, the guide can be mounted to the side as an alternative.
For a more detailed tutorial on how to make barn door, check out the video below:
Tips for DIY Barn Door Projects
Ready to change your space with a rustic touch? These essential tips for DIY barn door projects help to learn how to build a barn door with ease.
With the right guidance, you can create a stunning, functional feature for any room!
- Test fit everything first: Dry-fit boards before cutting and mark stud locations ahead of time to avoid problems during installation.
- Use the right tools: Clamps keep structures tight, and a rubber mallet with scrap blocks protects edges while ensuring tight seams.
- Don’t worry about perfect wood: Natural flaws add character, and generous wood filler around nail holes makes a big difference after staining.
- Keep staining simple: Stick to one coat unless you want a much darker look, as too much stain hides the door’s unique details.
- Get creative with mounting: Use side-mount floor guides if there’s no groove, and always have someone assist with installation.
Common Pitfalls in DIY Barn Door Projects
Building a barn door seems straightforward, but small mistakes can turn into big headaches. Many DIY enthusiasts rush through the process and end up with doors that don’t slide properly or look uneven.
1. Measurement and Leveling Mistakes
The biggest errors happen during measurement. Forgetting to measure twice and cut once wastes expensive wood. Many builders skip checking if the walls are level before installing the track. Others forget to measure gaps around the door opening properly.
2. Wrong Wood Choices
Wood selection makes or breaks the project. Using softwood like pine for heavy-use areas means the door dents easily. Picking wood that’s too thin leads to warping over time. Some builders don’t consider moisture levels when installing doors in bathrooms.
3. Hardware and Installation Problems
Cheap hardware often can’t support the door’s weight and fails quickly. Installing the track without proper wall anchors creates safety risks. Many builders skip testing the door’s movement before final installation.
These mistakes cost time, money, and frustration. But they’re all preventable with proper planning.
Barn Door Style Board for Your Home
| Style | Vibe | Key Decor Items | Hardware |
|---|---|---|---|
| Rustic Farmhouse | Weathered charm with country warmth | Distressed white paint, reclaimed wood planks, mason jar accents | Vintage black iron handles, antique-style hinges, rope pulls |
| Modern Minimalist | Clean lines with industrial edge | Matte black frame, smooth surfaces, geometric patterns | Sleek stainless steel handles, contemporary track systems and hidden hardware |
| Cottagecore Vibe | Soft romance meets garden charm | Pastel paint tones, floral stencils, vintage lace details | Ceramic floral knobs, brass fixtures, decorative hinges with scrollwork |
Each style creates a different mood in the home. The hardware choice affects both function and appearance. Heavier doors need stronger mounting systems regardless of style preference.
Key Takeaway
Learning how to build a barn door from scratch proves that DIY carpentry isn’t as scary as it seems.
The skills learned here, measuring, cutting, and assembling, apply to countless other home projects. Shelving, cabinets, and outdoor furniture all use similar techniques.
Every builder faces unique challenges and finds creative solutions.
Sharing photos of finished projects and asking questions helps the whole DIY community grow. What will the next woodworking project be?