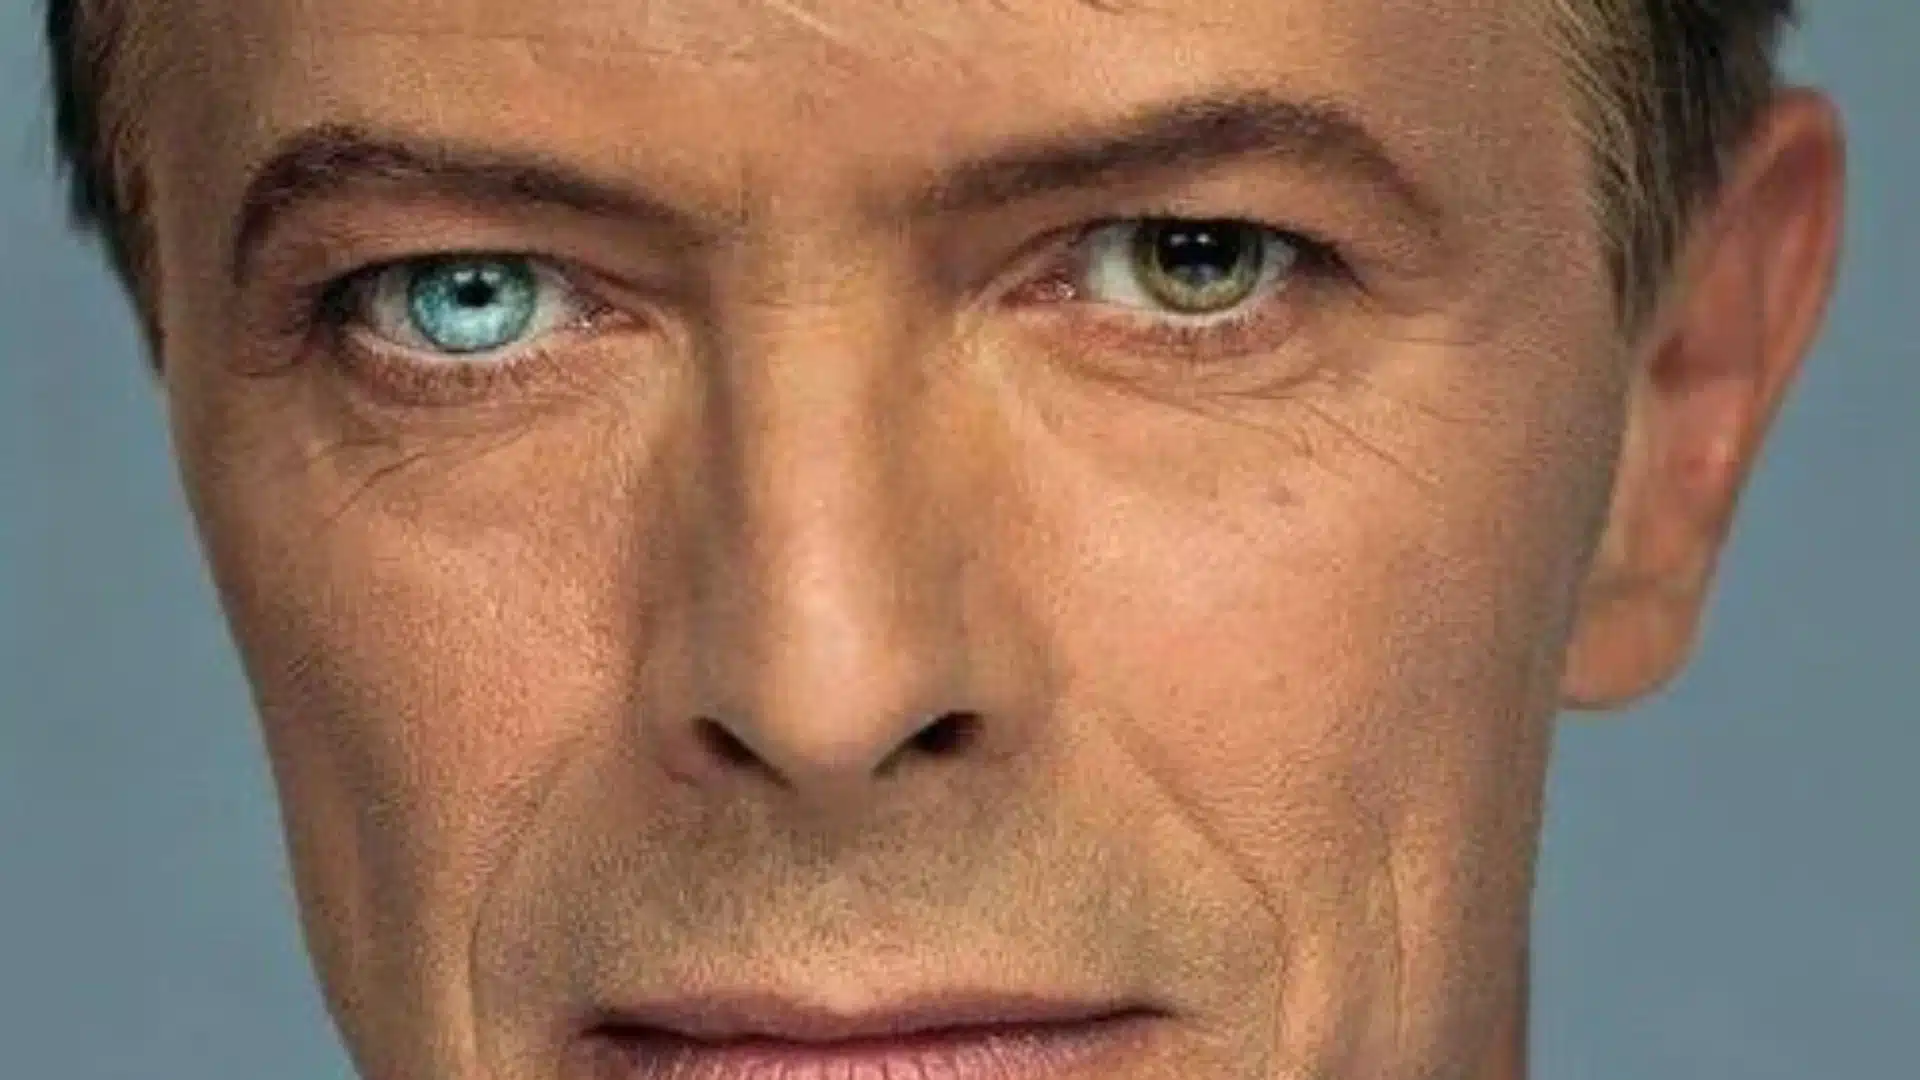
David Bowie, born David Robert Jones, was a legendary English singer, songwriter, and actor, widely seen as one of the most influential musicians of the 20th century. Known for constant reinvention and bold stage personas like Ziggy Stardust, he built an otherworldly look, and his eyes played a big part in that image. He did not have two different colored
Most Popular
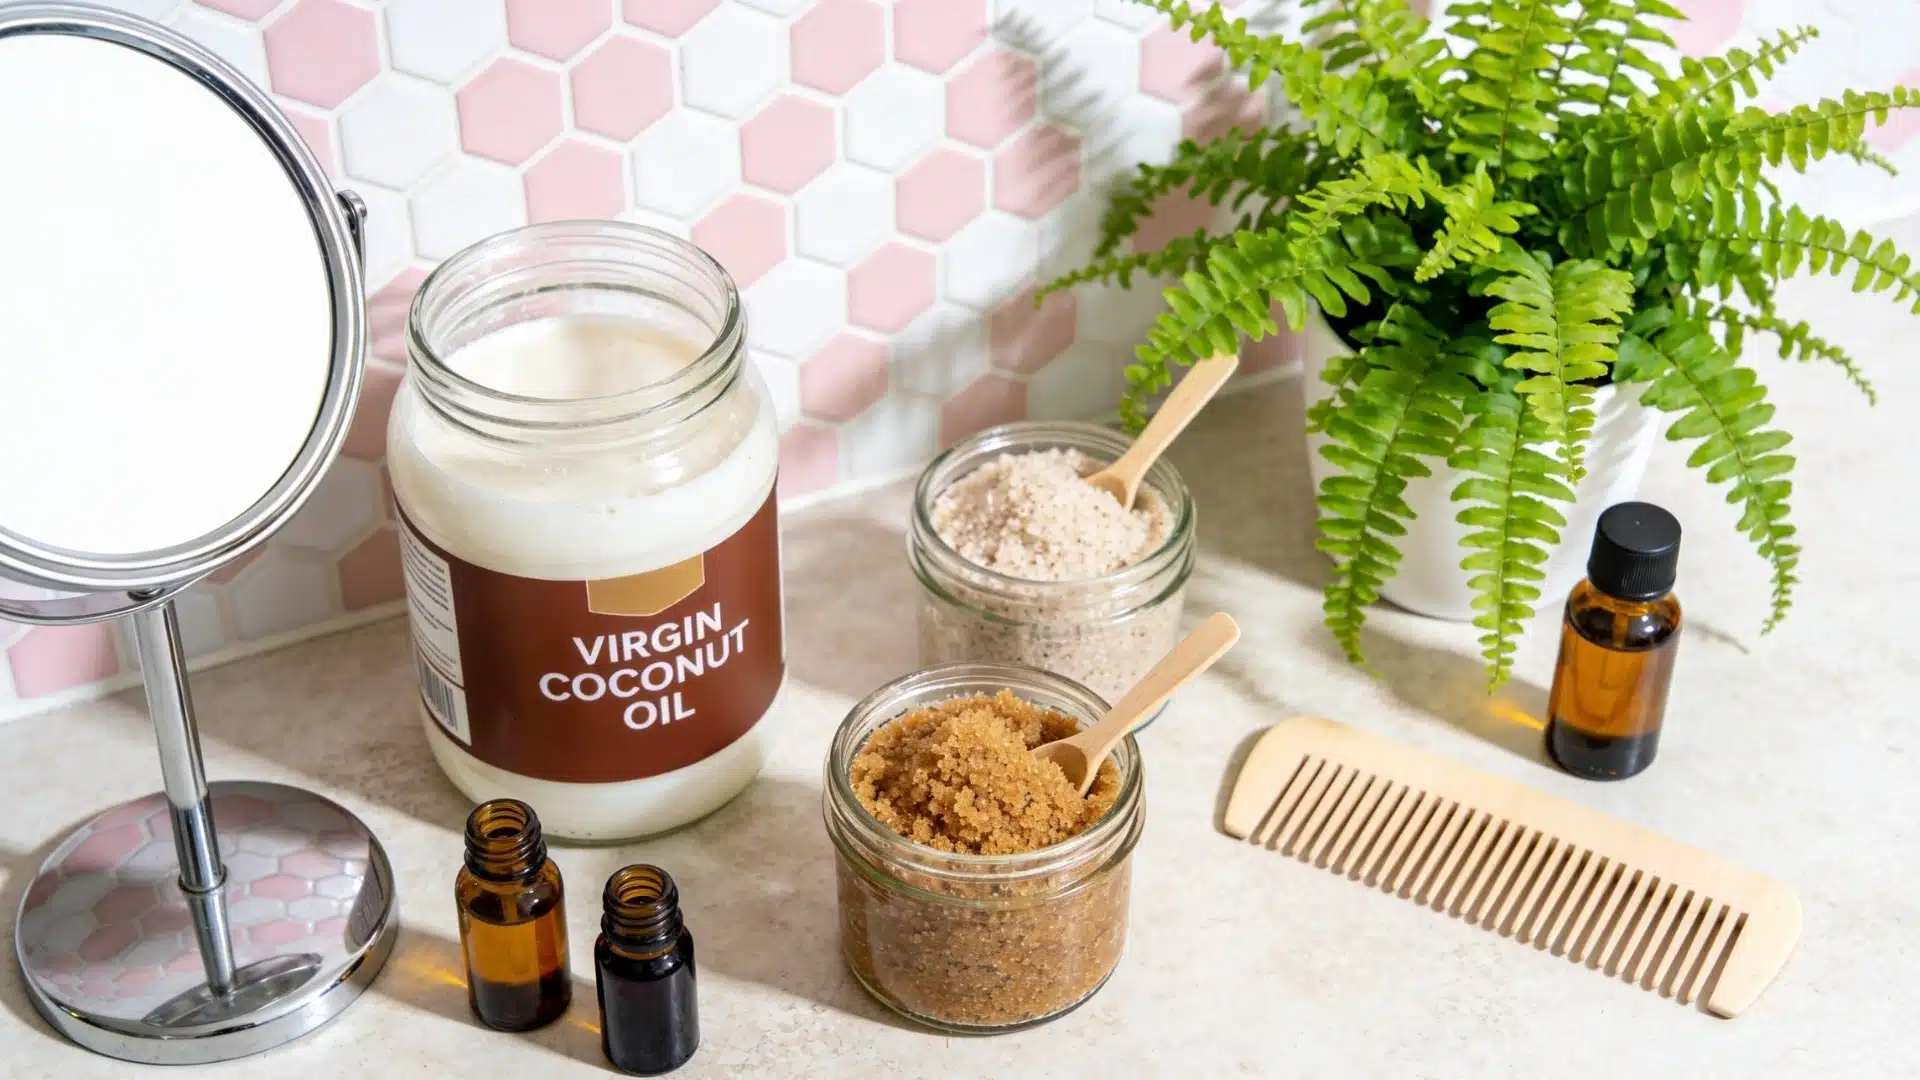
Ever look in the mirror and notice your skin looks dull, rough, or just tired? That is usually dead skin sitting on the surface, and a good natural exfoliant can fix it fast. The best part is you probably already have what you need in your kitchen From gentle oatmeal to a simple face scrub with sugar and honey, these options work without harsh chemicals or a big price tag. This is what actually works and how to use it without irritating your skin. What Makes a Good Exfoliant? A good exfoliant does two things. It either buffs away dead skin with small particles such as Sugar, rice powder, and finely ground oats. It uses enzymes and acids to loosen the bonds that hold dead cells in place, such as those found in papaya, pineapple, and yogurt. Neither method is automatically better. It really comes down to your skin type. Someone with tough, oily skin can often handle a coarser scrub. Someone with thin or reactive skin usually does better with a gentle enzyme mask instead. Natural Exfoliant According to Your Skin Type Which scrub to use, which ingredients, and why comes down to what skin type and problems you face. Some of the scrubs that will suit your skin can be, Oatmeal + Honey This is a staple for sensitive or reactive skin, mainly because it’s hard to get wrong. Oats contain compounds that calm inflammation while gently lifting away dead skin cells, so the skin gets exfoliated without causing harsh micro-tears. Grind the oats finely (a coffee grinder works fine), mix with a spoonful of raw honey, and let it sit on damp skin for five to ten minutes. Honey’s natural antibacterial properties are a nice bonus for skin that’s prone to occasional breakouts too. Papaya Papaya is a bit of an underrated pick, especially for skin that flares up at the sight of a washcloth. It contains an enzyme called papain that breaks down dead skin cells chemically rather than physically, so there’s genuinely no rubbing required. Mash a small piece into a paste and apply a thin layer for a few minutes; let it dissolve rather than scrubbing it in. Good for sensitive skin, but also a nice occasional treat even for normal skin types looking for a gentle refresh. Brown Sugar + Honey For dry skin, the goal is something to exfoliate and replenish moisture in the same step Otherwise, it’s just stripping without giving anything back. Brown sugar has smaller, softer granules than white sugar, so it buffs away flaky patches without being too harsh, while honey works as a moistening agent, pulling moisture into the skin as it goes. Exfoliation isn’t the finish line for dry skin; a rich moisturizer should follow immediately, since dry skin left bare after exfoliating tends to feel tighter and more irritated by the end of the day. Avocado + Honey This one’s basically a spa treatment from the fridge, and it works well for very dry, flaky, or windburned skin, as if it’s post-hiking, post-winter kind of dryness. Avocado is rich in fatty acids that reinforce the skin barrier, and combined with honey’s moisture-binding effect, it feels more like a nourishing mask than a typical exfoliant. Mash and apply a generous layer, leave it slightly longer than other options (around ten minutes), and rinse with lukewarm water (not hot) to avoid dehydrating the skin. Coffee Grounds + Fine Sea Salt For oily or acne-prone skin, some texture actually helps, unlike with sensitive skin. Coffee grounds provide gentle physical exfoliation and are believed to aid circulation and reduce puffiness, while fine sea salt assists with oil control. That said, one thing that most people have the instinct to do is scrub harder or more often to “fight the shine,” which almost always backfires. Over-exfoliating oily skin strips it, which paradoxically signals the skin to produce even more oil to compensate, and that can inflame active breakouts. Once or twice a week, with gentle pressure, is the sweet spot. Yogurt A quieter, gentler option for oily or acne-prone skin that still offers chemical exfoliation without adding extra grease. Plain yogurt contains natural lactic acid, an alpha-hydroxy acid that dissolves the “glue” holding dead skin cells together without any oil or grit. It’s a great choice on days skin feels congested but too sensitive for coffee or salt. Apply a thin layer, leave for five to seven minutes, then rinse. Oatmeal + Yogurt Combination skin is one of the trickier types to advise on, since two different needs are being managed on one face. This pairing works well because oats calm and gently exfoliate drier patches, often the cheeks, while the lactic acid in yogurt takes care of oilier zones like the forehead and nose. It can help to leave it on slightly longer around the T-zone and rinse the drier areas a touch sooner if one area seems to be over-processing compared to the other. Best Natural Exfoliants for the Body Body skin is thicker than facial skin, so it can usually handle a firmer scrub. Brown sugar mixed with olive oil or coconut oil works well for elbows, knees, and heels where skin tends to get rough. Massage it in for about a minute in the shower, then rinse with lukewarm water. Coffee grounds mixed with a carrier oil are another common choice for the body. Many people use this on their arms and legs to help with rough patches and dull skin. The grit is coarser than most facial ingredients, so it should stay off the face. Sea salt scrubs work well too, especially on the back and legs, but they can feel harsh on freshly shaved skin. A simple fix is to wait a day after shaving before using a salt-based scrub. How to Make a DIY Face Scrub at Home Making your own face scrub takes just a few minutes. Here is a simple process to follow. 1. Start with clean, slightly damp skin. 2. Mix your chosen ingredients into a smooth paste. Two tablespoons of a base ingredient, like oats or sugar, plus one tablespoon of honey or yogurt, is a good starting ratio. 3. Apply using your fingers in small circular motions for about thirty seconds. Enzyme masks like papaya do not need to be rubbed at all. 4. Leave it on for the suggested time for your ingredients, usually 5 to 15 minutes. 5. Rinse with lukewarm water and pat your skin dry. 6. Follow up with a moisturizer while your skin is still a little damp. A patch test on your wrist before trying a new mix on your face is worth the extra minute, especially with lemon juice or any acidic ingredient. How Often Should You Exfoliate? Most skin types do well with exfoliating one to three times a week. Sensitive or dry skin often does better sticking closer to once a week, while oily skin can sometimes handle a bit more. Signs you’re overdoing it include tightness, ongoing redness, or skin that suddenly feels more reactive to your usual products. If any of that shows up, cut back and let your skin recover before trying again. If you have active breakouts, sunburn, or a condition like rosacea or eczema, check with a dermatologist before adding any new exfoliant to your routine. Conclusion Finding the right natural exfoliant really comes down to knowing your skin type and being consistent without overdoing it. Whether you reach for oatmeal, yogurt, or a simple face scrub with sugar and honey, gentle, regular use will do more for your skin than an aggressive scrub ever could. Start slow, watch how your skin responds, and adjust from there. Frequently Asked Questions (FAQs) 1. Diy Home Exfoliating Scrub for Sensitive Skin Mix 1 tablespoon of finely ground oatmeal or superfine sugar with 1 teaspoon of raw honey and a splash of warm water to create a paste. 2. Best Homemade Body Scrub for Skin Whitening Mix 1 cup of finely ground sugar or rice flour, 2 tablespoons of coconut or almond oil, 1 teaspoon of turmeric powder, and 1 tablespoon of lemon juice or raw honey. 3. Is It Better to Exfoliate with a Sugar or Salt Scrub? Salt scrubs offer a more robust exfoliation experience and are better suited to people with thicker, rougher skin.
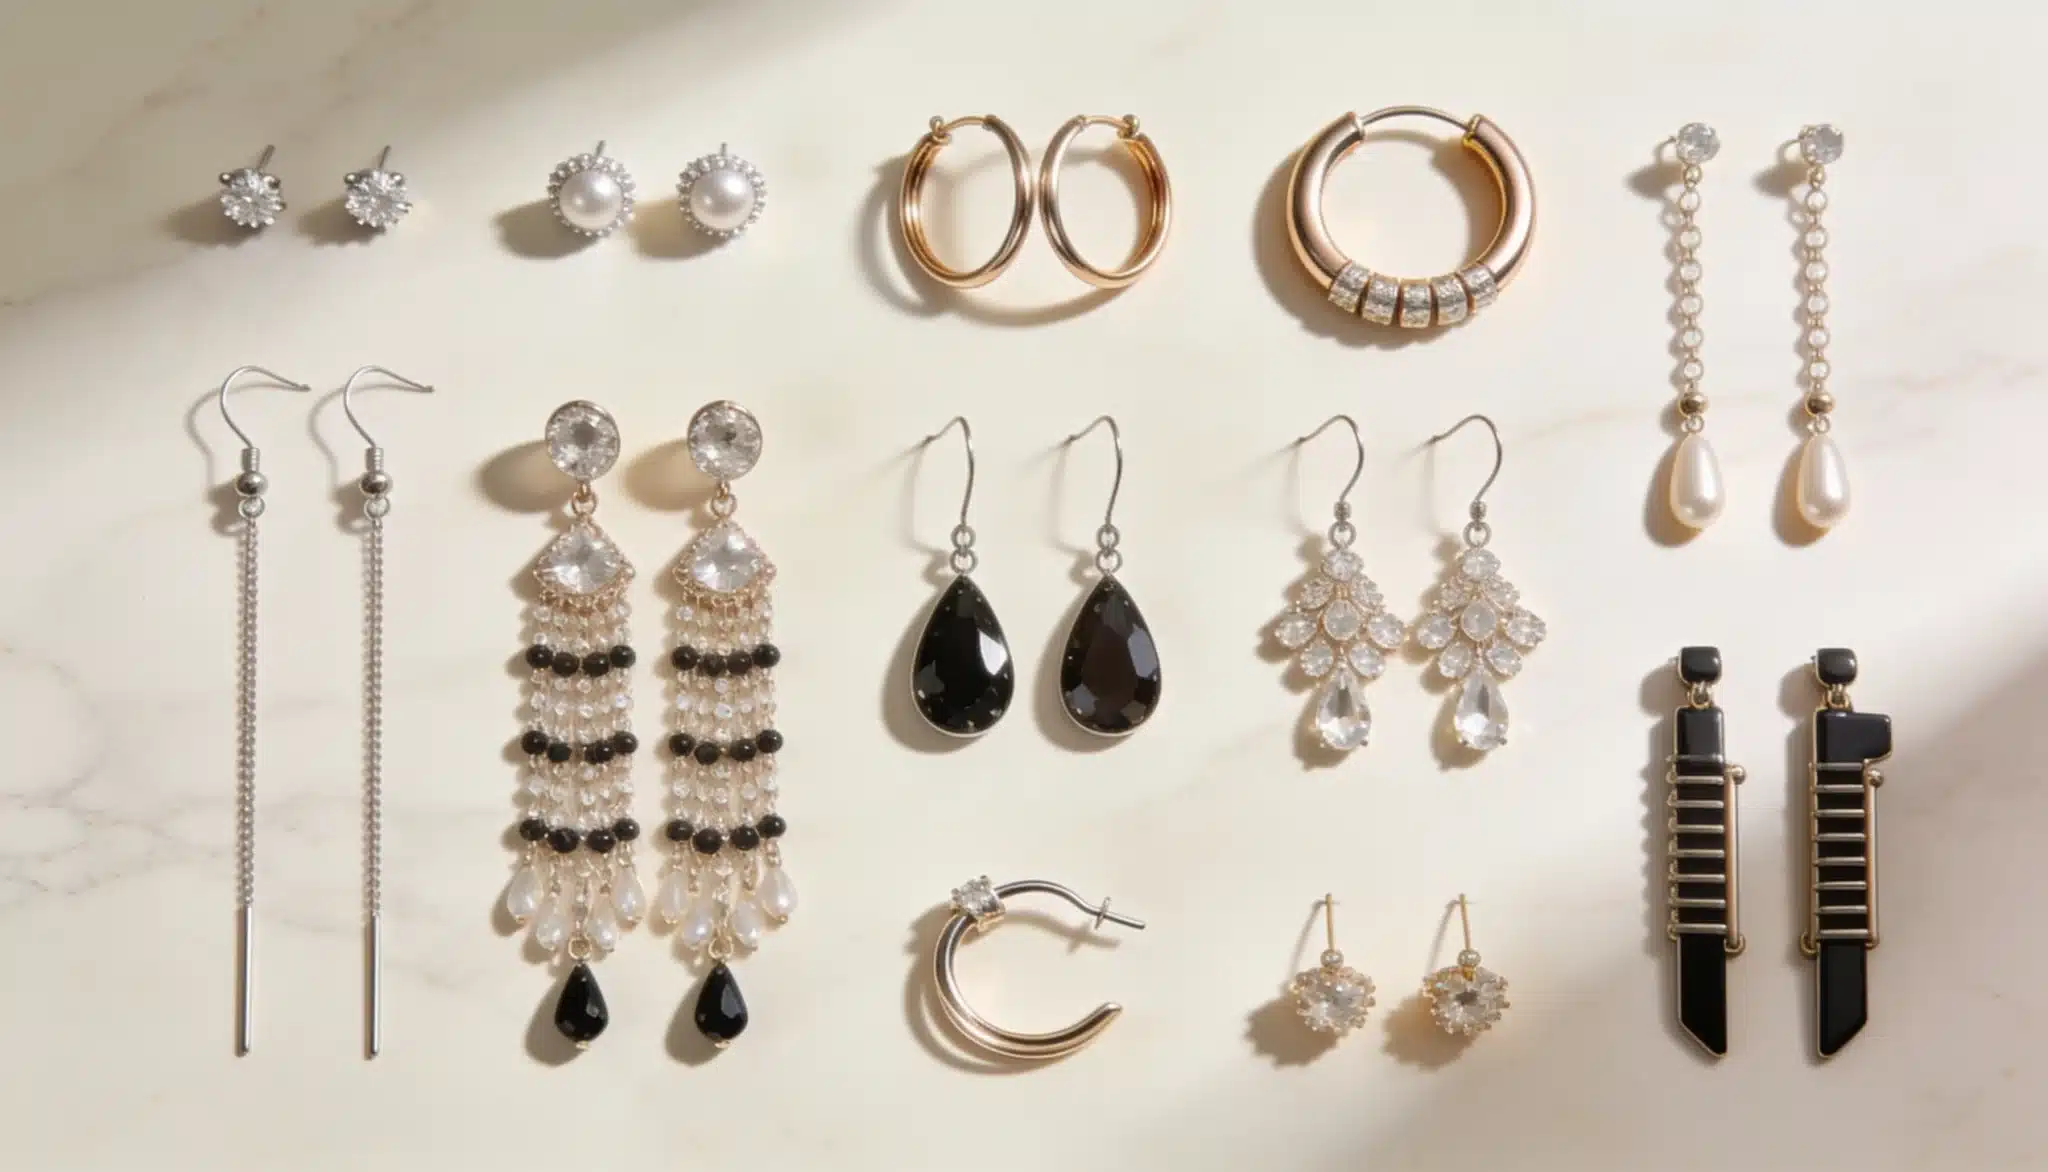
A pair of earrings can look perfect in the store and still feel “not me” when you wear it. Many overlook small details that affect comfort and security, like the type of earring hook and the backs that hold each piece in place. Choosing between different types of earrings involves more than picking a pretty design. It means considering how each piece feels through hours of wear. Popular earring styles, common backs, and the findings that keep them secure are all covered ahead. Earrings – Love of Every Woman The table below aligns major earring types with their typical backs, showing how style and function work together. A quick glance can help narrow down choices before reading through each style in detail. Earring Type Best For Common Back Used Stud Work, minimal look Butterfly (Push) Hoop Casual to bold Hinged (Latch) Huggie Layering, small hoops Hinged (Latch) Drop Balanced statement Lever Dangle Evening, parties Lever Chandelier Formal events Screw Ear Cuff Layering, no piercing needed French Hook Threader Minimal, multiple piercings French Hook Jacket Layered stud look Butterfly (Push) Climber Cartilage, curated ear looks Butterfly (Push) Tassel Boho, festival style French Hook Parts of an Earring Every earring, no matter the style, comes down to three basic parts working together. The Post or Wire: Passes through the piercing, connecting the earring to the ear. The Decorative Front: The visible part on display, whether a plain stud or an elaborate design. The Back or Clutch: Sits behind the ear, keeping the earring secure through daily movement. Together, these parts are called findings, a term used across the jewelry industry for the small components that make an earring functional. Knowing how they work together makes it easier to spot a well-made pair. Find the Perfect Types of Earrings for Every Outfit Understanding the different earring types makes it easier to match a piece with an outfit or occasion. Each style carries its own look, from simple and understated to bold and eye-catching. 1. Stud Earrings Stud earrings sit flat against the earlobe, with no drop or dangle. They rarely catch on hair or clothing, which makes them easy to wear all day. Plain metal dots, gemstone centers, tiny hearts, or tiny stars all fall under this style. Pairs well with: Button-downs, blazers, and simple tees for work or casual days out. 2. Hoop Earrings Hoop earrings are circular or semi-circular loops that pass through the earlobe. Sizes range from small huggies to large statement pieces that catch the eye. Larger hoops add a bold touch to an otherwise casual look. Pairs well with: Denim, graphic tees, and off-shoulder tops for an easy, put-together look. 3. Huggie Earrings Huggies are a smaller, closer-fitting version of the classic hoop style. They hug the earlobe tightly rather than swing with every movement. This tight fit makes Huggies comfortable for all-day wear without added weight and easy to layer with other earrings. Suits well on: Fitted tops, turtlenecks, and sleek ponytail hairstyles. 4. Drop Earrings Drop earrings extend slightly below the earlobe, usually 1 to 3 centimeters, and move little. A fixed decorative piece hangs just below the ear, striking a balance between simple studs and free-swinging dangles. Pairs well with: Collared shirts, blazers, and wrap dresses for a polished daytime look. 5. Dangle Earrings Dangle earrings move freely below the earlobe, swaying with every turn of the head. Chains, beads, or gemstones often combine to create a cascading effect. This movement draws more attention than studs or drops, making dangles a strong choice for evenings out. Pairs well with: Cocktail dresses, off-shoulder tops, and evening wear with simple necklines. 6. Chandelier Earrings Chandelier earrings feature a branched design with multiple tiers hanging from a single point, resembling the light fixture they take their name from. This dramatic style suits formal events, weddings, and other occasions calling for bold jewelry. Pairs well with: Gowns, formal suits, and updos that keep the neckline clear. 7. Ear Cuffs Ear cuffs wrap around the outer edge of the ear without needing a piercing at all. They stay in place through gentle pressure rather than a post or hook. This makes them a flexible option for layering, adding shape to the ear without committing to a new piercing. Pairs well with: Edgy streetwear, leather jackets, and asymmetric or slicked-back hairstyles. 8. Threader Earrings Threader earrings use a thin chain or wire that passes through the piercing and rests on both sides of the earlobe. This creates a minimal, modern look that differs from earrings sitting only at the front. Threaders often appeal to those with multiple piercings who want a subtle, layered appearance. Pairs well with: Minimalist outfits, slip dresses, and low-key everyday looks. 9. Jacket Earrings Jacket earrings combine two pieces: a stud that passes through the piercing and a decorative jacket that sits behind the lobe. From the front, this creates the illusion of a larger, more detailed earring. One stud can pair with multiple jackets, offering variety without needing several separate pairs. Pairs well with: Office wear during the day, switched to statement jackets for evening plans. 10. Climber Earrings Climber earrings, sometimes called ear crawlers, follow the curve of the ear upward from the lobe instead of hanging downward. The design extends along the ear’s edge, creating the look of multiple piercings using just one earring. Suits well on: Sleek updos, slicked-back hair, and modern, structured outfits. 11. Tassel Earrings Tassel earrings feature strands of thread, beads, or metal that hang loosely from a base, creating movement and texture. This style suits: Festival looks, boho outfits, or any occasion calling for a playful accessory. The Different Earring Hook Types The hook or back holding an earring in place matters just as much as the front design. Some prioritize security, while others focus on comfort or ease of use. Butterfly (Push) Backs Butterfly backs slide onto a straight post and stay in place through simple friction. This design suits studs and lightweight earrings well, since it allows quick removal without extra steps. Screw Backs Screw backs use a threaded post paired with a backing that twists on securely. This mechanism offers a strong hold, making it a common choice for fine jewelry or heavier studs. Lever Backs Lever backs feature a hinged wire that snaps shut behind the earlobe, forming a closed loop. This design securely holds drop and dangle earrings, preventing them from coming loose during movement. Hinged (Latch) Backs Hinged backs work with a small latch that clicks into place and are commonly found on hoops and huggies. The closed-loop design keeps earrings secure through daily activities without needing a separate backing piece. French Hook French hooks consist of a simple curved wire that passes through the piercing and hangs freely. This lightweight design suits dangle and threader earrings. Since the hook stays open rather than locking shut, it can occasionally slip out with certain hairstyles or scarves. Earrings According to Face Shape Face shape offers a helpful starting point for choosing earrings, though it works best as a general guide rather than a strict rule. Round Face: Long drop or dangle styles with straight lines help create the appearance of a more defined jaw. Geometric shapes, like rectangles or elongated triangles, work especially well. Oval Face: Nearly every earring style suits this shape, thanks to balanced proportions. Studs highlight the eyes, while longer dangles draw attention toward the jawline. Diamond Face: Earrings with detail near the top, like studs or huggies, add width where the face narrows at the forehead and chin. Long Face: Hoops, chunky studs, and shorter dangles add width and help balance vertical proportions. Long, thin styles tend to stretch the face further. Face shape is only a starting point; the best earrings are the ones that feel comfortable and match personal style. Wrapping Up Choosing between different types of earrings becomes much easier once style, hooks, backs, and face shape are considered together Each style carries its own look, while the back or clutch decides how secure it feels throughout the day. Findings, the small parts holding everything together, explain why some pairs feel effortless, and others need adjusting. A pair that once felt uncomfortable often just needed the right combination of these details. Picking earrings for daily wear or special occasions now becomes a simpler decision. Frequently Asked Questions (FAQs) 1. How Many Earrings Can One Ear Hole Safely Support? One earring per hole is ideal; adding heavier styles increases strain and raises the risk of tearing. 2. Do Earring Backs Wear Out and Need Replacing? Yes, especially push and screw types, which loosen over time and should be replaced periodically. 3. What Metal Works Best for Sensitive or Reactive Skin? Titanium, surgical steel, and high-karat gold cause fewer reactions than nickel-based metals. 4. Is It Safe to Wear Earrings While Sleeping? Flat-backed studs or small huggies are safest; dangling styles should be removed before bed.
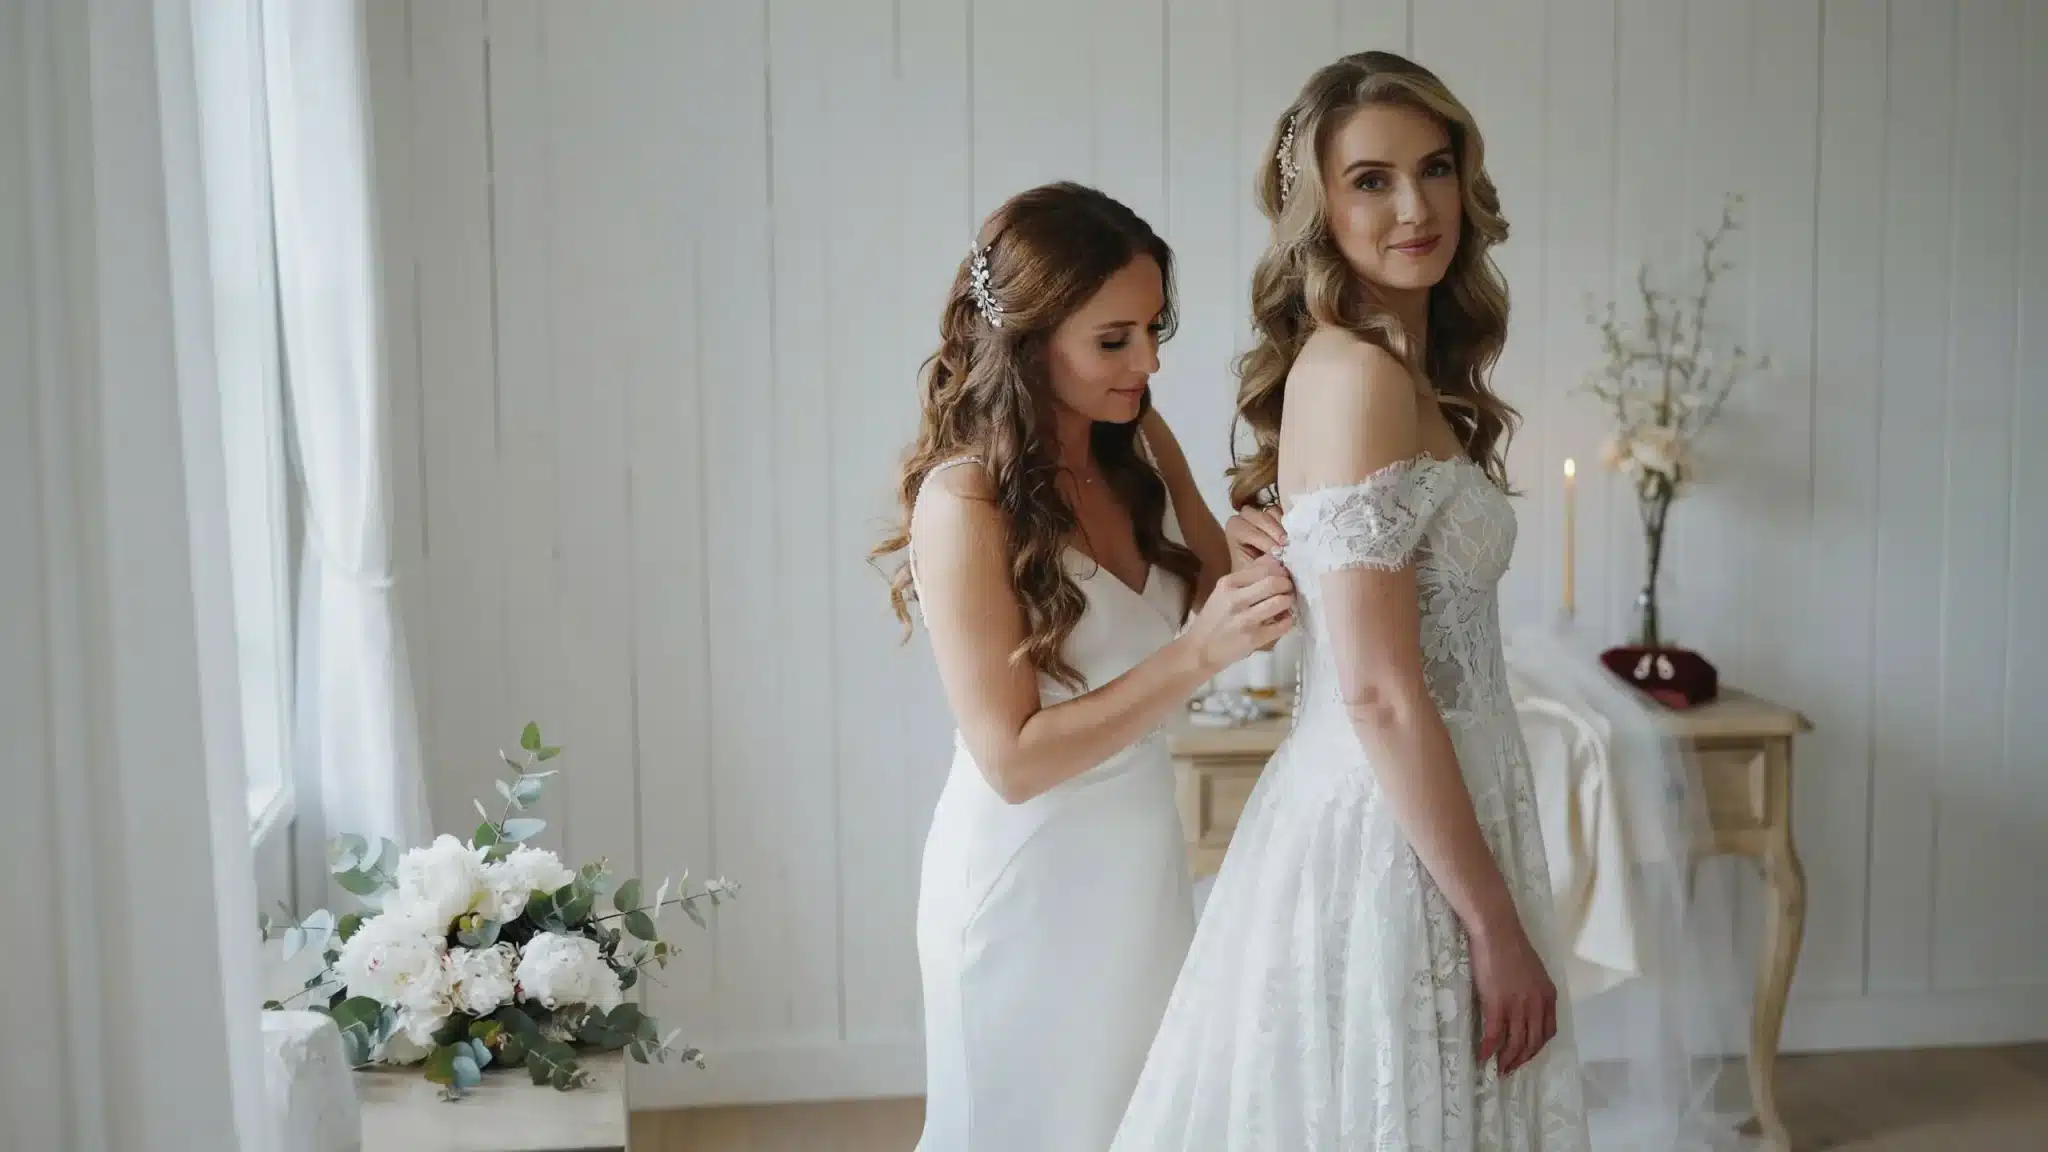
The last thing a bride would want is for her bridesmaids to look fabulous. The process of finding suitable hairstyles may seem quite difficult. There are so many styles to choose from. Would she like to go for an updo, braids, or even waves? Just have a look through this list of bridesmaid hairstyles for all hair lengths and lengths. Full List of Popular Bridesmaid Hairstyles The following list contains bridal party hairstyle ideas that can be worn by bridesmaids with any hair length. There are hairstyles for long, medium, and short hair, and each of them is perfect for any wedding style – from formal to bohemian. Some of them are easy to make, and some require more effort. For Long Hair If someone has long hair that is more than 12 inches, these hairstyles can make hair look pretty and attractive. Try these for a perfect look. 1. Classic Low Bun Credit: Shine&Bliss A classic low bun is elegant and sophisticated. It sits at the nape of the neck. It’s perfect for formal or classic weddings. It goes great with veils or hair accessories. A low bun can hold in place all day long. Moreover, it does not require many touch-ups on the wedding day. It is a favorite hairstyle among brides due to its classic design that fits any wedding dress. 2. Boho Braided Crown Credit: LaneyZiemann A braided crown is an elegant hair accessory placed around the bride’s head. It is ideal for a boho look and outdoor weddings. Moreover, it will be perfect when decorated with flower crowns. A braided crown holds hair away from the face throughout the whole day, and it is suitable for windy weather or beach weddings. Brides who want a more free-spirited look usually choose it. 3. Loose Beach Waves Credit: MODERNSALON Loose waves add softness and natural movement to hair. This is a good choice for beach weddings and destination weddings. This look appears effortless and requires little styling. Waves flow softly on the shoulders. The loose beach waves complement a simple flower or clip well. They are suitable for casual and semi-formal weddings. Loose waves make brides who desire a simple look feel comfortable. 4. High Sleek Ponytail Credit: Sara A high ponytail is sleek and stylish. It is a perfect fit for modern and minimalist weddings. A high ponytail leaves the hair off the neck when it is hot outside. The high ponytail complements statement earrings perfectly. The high sleek ponytail looks perfect for either a day or a night wedding. It is chosen by brides looking for a bold and clean look. It is a style that can be quickly created and lasts long through dancing. 5. Fishtail Braid Credit: KeelyMoore The Fishtail Braid is quite neat and also has a bit of texture to it. This hairstyle is quite apt for rustic and vintage-style weddings. It has staying power throughout an entire wedding ceremony. The Fishtail Braid can either be done on one side of the head or down the back of it. It complements small flowers or hairpins quite well. Those brides looking for a romantic texture style choose this one. Medium Length Hair Styles If someone has hair of about 6-12 inches in length, then these hairstyles are a good start. These styles are easy to make and will make bridesmaids look very pretty. 6. Textured Bob Updo Credit: KarenD The textured updo is a good option for medium-length bob hair. It can be worn at any wedding, whether traditional or modern. Tiny pins hold it in place for the whole day. This updo provides a tidy appearance without appearing rigid. This updo goes well with either statement jewelry or a simple clip. Brides with thick, short hair prefer wearing this hairstyle. 7. Twisted Bun Credit: TrèndyFashiön The twisted bun appears soft yet neat. It is a good choice for both formal and semi-formal weddings. Small twists of hair are pinned upwards to create a bun. It stays in place throughout the day of the wedding. This updo goes well with either a simple clip or a comb. The brides who love traditional hairstyles but would like some texture go for this one. 8. Soft Curls with Clip Credit: MariGarcia Soft curls with a clip style are romantic and delicate. The curls hang freely over the shoulders, while the clip keeps the front of the hair smooth. This hairstyle can be used with straight and wavy hair. Brides looking for something simple and natural go for this option. It requires no maintenance on the day of the wedding. It looks great in natural light. For Short Hair Some people worry that short hair might stop them from making trending hairstyles, but that is not true. These hairstyles prove that short hair can also create beautiful hairstyles. 9. Smooth Bob with Headband Credit: annacavllro Smooth bob combined with a headband creates a neat and elegant hairstyle. It is perfect for vintage or classic weddings. Headband will create a simple but distinctive element in this look. The hairstyle will stay in place the whole day. It can be complemented with pearl or crystal hair ornaments. Short and straight hair should suit this hairstyle best. 10. Curly Pixie with Flower Clip Credit: gaetano.demarco A curly pixie cut is exciting and lively. This haircut suits boho and beach-themed weddings well. A flower clip adds softness to the look. This hairstyle requires almost no styling during the day. It is ideal for summer and humid weather conditions. It is usually worn by brides with short and curly hair. This hairstyle makes the bride look light and happy. 11. Slicked-Back Short Waves Credit: UgneSivolovaite Slicked-back waves give short hair an elegant and chic look. This hairstyle is suitable for modern or minimalistic-themed weddings. It is slicked back towards the head. This hairstyle highlights the facial features and neck area of the bride. It goes well with big earrings or a simple neckline. Women who want to make a statement go for this hairstyle. It is a hairstyle that lasts for hours of dancing and celebration. 12. Half-Up Short Style With Pins Credit: julsweek|hairstyles,haircuts A half-up hairstyle is equally perfect for short hair. It works well for both rustic and classic weddings. Small pins help to keep the top portion secured in place. The remaining hair is left flowing down effortlessly. The style complements simply styled pins and also a small comb perfectly. Women preferring a subtle and effortless look go for this style. Half Up Bridesmaid Hairstyles This category of half-up bridesmaid hairstyles looks good on many types of hair. It combines neatly done hair at the top with loose and soft hair below. 13. Half-Up Braided Crown Credit: Pinterest Two small braids are done on each side of the head. They come together at the back of the head and then are pinned together. The other hair is left to fall down softly in waves. This look is very appropriate for outdoor weddings. For decoration purposes, one may use flowers and pearl pins that are tucked into the braid. Ribbon can be woven into the braid too. 14. Half-Up Twist Credit: HairstylePicks|Bobs, Braids,Updos & More The hair on the top is twisted and pinned down while the remaining hair remains loose. This look is easy and quick to do. It can work for both casual and formal weddings. A jeweled pin can be added to the twist part of the hair while curls are made at the bottom. 15. Half-Up Bun Credit: TheKnot The upper part is secured and twisted to form a bun. The bun is held tightly by bobby pins. The remaining hair is left hanging down loosely. The style is polished yet always soft-looking. A hair accessory or comb can easily be placed on the base of the bun. It works great with pearl or crystal pins. 16. Half-Up Fishtail Braid Credit: Carlyweddinghair The upper part is divided into two strands and then braided in a fishtail braid. The fishtail braid is then secured at the top of the head. The rest of the hair flows down loosely. This style is suitable for rustic or outdoor weddings. Small flowers can easily be tied between the braid parts. A narrow gold clip also completes the look nicely. 17. Half-Up Curls Credit: NiciaStroman The upper part is secured with a small clip while the remaining hair is curled into waves. This style is very romantic. It is appropriate for garden and spring weddings. A jeweled clip or comb adds some sparkle to the pinning area. Small flowers also make good choices for adding to the front of the hairstyle. 18. Half-Up Rope Twist Credit: Lovelyish:Fashion Trends,Beauty Tips,and StyleInspiration The hair is split into two parts, which are then twisted together to create a rope-like effect. The rope is pinned in the back part of the head. Loose hair cascades down from beneath it. This style will suit beach and garden weddings. A vine clip can be used to decorate the twist, as well as tiny pearl pins. 19. Half-Up Bubble Braid Credit: CathyS.Blumenthal In this style, a small section of hair in a ponytail is separated and pulled through in loops to create bubbles at the top of the head. The remaining hair is left loose. This style looks good for a modern wedding. Clips can be placed between each bubble to add extra shine. 20. Half-Up with Flower Crown Accent Credit: ChristineChia The upper part of the hair is twisted or braided and pinned. A flower crown is placed behind the pinned upper hair part. The remaining hair remains loose and natural. The hairstyle is suitable for boho or outdoor weddings. Either fresh or fabric flowers can be used in the style. No other pins are needed because the flower crown does not require them. 21. Half-Up Sleek Ponytail Twist Credit: MeganCoxBridal The upper part of the hair is combed and twisted into a small ponytail, which is then pinned to the head. The remaining hair falls down into soft waves. The hairstyle is suitable for modern and sleek weddings. A metallic pin can complement the hairstyle and create an additional element. Small crystal hairpins are also nice for evening weddings. 22. Half-Up Waterfall Braid Credit: Pinterest A braid is done starting from the back part of the head and leaving sections of hair to fall out while creating a braid. The braid is pinned at the end. The remaining hair is left hanging loose. The hairstyle is suitable for romantic or outdoor weddings. Small flowers can be added into the braid and create a soft finish. A pearl pin at the end also works. Hairstyles for Mother of the Bride The mother of the bride deserves to feel special too. She has every right to look and feel her best on this big day. 23. Classic Chignon Credit: JenniferWinn A chignon is a small, neat bun placed low at the back of the head. It is simple to create with a few pins. This style suits formal and traditional weddings well. It pairs nicely with pearl earrings or a simple brooch. The chignon holds up well through long hours. It also works for both daytime and evening events. 24. Soft Blowout Waves Credit: DailyHairVibes Soft waves are created with a round brush and some heat styling. The hair falls in gentle curls around the face. This style suits classic and semi-formal weddings. It gives a soft, polished look without much fuss. Small clips can hold back the front if needed. It works well for both church and outdoor ceremonies. 25. Updo with Twist Credit: LW Twist the hair sections and gather them at the back. It will give a smooth and rounded effect on the top of your head. It is suitable for formal and evening weddings. Adding a jeweled comb or pin is a perfect final touch. It will stay well during dinner and dances and also looks great in family pictures. 26. Side Swept Curls Credit: Styles-4-You-Fashion&BeautyBlog Your hair is curled and brushed to one side. A few pins hold them in this position right near the ear. It is suitable for garden and outdoor weddings. It is a soft and graceful hairstyle but not very formal. It will look great with floral or pearl clips. It is suitable for short and long hair lengths. 27. Smooth Low Ponytail Credit: sara Hair is brushed back and tied into a low ponytail. A small section of hair can wrap around the tie to cover it up. This style will be appropriate for modern and minimalist weddings. It is a simple and neat hairstyle that doesn’t require a lot of work. Using a pin or ribbon as a decoration will suit perfectly. 28. Textured Bob with Waves Credit: styles-4-you Soft waves will create more texture and volume in short hair. Using the curling iron, loose waves will be created all around the bob. This hairstyle is perfect for classic and vintage weddings. There will be no need for frequent styling during the wedding. A small pin can hold back one side of your hair. It looks good at any time of the day or night. 29. Half-Up Twisted Hairstyle Credit: mcgphotography The upper part of the hair will be twisted and pinned up. The remaining hair will fall freely in soft waves. This hairstyle will suit rustic and garden weddings well. It is an elegant yet not formal hairstyle. A small pin will look great in this style. This hairstyle also looks great on mothers’ hair regardless of its length. Choose Your Bridesmaid Look There are a few little things that go into picking the right bridesmaid hairstyles. The first thing to look at is hair length. The theme of the wedding is also a big factor in this choice. Loose waves are a must for a beach wedding. A formal wedding calls for a neat bun or updo. And comfort is important too, because the style has to last all day. Bridesmaids may also coordinate their hairstyle with their outfit and the season. Choosing a style that feels natural is usually best. Frequently Asked Questions 1. Should All Bridesmaids Have the Same Hairstyle? No, bridesmaids can choose different styles. Matching the wedding theme and hair length matters more than having identical hairstyles. 2. How Early Should Bridesmaids Book a Hair Trial? Bridesmaids should book a hair trial at least one Month before the wedding to avoid last-minute changes. 3. Do Bridesmaid Hairstyles Need Touch-Ups During the Day? Simple styles like buns and braids need little touch-up. Loose curls may need occasional pins during long events.