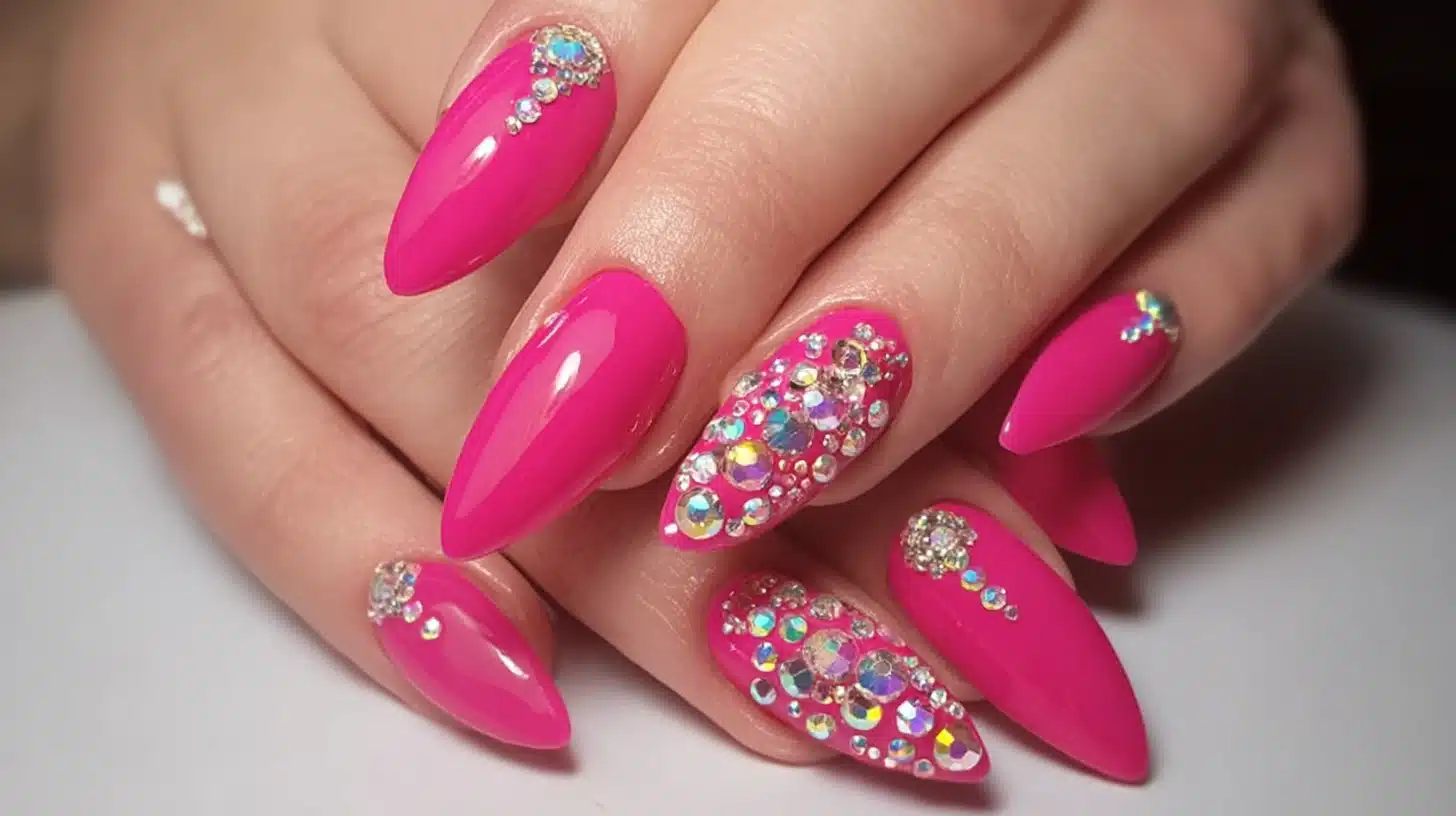
Hot pink nails never really lose their charm. The shade works across skin tones, seasons, and occasions in a way that most nail colors simply do not. Hot pink nail ideas range from clean, glossy solids to ombre fades, chrome finishes, and detailed nail art. Whatever your style or skill level, there is a version of this color that works
Most Popular
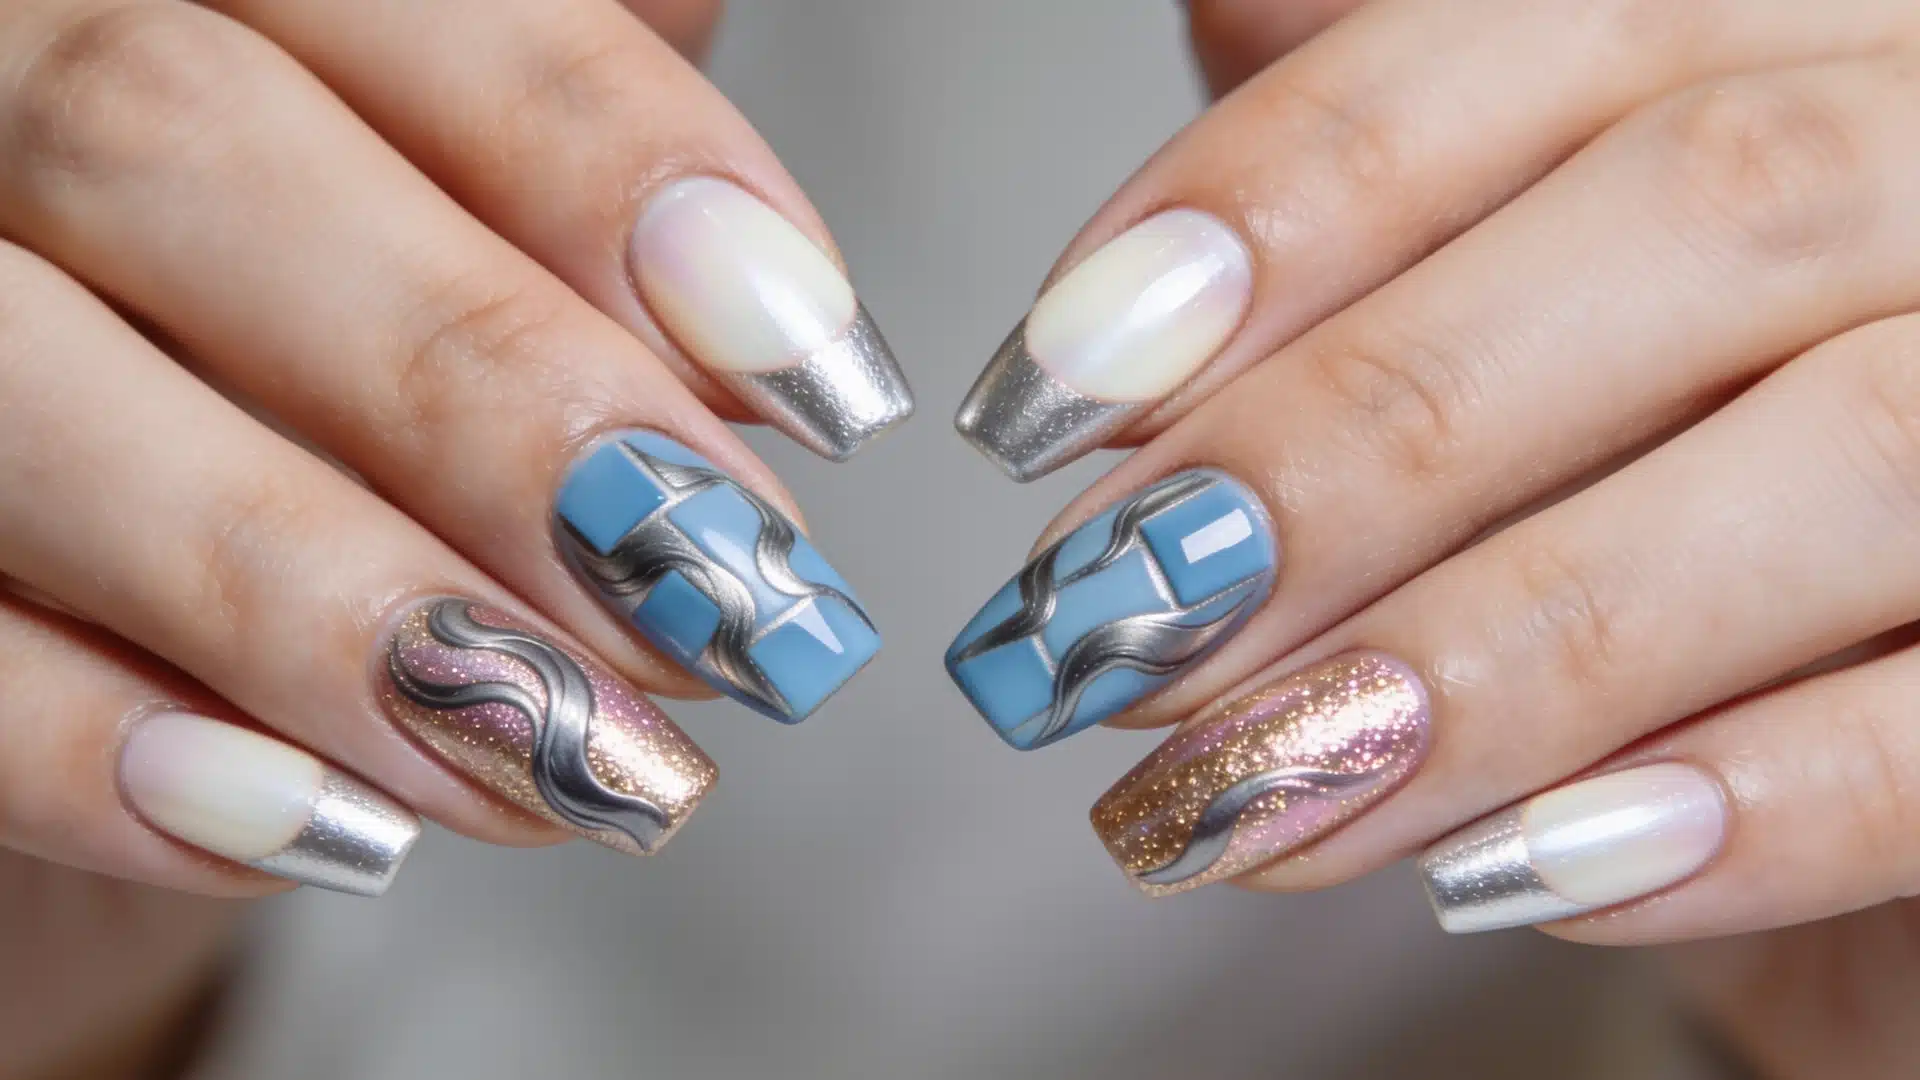
Nail trends are always changing, but SNS nails are in trend as they feel light and look amazing. In this blog, you’ll learn about the benefits of SNS nails, see the top trending styles, and understand how they compare to gel and acrylic nails. By the end, it will be easy to decide if an SNS manicure is the right choice for your next salon visit. What are SNS Nails? SNS nails use a dipping powder system to build a strong layer over your natural nails. Instead of painting liquid polish, your nails are coated with colored powder, then sealed to give them a nice, smooth finish. SNS nails feel natural because the layers are thin and lightweight. They don’t feel as heavy as acrylics, and they don’t always require UV light like gel nails. This makes it more comfortable for daily wear. How is SNS Manicure Applied (Step-by-Step Process) An SNS manicure involves prepping the nails, applying a base coat, dipping them into colored powder, sealing with a top coat, and finishing with gentle buffing for a smooth, long-lasting result. Step 1: Cleaning and Shaping The process begins by thoroughly cleaning your natural nails to remove any old polish, oils, dirt, or residue. This creates a fresh surface for the products to adhere properly. Your nail technician will also trim, shape, and tidy the nails and cuticles, ensuring they are neat and evenly prepared before the SNS application begins. Step 2: Light Filing Next, the surface of each nail is lightly buffed to remove its natural shine. This gentle filing creates a slightly textured surface, allowing the base resin and dip powder to bond more effectively. It’s important that only a small amount of the surface is buffed to avoid weakening the natural nail. Step 3: Base Coat A thin layer of base resin is applied to each nail, acting as the adhesive for the dip powder. The base coat should be applied evenly because it determines how smoothly the powder will adhere. Since the resin dries quickly, the next step is performed immediately after application. Step 4: Dipping in Powder Each nail is dipped into the chosen colored powder, or the powder is carefully sprinkled over the nail. This process is repeated two or three times to build opacity, strength, and a smooth finish. Multiple thin layers produce a more durable manicure. Step 5: Sealing the Nails Once the desired powder layers are complete, an activator (also called a sealing liquid) is brushed onto each nail. This solution hardens the powder, locking all the layers together for added durability. It also prepares the nails for shaping and helps create the strong, chip-resistant finish that SNS manicures are known for. Step 6: Final Touch In the final step, the nails are refined by gently filing and buffing away any uneven areas to create a smooth surface. A glossy top coat is then applied to add shine and protect the color from daily wear. After it dries, your SNS manicure is complete, leaving you with durable, polished nails that can last for several weeks with proper care. Benefits of SNS Nails The following are the benefits of SNS nails: they are long-lasting, lightweight, and strong; they protect natural nails; and they use fewer harsh chemicals, helping keep nails healthy and stylish. Long-Lasting and Strong Nails: They can last around 2-3 weeks, or longer if you take care of them. They don’t break as quickly as normal nail polish. Light, Natural Feel on Nails: They feel very light on your natural nails. This means you can do your daily work comfortably without feeling like you have extra layers on your nails. Safer Option for Nail Health: SNS nails are considered a better option for people who want to protect their natural nails. The process does not involve extensive use of strong chemicals, unlike some other methods. SNS Nails vs Gel and Acrylic Nails: Key Differences Comparisons SNS Gel Acrylic Application Method Uses Dipping Powder Uses Gel Polish Applied with Acrylic Liquid and Powder Light Requirement No UV/LED Light Needed Requires UV/LED Light No Light Needed Feel on Nails Light, Natural, Comfortable Slightly Heavier, Glossy Feel Thick and Strong, Can Feel Heavy Finish Natural-Looking Very Glossy Can Be Shiny or Matte Depending on Topcoat Durability / Lifespan Usually Lasts Longer Can Chip if Not Maintained Very Strong, Great for Long Extensions Removal Easier to Remove Requires Soaking/Curing Harder to Remove, Often Needs Filing How Much Does SNS Nails Cost? SNS manicures usually cost between $35 to $75 for a basic set, depending on the salon and location. Adding designs, colors, or special effects can increase the price to $80-$100 or more. Simple SNS nails are more affordable, while creative designs and nail art make them a bit pricier. Top SNS Nail Designs You Need to Try Check out popular SNS nail designs that look great and last a long time. From soft colors that fade to shiny metallics, find styles to make your nails look amazing. 1. Milky White Chrome (the Glazed Look) A soft, semi-see-through milky white base with a shiny, pearly chrome finish on top. Great for everyday wear or formal occasions because it looks sophisticated without extra nail art. 2. French Ombré (Baby Boomer Nails) A smooth gradient from soft nude-pink near the cuticle to crisp white at the tips. Works well for weddings, office settings, or anyone who wants a subtle, manicure that pairs easily with any outfit. 3. Sky Blue Blocks The design is bright, solid blocks of pastel or baby blue on each nail. Perfect for casual looks, summer outfits, or anyone who loves a crisp, vibrant color without extra decorations. 4. Organic Liquid Metal Swirls Swirling patterns of metallic colors that look like liquid metal flowing across the nails. Ideal for parties, special events, or anyone who wants their nails to look eye-catching. 5. Glitter Gradients Soft pastel or neutral nails with glitter packed at the tips, fading toward the base. Great for holidays, birthdays, or nights out. adds sparkle without overwhelming the nails, so it’s versatile enough for everyday wear while still being glamorous. Wrapping it Up If you are thinking of trying them, go ahead and book your next salon visit to see how they look on your nails. You can also try different SNS nail designs to match your style. Can you share your experience? Thank you for reading. Frequently Asked Questions (FAQs) 1. How Long Does an SNS Manicure Take to Complete? An SNS manicure usually takes about 45 to 60 minutes, depending on the number of layers, nail length, and any additional designs. 2. Can SNS Nails Be Removed Safely at Home? Yes, SNS nails can be removed at home with an acetone soak and gentle buffing, but it’s recommended to follow the salon’s instructions carefully to avoid damage. 3. Are SNS Nails Suitable for People with Weak or Brittle Nails? Yes, SNS nails are often recommended for weak nails because they are lighter than acrylics and provide extra strength without the need for heavy layers.

Dry, peeling, or over-trimmed cuticles make your hands look rough and feel sore. These sections cover what your nail cuticles are, why they matter, and how to care for them at home. You’ll also learn what to do before and after a manicure, and how to catch a problem before it turns into an infection. Importance of Nail Cuticles Cuticles play a bigger role in nail health. This thin layer of skin at the base of the nail acts as a natural seal, protecting the nail matrix (where new nail growth begins) from bacteria, fungi, and other pathogens. When cuticles are cut too aggressively or removed entirely, this protective barrier is broken, increasing the risk of infection, inflammation, and painful hangnails. Rather than cutting cuticles, dermatologists recommend gently pushing them back after softening with moisturizer or during a warm soak. Regular cuticle care, hydrating with oil, and avoiding harsh trimming keep nails strong, promote healthy growth, and prevent infections, making it an essential part of any nail care routine. Healthy Cuticles vs Unhealthy Cuticles Healthy cuticles look smooth and sit neatly against the nail with no redness or pain. Unhealthy ones turn dry, cracked, sore, or swollen, and the nail itself may change shape or color. Unhealthy cuticles don’t always mean infection, but redness, pus, ongoing pain, or nail changes are signs you shouldn’t ignore. Healthy Cuticles Unhealthy Cuticles Smooth and soft Dry, cracked, or peeling No redness or swelling Red, sore, or swollen skin Attached neatly to the nail base Torn, lifted, or overcut No pain or pus Pain, pus, or tenderness Nails grow normally Nail shape or color may change How to Take Care of Your Cuticles at Home A good routine is short and gentle. The steps below follow the order that works best, moving from soaking to moisturizing to gently pushing back. Take care of your nails and cuticles, and make any nail design you want without worrying about the damage. 1. Soften the Cuticle Never work on your cuticles while they’re dry, as that can cause them to split and tear. Fill a small bowl with warm, soapy water and soak your fingertips for 5 to 10 minutes. This softens the dead skin and loosens built-up debris safely. 2. Moisturize Daily Apply a dedicated cream, oil, or thick petroleum jelly straight onto your nail beds every day. Massaging a rich moisturizer into the base of your nails right before bed keeps the skin soft and pliable, preventing the cracks that turn into hangnails. 3. Push Back Gently After your bath or soak, use a clean, rounded cuticle pusher or a wooden orange stick to ease the softened skin back toward the base of your finger. Work with very light pressure, letting the tool glide smoothly across the nail surface instead of forcing it. 4. Trim only Loose Hangnails Keep your cuticle nippers strictly for pieces of completely dead, loose skin or detached hangnails that might catch on clothing. Never use nippers to cut into the continuous, intact rim of skin protecting the nail base. 5. Wear Gloves for Chores Household cleaners, dish soaps, and long stretches in hot water strip away the natural oils that protect your hands. Always slide on a pair of rubber or latex gloves before you start chores to keep your skin from drying out. Signs of Nail Cuticle Infection When the protective cuticle seal breaks, bacteria such as Staphylococcus or fungi can enter, causing an infection called paronychia. Common symptoms include: Redness in one spot Clear swelling around the edges of the nail Skin that feels hot to the touch Small, fluid-filled blisters Left untreated, the infection can warp your nail plate, change its color, or make it detach from the skin underneath. Consult a doctor if you notice pus draining from your nail wall, experience severe throbbing pain, see redness spreading down your finger, develop a fever, or notice your nail lift entirely off the bed. How to Take Care of Your Cuticle? Cuticle care doesn’t stop at the salon door. What you do in the days leading up to an appointment determines how your nails hold up afterward. Prep well beforehand so your cuticles are soft and intact, then keep them moisturized once you’re home. Before a Manicure Scrub your hands and under your nails thoroughly before your appointment. Resist the urge to pick, scratch, or bite at loose skin in the days leading up to your visit. Apply moisturizer generously for the 48 hours beforehand to give your skin maximum flexibility. Tell your nail technician clearly that you want your cuticles gently pushed back, not trimmed or clipped. Only book clean salons that use autoclaves to sterilize their metal tools. After a Manicure Apply a drop of cuticle oil to your fresh manicure every morning and night. Never peel or pick at lifting gel or acrylic edges, since that tears away real nail and skin. Slip on protective gloves before you do the dishes or use chemical cleaners. Clip any post-salon hangnails cleanly with sanitized tools instead of pulling them. Check around your fingers daily for early signs of throbbing, redness, or heat. The Bottom Line Your cuticles protect the part of your nail you can’t see, so care for them instead of cutting them away. Keep the routine simple: clean, soften, moisturize, gently push back, and leave the seal intact. If you spot redness, pus, or spreading pain, see a doctor rather than treating it at home. If you have any tips, drop them in the comments below and help others to achieve healthy cuticles. People May Ask 1. Why are My Cuticles Peeling? Cuticles usually start peeling due to dryness or damage from cold weather, frequent handwashing, harsh products, or acetone. 2. Can Damaged Cuticles Grow Back? Usually yes, with gentle care and time, unless there’s repeated trauma or infection. 3. How Often Should I Use Cuticle Oil? You can safely apply it several times a day, and a generous amount right before bed gives the best results.
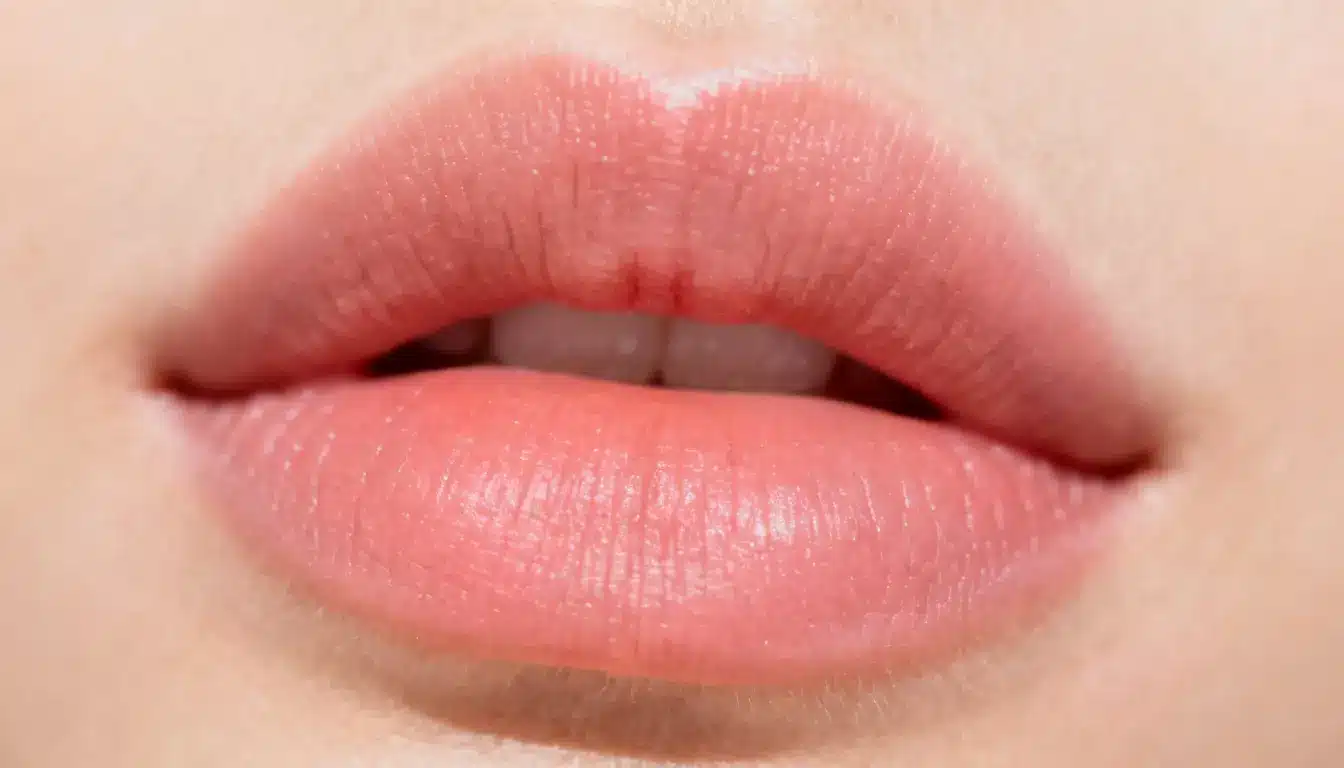
Full, rosy lips all day long with no touch-ups needed. Lip blush tattoo is the semi-permanent solution thousands are turning to for effortless color. It sounds too good to be true. But once someone sees lip-blushing before-and-after photos, the results speak for themselves. Here’s everything you need to know about lip blushing. What is a Lip Blush Tattoo? A lip blush tattoo is a semi-permanent cosmetic procedure that deposits pigment into the upper layers of the lips to enhance their natural color, shape, and fullness. Using a technique similar to microblading, a trained artist applies fine layers of color to even out tone, define the lip border, and create a soft, natural-looking flush. Results typically last one to three years, fading gradually, and the treatment is popular for reducing the need for daily lipstick application. How is it Done? Getting a lip tattoo is simpler than it sounds. Here’s exactly how the process works. Step 1: Consultation and Color Selection Before anything else, the artist sits down with the client. They talk about the desired lip shape, color tone, and overall look. Skin tone plays a big role in picking the right shade. This step sets the foundation for a great result that looks natural and suits the client’s face perfectly. Step 2: Numbing the Lips No one wants to sit through pain. A topical numbing cream is applied to the lips before the procedure begins. It usually takes about 20–30 minutes to take full effect. This makes the lip-blushing process much more comfortable. Most clients report feeling only light pressure or a mild scratching sensation during the session. People with certain skin conditions, allergies, or active cold sores may not be good candidates. A proper consultation with a certified artist is recommended. Step 3: Outlining the Lip Shape Once the lips are numb, the artist carefully maps out the lip shape. This step defines the borders and adds subtle symmetry. A good outline can make lips look fuller and more even. This is where the real transformation begins, and that is why choosing a skilled artist for the tattoo matters so much. Eating, drinking, and even sweating won’t affect the color. Once healed, a lip tattoo holds up well through all kinds of everyday situations. Step 4: Pigment Application The artist uses a fine needle to deposit pigment into the top layer of the skin. This is the core of the process: adding soft, buildable color that mimics a natural lip tint. The needle moves in small, precise strokes. The result is an even, lasting color that doesn’t look overdone or artificial. Fresh pigment always looks bolder than the final result. The shade softens significantly after healing, so patience is key during the first few days. Before and After Care Tips Taking care of your lips before and after a lip blush tattoo session makes a big difference in how the results turn out. Following these simple tips helps the color heal evenly and last longer. Drinking plenty of water in the days leading up to the session keeps lips healthy and plump. It holds pigment better and makes the overall process more comfortable. Clients should avoid alcohol and certain medications at least 24–48 hours before their lip tattoo session to ensure clean pigment application and better color retention. Applying a gentle, fragrance-free lip balm regularly during the healing period prevents dryness and cracking. Clients should stay out of the sun and skip SPF lip products for at least two weeks after their session. Avoid picking at the skin as it can pull out pigment and leave patchy spots. Eating, drinking, or sweating during healing can affect color retention; acidic, oily, salty, or spicy foods and excessive sun/sweat exposure may cause faster fading, contradicting this claim. Color Ideas for Lip Tattoo Choosing the right color is one of the most important parts of the process. The right shade can make lips look naturally beautiful and well-defined. Nude Pink Nude pink is one of the most popular choices. It gives lips a soft, natural flush that works well across most skin tones and suits everyday looks perfectly. Dusty Rose Dusty Rose adds warmth to the lips without looking too bold. It blends beautifully with medium and olive skin tones, giving a polished, effortless look that feels natural all day. Berry Tint Berry tint works best for those who want a slightly deeper, richer lip color. It adds visible definition and suits deeper skin tones especially well, creating a bold yet natural-looking finish. Who Should Avoid Getting a Lip Blush Tattoo? Pregnant or breastfeeding women are typically advised to wait, as the procedure’s effects on this stage aren’t well studied. People with active cold sores or herpes simplex outbreaks should heal first, since the trauma can trigger flare-ups. Those with autoimmune disorders, uncontrolled diabetes, keloid-prone skin, or blood-clotting issues face higher risks of poor healing or complications. People allergic to pigments or anesthetic ingredients, and those currently on blood thinners, isotretinoin (Accutane), or undergoing chemotherapy, should also consult a doctor before proceeding. Always disclose your full medical history to your technician beforehand. Conclusion Lip blush tattoos have helped thousands of people feel more confident without relying on daily makeup. Performed by trained and certified artists, it is a safe and proven semi-permanent treatment. For anyone wondering what lip blushing is, the process is straightforward, and the results are long-lasting. Frequently Asked Questions (FAQs) 1. How Much Does a Lip Blush Tattoo Cost? The costs typically range from $400 to $800. The price depends on your artist’s experience and location. Some studios charge more for touch-up sessions. 2. Is Lip Blushing Safe? Yes, lip blushing is generally safe when done by a trained and certified artist. If you have sensitive skin or allergies, consult your doctor before the procedure. 3. Can a Lip Tattoo Cause Any Side Effects? Mild swelling, redness, and dryness are common after the procedure. These usually fade within a few days. If you follow your artist’s aftercare instructions carefully, it helps minimize any side effects quickly.